Lto4 and later tape drives – HP EML E-series Tape Libraries User Manual
Page 73
1.
Insert the tape drive into an empty drive bay.
2.
Tighten the captive screw to attach the tape drive to the drive bay.
CAUTION:
To avoid damaging FC cables, do not pinch or sharply bend the cables tighter
than a 5-cm (2-inches) diameter.
3.
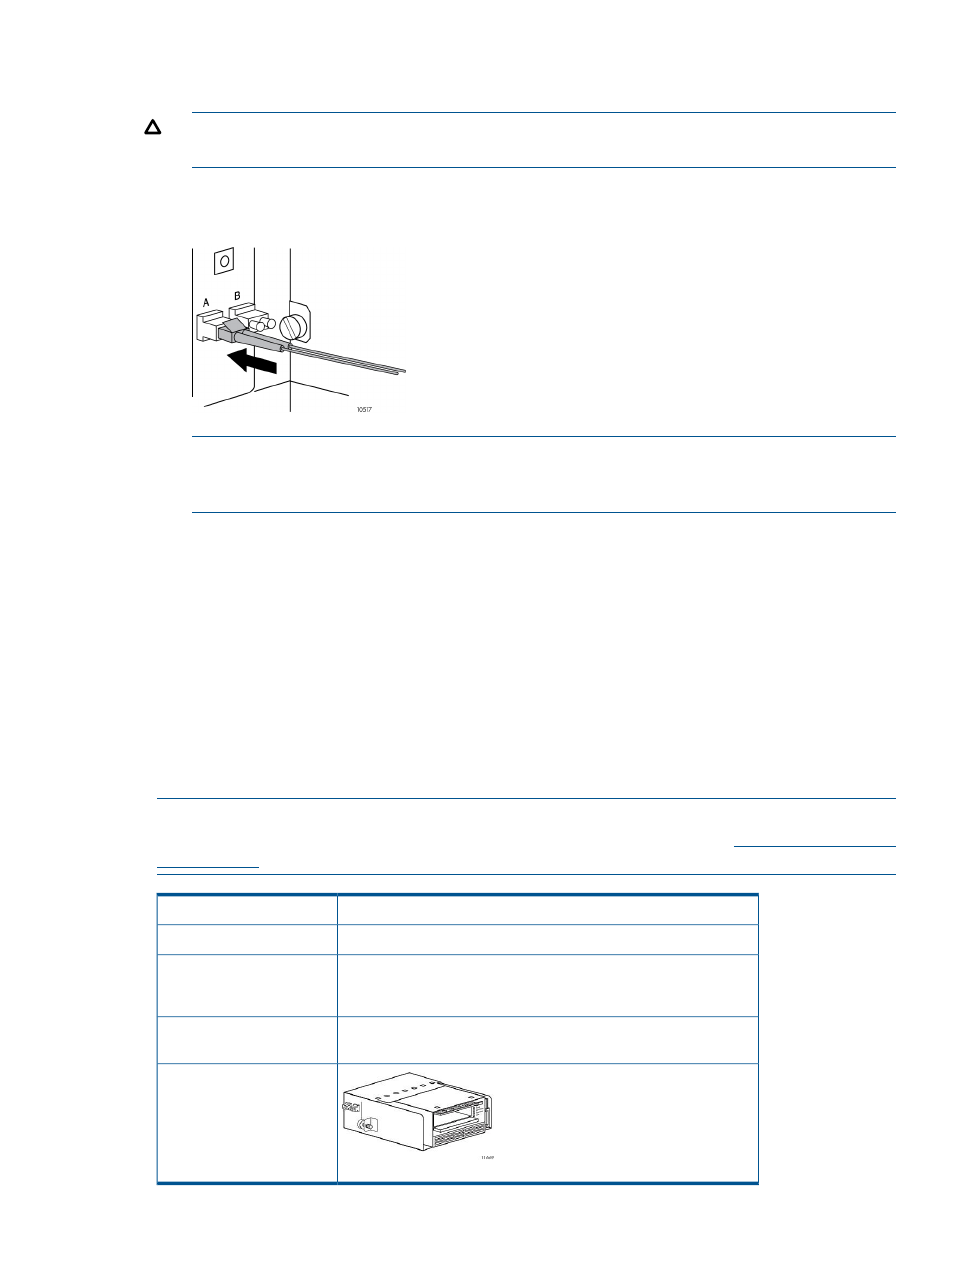
Connect the FC cable to the tape drive. The FC cable connector clicks into place.
Figure 56 Connecting the FC cable to a tape drive
NOTE:
Replacement tape drives placed into previously occupied drive bays are recognized
by the library. Tape drives placed into previously vacant drive bays are not recognized until
after a reboot.
4.
Make sure that the tape drive has the current firmware version. See the HP Interface Manager
and Command View TL User Guide for detailed procedures on updating tape drive firmware.
5.
Use the Command View TL user interface to reboot the interface controller. See the HP Interface
Manager and Command View TL User Guide for detailed procedures.
6.
Make sure the FC port LED for the corresponding tape drive on the interface controller is solid
green (see
or
).
7.
If the tape drive was installed in a previously vacant drive bay, reboot the library. On the
OCP, select the Operations
→Reboot Library command.
8.
Check the tape drive status on the OCP to make sure that the tape drive is recognized.
Alternatively, make sure Command View TL recognizes the new tape drive using the console.
LTO4 and later tape drives
NOTE:
For information on how to remove and replace LTO4 and later tape drives, see the
separate HP EML E-series LTO4 or Later Tape Drive Replacement Instructions at
.
447790-001 (Ultrium 1840)
Part number
In the base module or tape drive expansion module
Location
Characteristics
•
Hot-swappable
•
1/2-inch cartridge tape drive
Writes data to and reads data from Linear Tape-Open (LTO)
cartridges
Function
Illustration
LTO4 and later tape drives
73