Lto2 or lto3 tape drive, Required tools, Removing an lto2 or lto3 tape drive – HP EML E-series Tape Libraries User Manual
Page 72: Replacing an lto2 or lto3 tape drive
LTO2 or LTO3 tape drive
375817-001 or 409859-001 (Ultrium 460 or LTO2)381676-001
or 409860-001 (Ultrium 960 or LTO3)
Part number
In the base module or tape drive expansion module
Location
Characteristics
•
Hot-swappable
•
1/2-inch cartridge tape drive
Writes data to and reads data from Linear Tape-Open (LTO)
cartridges
Function
Illustration
Required tools
•
Flat-blade screwdriver
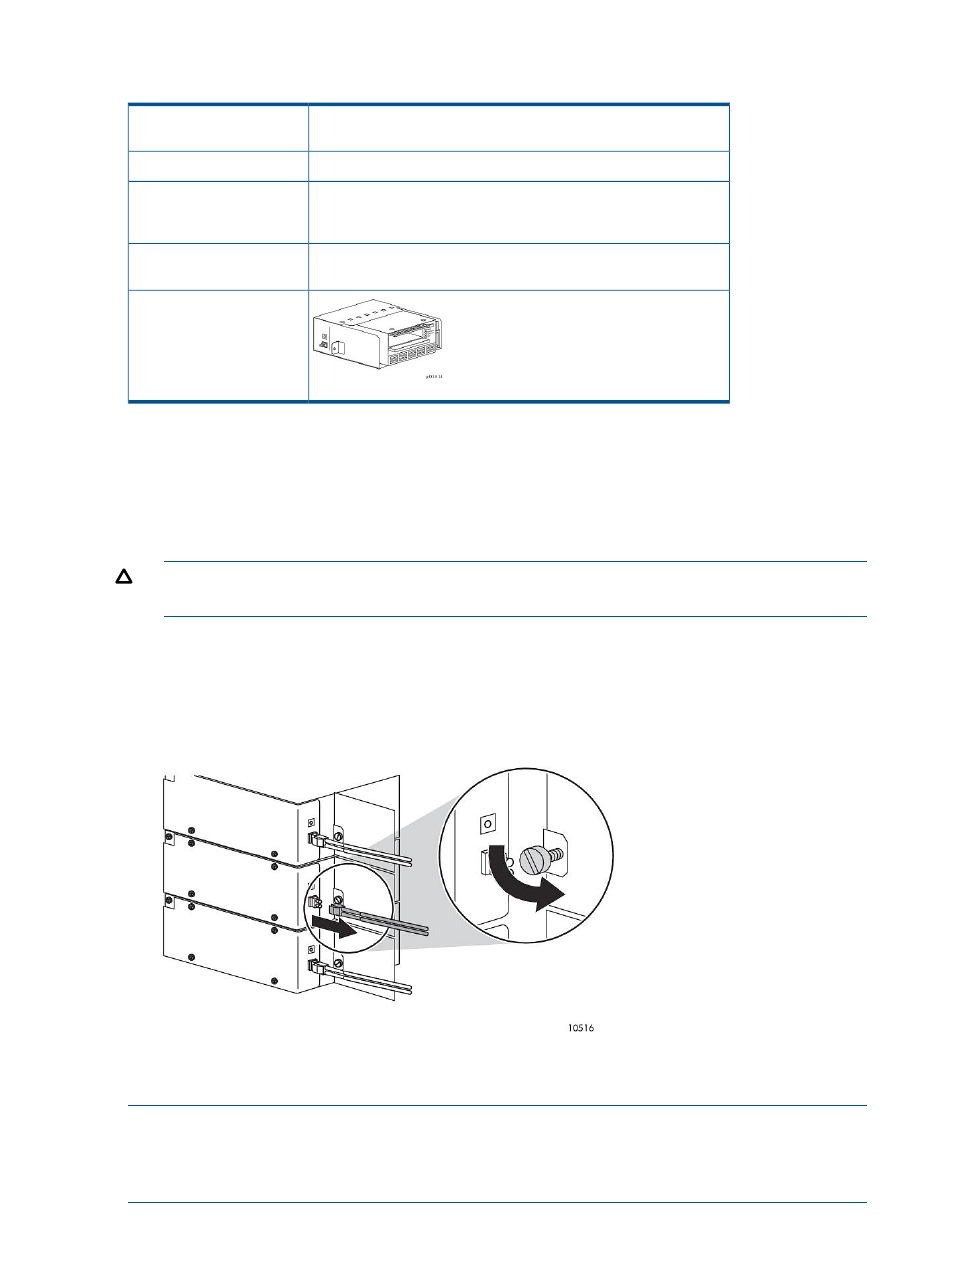
Removing an LTO2 or LTO3 tape drive
1.
Identify the tape drive to be replaced. The FAULT LED light might be lit (see
).
CAUTION:
To avoid damaging FC cables, do not pinch or sharply bend the cables tighter
than a 5-cm (2-inches) diameter.
2.
Unplug the FC cable from the tape drive.
3.
Use your fingers or a flat-blade screwdriver to loosen the captive screw on the right side of
the tape drive.
4.
Pull the tape drive out of the library.
Figure 55 Removing a tape drive
Replacing an LTO2 or LTO3 tape drive
NOTE:
HP recommends that you install tape drives from top to bottom, with no gaps between
them. If you are installing LTO2 or LTO3 tape drives and LTO4 or later tape drives in the same
library, HP recommends that you place all LTO2 and LTO3 tape drives above all LTO4 or later
tape drives.
72
Removing and replacing parts