Connecting the cables, Connect the scsi signal cable, Figure 2-8 – HP Integrity NonStop H-Series User Manual
Page 25: Rear panel components
Installing and Configuring the Tape Drive
5158ACL Tape Drive Installation and User’s Guide — 524955-002
2 -5
Connecting the Cables
6. With the
cursor n
ext to line 3, press Enter. The cursor moves to line 4, the up
arrow appears at the end of line 1, and th
e down arrow
appears at the end of
line 4. On line 4, scroll to display more options. Scroll so that line 5 appears.
Then press Enter to save the new selection. An * appears at the left of line 5
to indicate that it is the current selection.
7. Press Escape repeatedly until the menu in Figure 2-4 reappears.
8. Repeat Steps 1 through 7 for each configuration option that you want to
change.
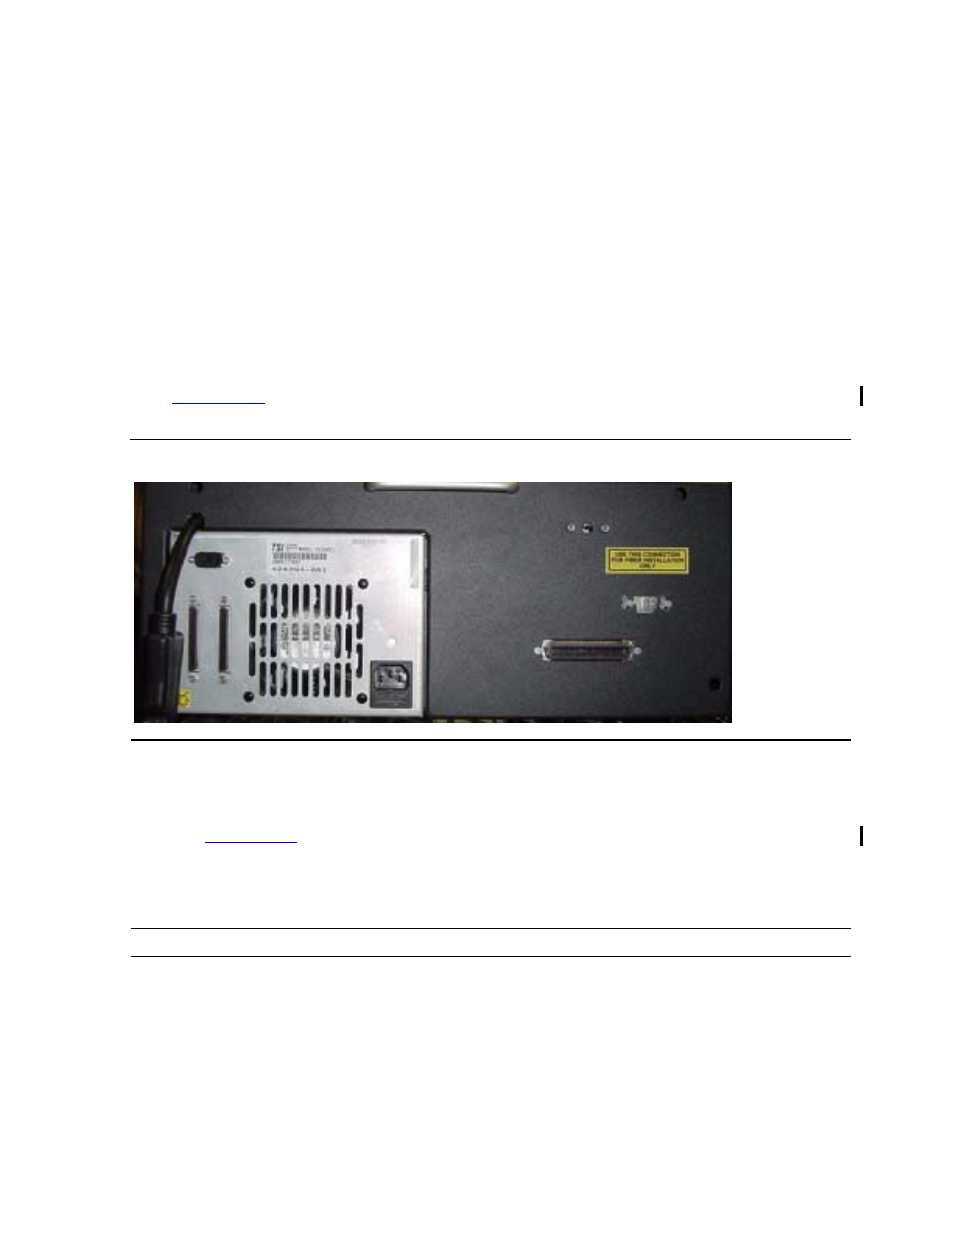
Connecting the Cables
Examine the components on the rear panel to complete the physical installation.
See
Connect the SCSI Signal Cable
1. Connect one end of the SCSI cable to SCSI signal port 1 on the rear panel.
See
2. Hand tighten the screw on one side.
3. Connect the opposite end of the 68-pin connector to the server.
For server SCSI connections, see the server documentation.
Figure 2-8.
Rear Panel Components
Note. Do not use the right SCSI Signal Port for any type of copper connection.