Adding a group to a role, Removing a group from a role, Removing groups – Milestone Central 3.7 User Manual
Page 43: If not using active directory
Milestone XProtect 3.7; Administrator’s Manual
Adding a Group to a Role
1. In the Client’s Navigation section, select User Configuration, then Groups.
2. Right-click the required group name, select Add group to role ..., then select the required
role.
All members of the group will get the selected role.
Removing a Group from a Role
1. In the Client’s Navigation section, select User Configuration, then Groups.
2. Right-click the required group name, select Remove group from role ..., then select the
required role.
All members of the group will be removed from the role.
Bear in mind that individual users may be members of more than one group. If you want to
be sure that a particular user is completely removed from a particular role, it is
recommended that you check whether the user is a member of other groups and, if so,
whether the user’s membership of other groups does not still tie the user to the role.
Removing Groups
To remove groups from XProtect Central, do the following:
1.
In XProtect Central Client’s Navigation section, expand the User Configuration entry and
right-click Groups.
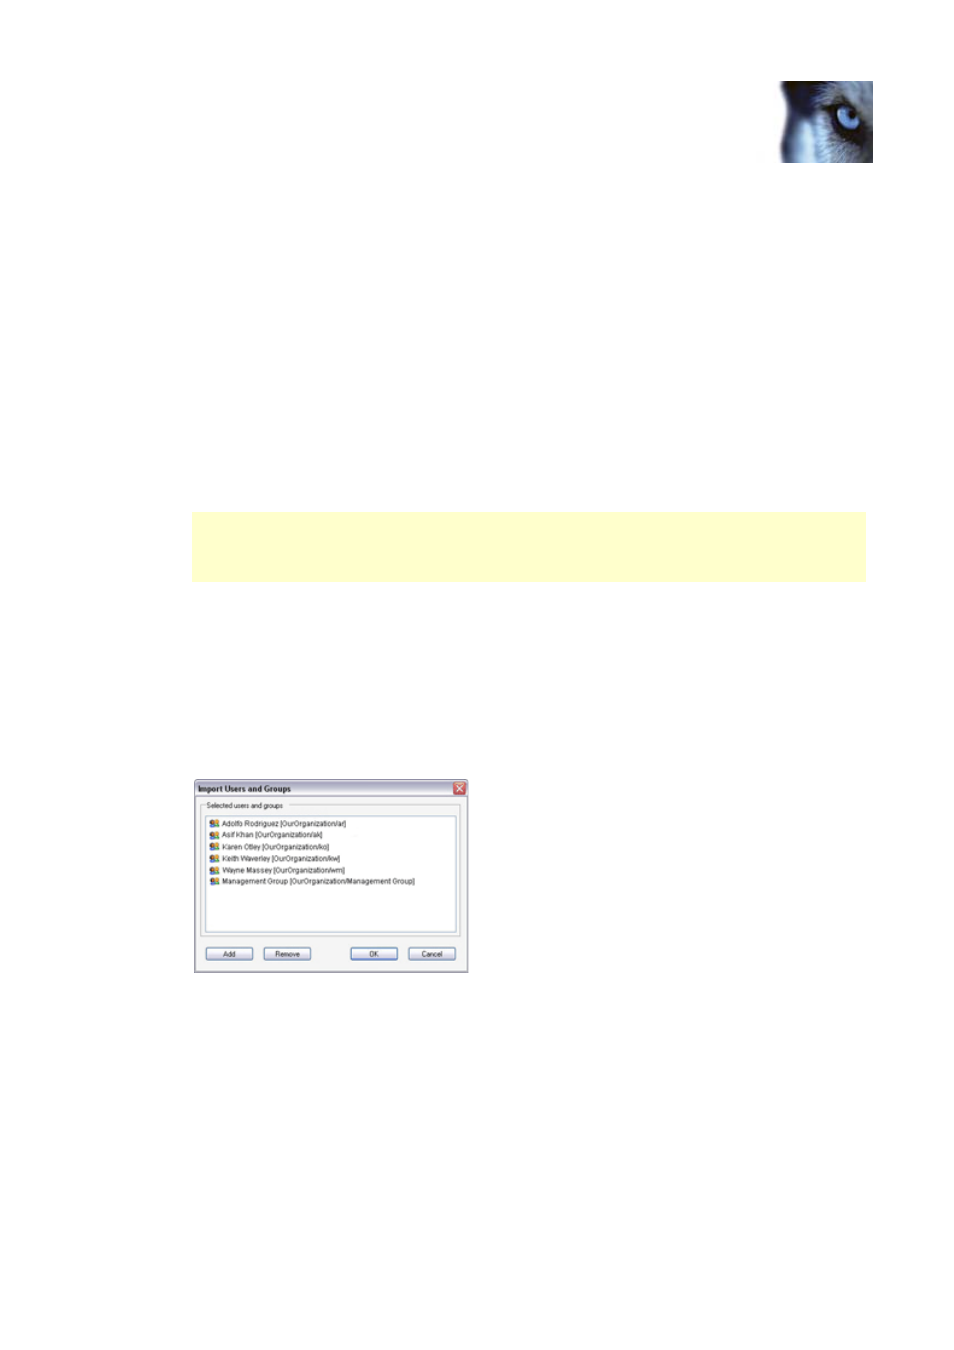
2.
Select Import from Active Directory ... This will open the Import Users and Groups dialog:
3. In the Import Users and Groups dialog, select the groups you want to remove, then click
the Remove button.
4. Click OK.
If Not Using Active Directory
While Active Directory import of users and groups is the primary way of handling users in XProtect
Central, it is also possible to use XProtect Central without Active Directory.
If using XProtect Central without Active Directory, note the following:
www.milestonesys.com Page
43
Client: Users, Groups & Roles