Adding a user to a role, Removing a user from a role, Removing users – Milestone Central 3.7 User Manual
Page 41
Milestone XProtect 3.7; Administrator’s Manual
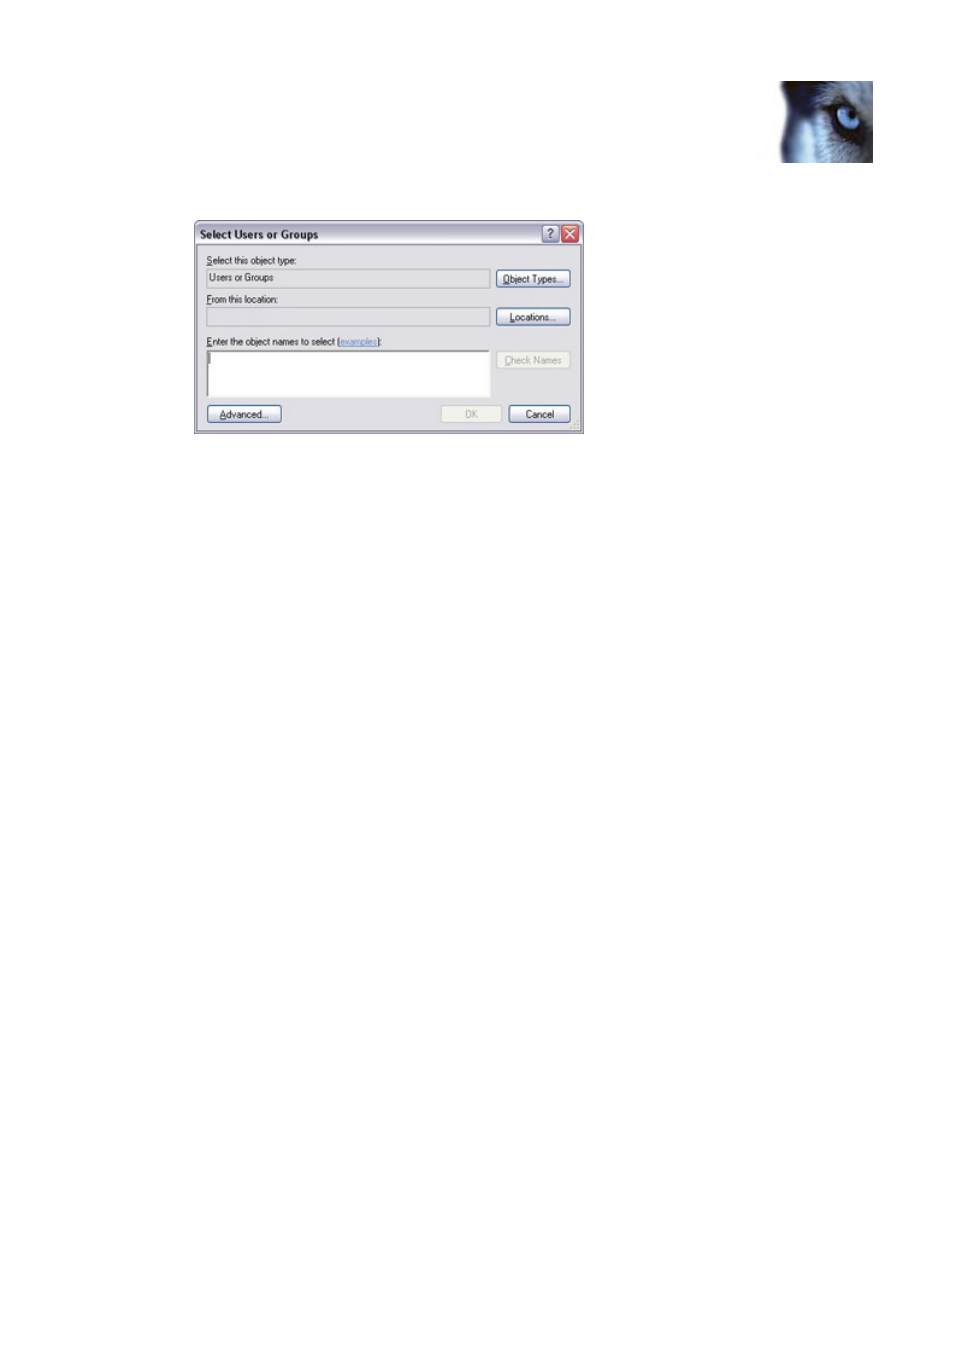
3. In the Import Users and Groups dialog, click the Add button. This will open the Select Users
or Groups dialog:
4. In the Select Users or Groups dialog, verify that the required domain is specified in the
From this location field. If not, click the Locations... button to browse for the required
domain.
5. In the Enter the object names to select box, type the required user names, display names
or other types of identifier which Active Directory will be able to recognize.
Tip: Typing part of a name is often enough. Use the Check Names feature to verify that the
names you have entered are recognized by Active Directory.
6. Click OK. You are returned to the Import Users and Groups dialog, in which the required
users will now be listed.
7. Click OK. The required users will be imported into XProtect Central. Upon import, the
names of the imported users will be added under Users in the Client’s Navigation section.
Provided roles have been defined, you are now able to select roles for the imported users.
See Defining a New Role on page 45 and Adding a User to a Role in the following for
further information.
Adding a User to a Role
1. In the Client’s Navigation section, select User Configuration, then Users.
2. Right-click the required user name, select Add user to role ..., then select the required role.
Removing a User from a Role
1. In the Client’s Navigation section, select User Configuration, then Users.
2. Right-click the required user name, select Remove user from role ..., then select the
required role.
Removing Users
1.
In XProtect Central Client’s Navigation section, expand the User Configuration entry and
right-click Users.
2.
Select Import from Active Directory ... This will open the Import Users and Groups dialog:
www.milestonesys.com Page
41
Client: Users, Groups & Roles