Brocade Virtual ADX Installation and Deployment Guide (Supporting ADX v03.1.00) User Manual
Page 54
NOTE
Failure to perform a shutdown prior to adding or removing interfaces, will cause unexpected
behaviour on Brocade Virtual ADX .
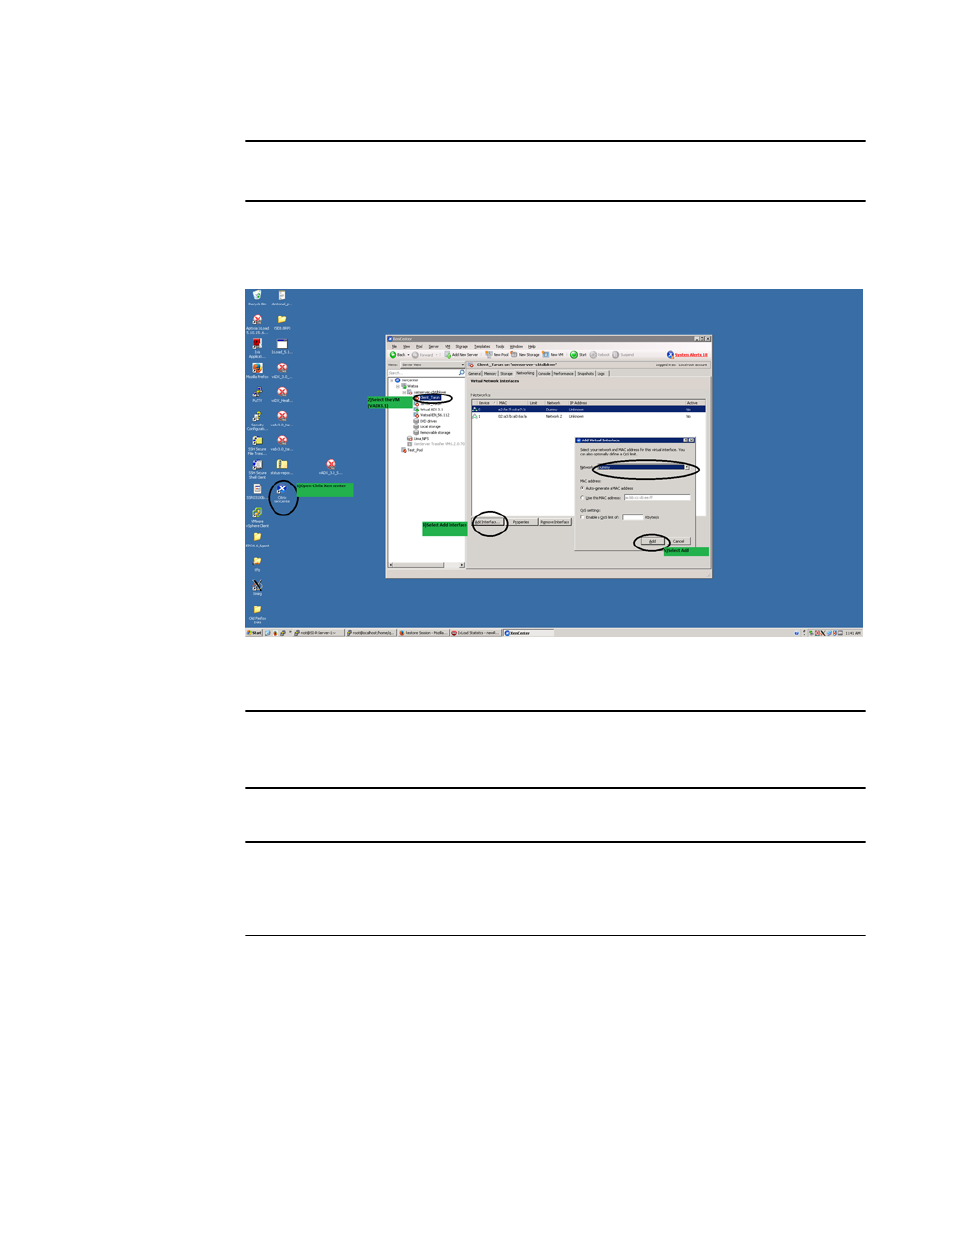
2. Open Citrix XenCenter and select the Brocade Virtual ADX VM from the left menu as shown in the
figure below.
FIGURE 23
3. On the Networking tab, select Add Interface to add an interface or Remove Interface to remove
an interface.
NOTE
Brocade Virtual ADX supports a maximum of nine interfaces. Adding more than nine interfaces will
generate a random order of interfaces on the VM and interfere with normal processing on Brocade
Virtual ADX.
4. To add or remove another interface, return to Step 3.
NOTE
Interfaces must be added in interface number order i.e. 4, 5, 6, 7, 8 and removed in reverse order
i.e. 8, 7, 6, 5, 4. Adding or removing interfaces in any other order will generate a random order of
interfaces on the VM. To ensure proper functioning on the Brocade Virtual ADX, disable (rather than
remove) an interface from the middle of the configured range of interfaces.
5. Verify that the interfaces have been added or removed, by opening Citrix XenCenter again,
selecting the Brocade Virtual ADX VM from the left menu and viewing the available interfaces on
the Networking tab.
A vSwitch in trunk mode will not cause network loops. To avoid looping in other cases, add one
vSwitch only to each interface.
Brocade Virtual ADX Installation on Citrix XenServer
54
Brocade Virtual ADX Installation and Deployment Guide
53-1003241-01