Installation instructions using blind fasteners, Feature operation, Warning – WEATHER GUARD 164-X-01 THRU 186-X-01 User Manual
Page 4
4
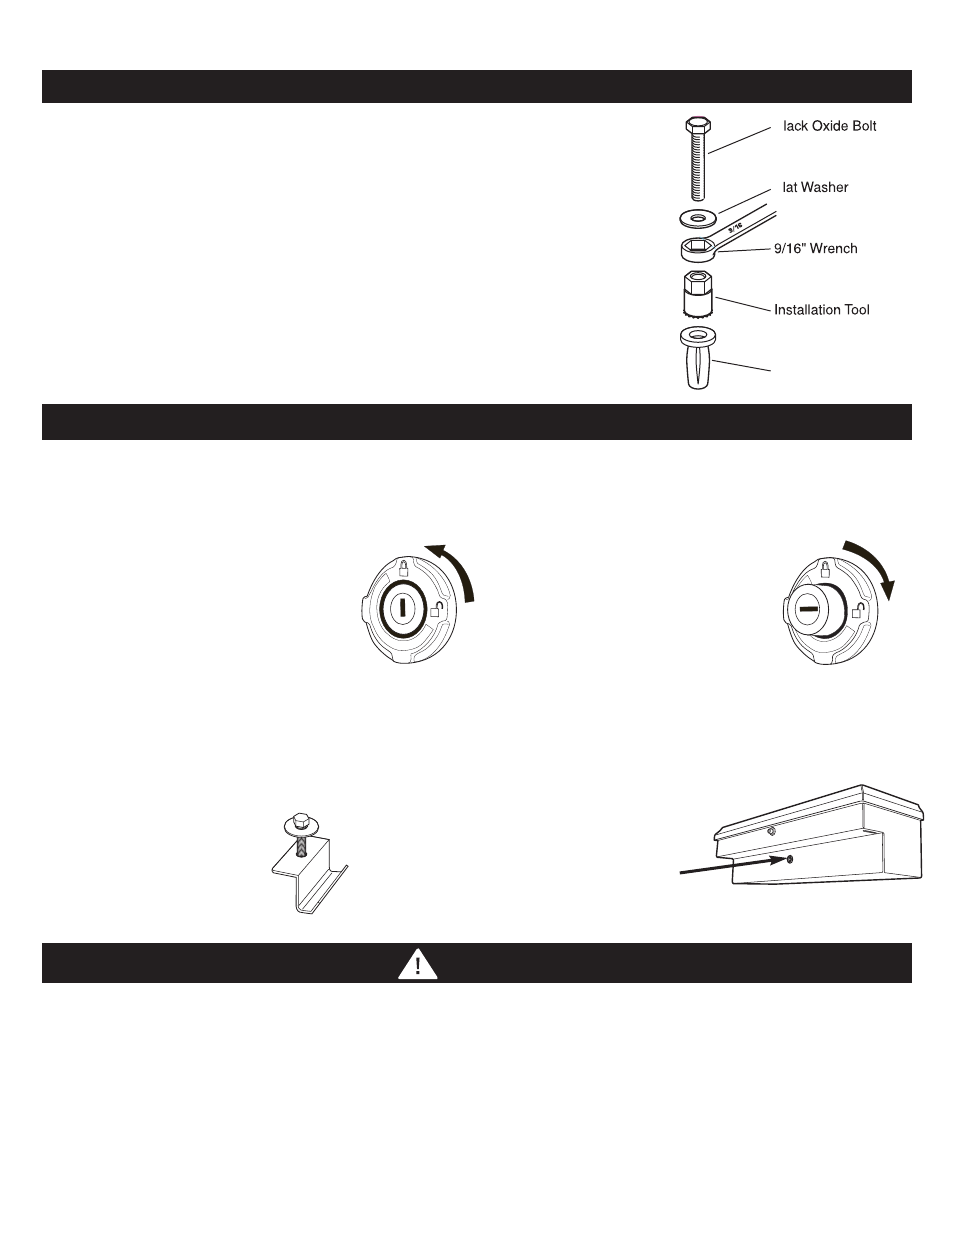
INSTALLATION INSTRUCTIONS USING BLIND FASTENERS
Note: Make sure there is enough hole depth before installing the Blind Fastener.
Note: Black Oxide Bolt, Flat Washer, and Installation Tool are only used to install
Blind Fasteners.
• Install Blind Fastener using Figure 4 as a guide.
• Place a drop of oil on black oxide bolt for lubrication.
• Insert Blind Fastener in the hole.
• Hold the “Installation Tool” with a 9/16” wrench while turning the “Black Oxide
Bolt” with a 1/2” wrench until fully seated.
• Turning “Black Oxide Bolt” will be hard until fastener “bulbs” out.
• When Blind Fastener is fully seated, continue with installation.
FEATURE OPERATION
LOCK SYSTEM
The WEATHER GUARD
®
Lock is designed to provide maximum security, while providing ease of use and years of
reliable service. When in the locked mode, the button remains retracted in a tamper-resistant position. When the button is
pressed in the unlock mode, the latch is activated and the cover opens.
The WEATHER GUARD
®
Latch System utilizes an automotive grade latch in conjunction with a high strength latch
striker to ensure maximum security. The WEATHER GUARD
®
Latch System is designed to open with a single touch of
the button, and close securely. Expect years of reliable service from the WEATHER GUARD
®
Latch System with only
minimal maintenance: Bi-annually lubricate latch pivot points with white grease. If latch striker is accidentally knocked
out of alignment, simply use a mallet to realign.
MOUNTING BRACKETS
Wide flange mounting bolts
provide secure mounting
without crimping bed rails
and allow full unobstructed
use of side pockets.
12V ELECTRICAL ACCESS
WEATHER GUARD
®
Truck Boxes are
equipped with a 12 Volt Electrical
Access Plug for easy electrical
accessory fit-ups. To use, simply cut
along one or more perforations in the
rubber grommet and run wire through.
B
F
Blind Fastener
LOCK
Turn key counterclockwise to locked
position as indicated on lock bezel.
When the button is now pressed, it will
stay in the retracted or tamper-resistant
position until unlocked.
UNLOCKED
Turn key clockwise to unlock position
as indicated on the lock bezel. Button
will pop out and is now ready to release
the latches when pressed.
LATCH SYSTEM
B
F
Blind Fastener
B
F
Blind Fastener
B
F
Blind Fastener
B
F
Blind Fastener
To prevent electric shock, explosion, fire and/or serious personal injury when using side box with:
Extension Cord -
• Follow all Extension Cord manufacturer’s warnings and instructions.
• Do NOT insert extension cord through hole without grommet in place (see Figure 5).
• Only use a three-wire extension cord with all three prongs intact. Never remove the round grounding prong.
• Extension cord must be connected to a 120 Volt GFCI protected outlet with proper ground. If GFCI outlet is
not available, use an extension cord with GFCI protection built in.
• Check the insulation and plugs of extension cord before using. Do NOT use cord if it is worn or damaged.
• Do NOT overload extension cord.
WARNING
Figure 4
Figure 5
Electrical
access