Figure 2, Figure 3 figure 1 – WEATHER GUARD 164-X-01 THRU 186-X-01 User Manual
Page 3
3
Step 2: MARK AND DRILL MOUNTING HOLES
• Position rear leg as shown in Figure 1. Use square to ensure vertical orientation.
• Mark both holes at top of leg and both holes in truck bed floor.
Note: To maintain full floor width between wheel wells, legs should be aligned with the inside edge of wheel wells. The
foot of the leg must be squarely mounted on or between the tops of floor ribs.
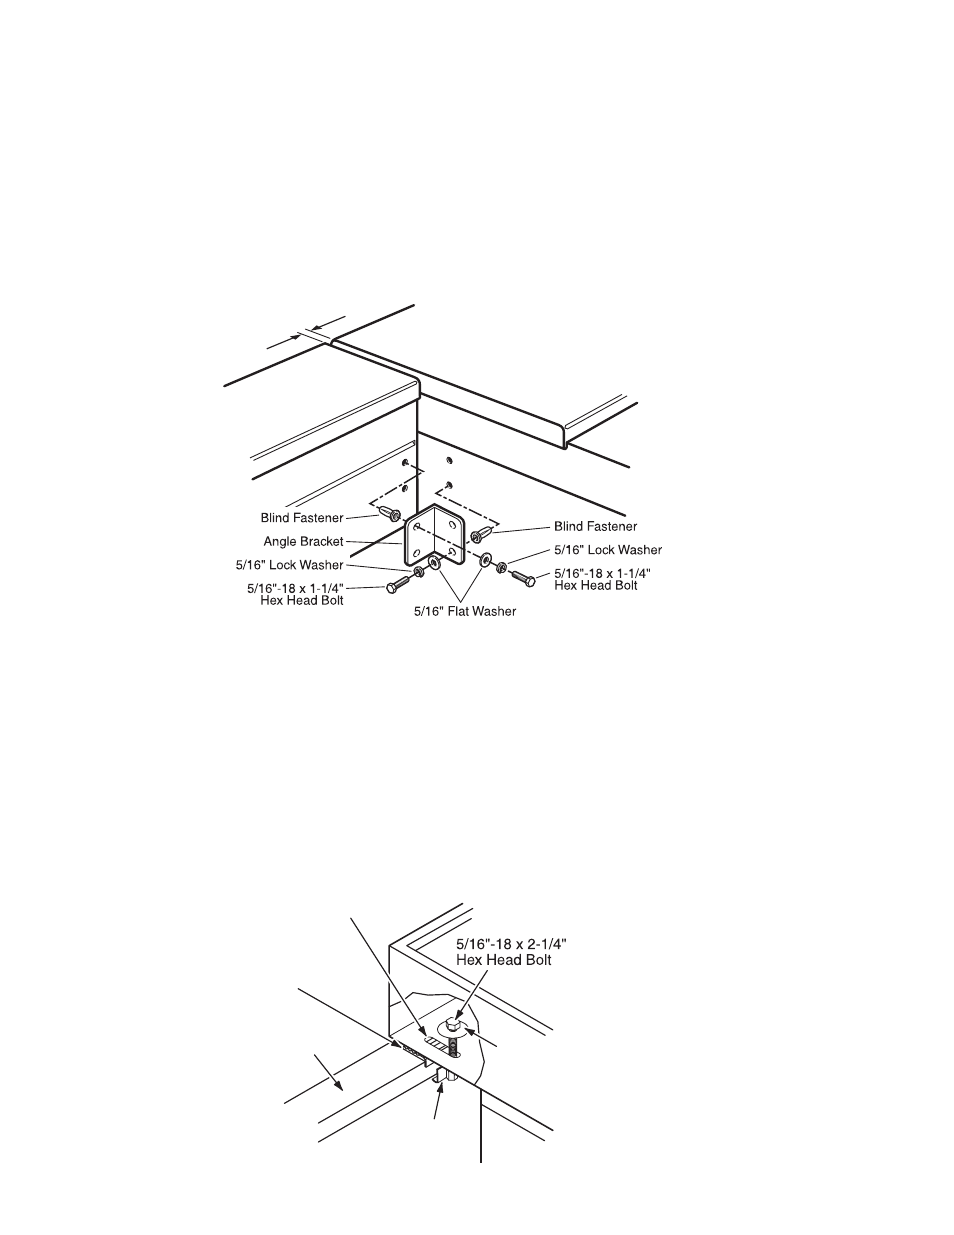
• Repeat leg placement and marking process for other leg. If installing side boxes with a saddle or cross box, the front
leg can be replaced with an angle bracket (see Figure 2).
• Remove box from truck
• Drill all marks on box and truck with 3/16” drill bit. Redrill all holes with 1⁄2” drill bit.
• Install all Blind Fasteners (see Figure 1, 2 and 4).
Step 3: ATTACH BOX TO TRUCK BED
Note: If you encounter interference with the mounting clamp and a stake pocket in the truck bed, it may be
necessary to drill a 1⁄2” hole in the truck box and use the “J” bolt instead of mounting clamp.
Note: It is recommended that all fasteners be tightened hand tight first to ensure fit, then go back and fasten
securely with wrench.
• Place box back in original position.
• Install all bolts in leg mounting feet as shown in Figure 3.
• Insert the two mounting clamps as shown in Figure 3.
• Snap Cap Plug into bottom hole.
Note: Mounting clamp bolt may be difficult to turn due to the “lock nut” feature. Apply a small amount of grease to
bolt threads prior to installation to ease assembly.
1/8"
SIDE BOX
CROSS BOX
Figure 2
Bed Lip
Mounting Pad
End Panel Slot
Mounting Clamp
Fender Washer
5
5/16" Flat Washer
Hex Head Bolt
Mounting Clamp
5/16" Flat Washer
Figure 3
Figure 1
1/8"
SIDE BOX
CROSS BOX
Figure 2
Bed Lip
Mounting Pad
End Panel Slot
Mounting Clamp
Fender Washer
5
5/16" Flat Washer
Hex Head Bolt
Mounting Clamp
5/16" Flat Washer
Figure 3
Figure 1