Installation instructions parts list, Tools required – WEATHER GUARD 164-X-01 THRU 186-X-01 User Manual
Page 2
2
INSTALLATION INSTRUCTIONS
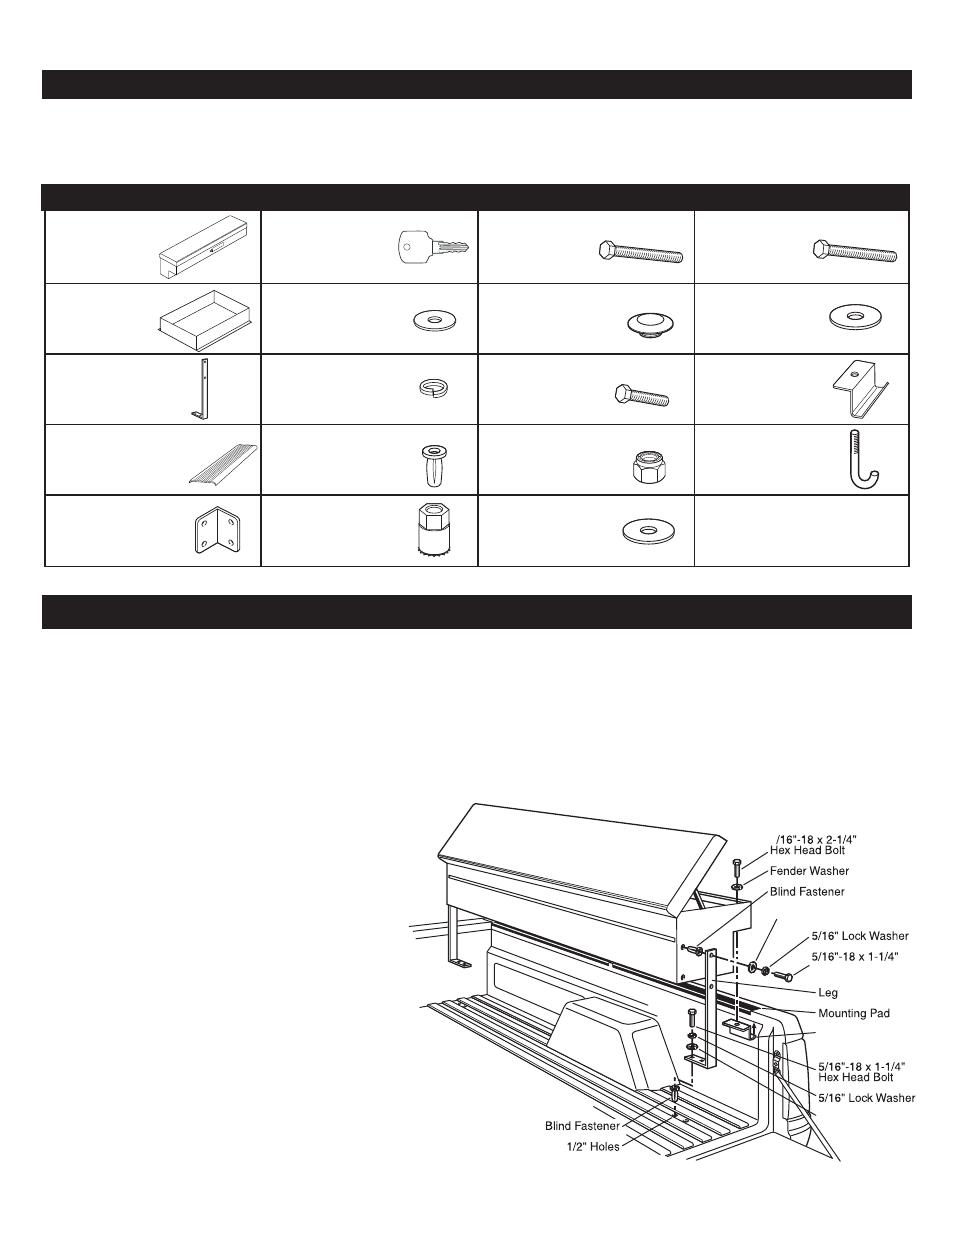
PARTS LIST
(1) Side Box
(1) Small Parts Tray
(2) Legs
(2) Rubber Mounting Pads
(1) Side to Cross Box
Mounting Angle
(2) Keys
(10) 5/16” Flat Washers
(8) 5/16” Lock Washers
(8) 5/16”–18 Blind Fasteners
(1) Installation Tool
(1) 5/16”–18 x 2 1⁄4” Black
Oxide Hex
Head Bolt
(1) 3⁄4” Round Cap Plug
(8) 5/16”–18 x 1 1⁄4 “ Hex
Head Bolts
(1) 5/16”–18 Nylon Lock Nut
(1) Retaining Washer
(2) 5/16”–18 x 2 1⁄4” Hex
Head Bolt
(2) Fender Washers
(2) Mounting Clamps
(1) “J” Bolt
Note: The rubber mounting pad comes
as a single piece and must be
separated into two pieces, one for
each side of the truck.
Note:
• If your pickup is fitted with a plastic drop-in bed liner, it may need to be drilled, trimmed, or cut for proper installation
of truck box.
• Truck box cover may not properly latch until box is fully bolted to truck bed.
• Periodically check tightness of mounting bolts to insure proper attachment.
• Use touch-up paint on any drill holes to prevent oxidation.
• Install boxes with vehicle parked on level ground.
Step 1: LOCATE BOX IN TRUCK BED
• Mount Saddle/Cross Box first (if applicable).
• Place rubber mounting pads on bed rails.
• Place box into position on top of mounting
pads.
• Support box with blocking until mounted.
• Square box to bed and level box so top is
horizontal when viewed from rear.
• Leave 1/8” gap between side box and saddle/
cross box (if applicable).
• Make sure cover opens fully without
interference.
Note: Fasten leg mounting feet directly to bed
floor, not bed liners or mats.
1/8"
SIDE BOX
CROSS BOX
Figure 2
Bed Lip
Mounting Pad
End Panel Slot
Mounting Clamp
Fender Washer
5
5/16" Flat Washer
Hex Head Bolt
Mounting Clamp
5/16" Flat Washer
Figure 3
Figure 1
TOOLS REQUIRED
• 1⁄2” deep well ratchet wrench
• 1⁄2” open or box end wrench
• 9/16” open or box end wrench
• Drill with 3/16”, 3/8”, and 1⁄2” drill bit
• Carpenter’s square