Step 3. mount the wall bracket assembly – Staub Electronics SM-RAZOR-T-XL STRONG - LARGE RAZOR TILT MOUNT FOR 55-80 IN. FLAT-PANEL TVS User Manual
Page 6
SM-RAZOR-T Installation Manual
pg.6
www.snapav.com Support: 866.838.5052
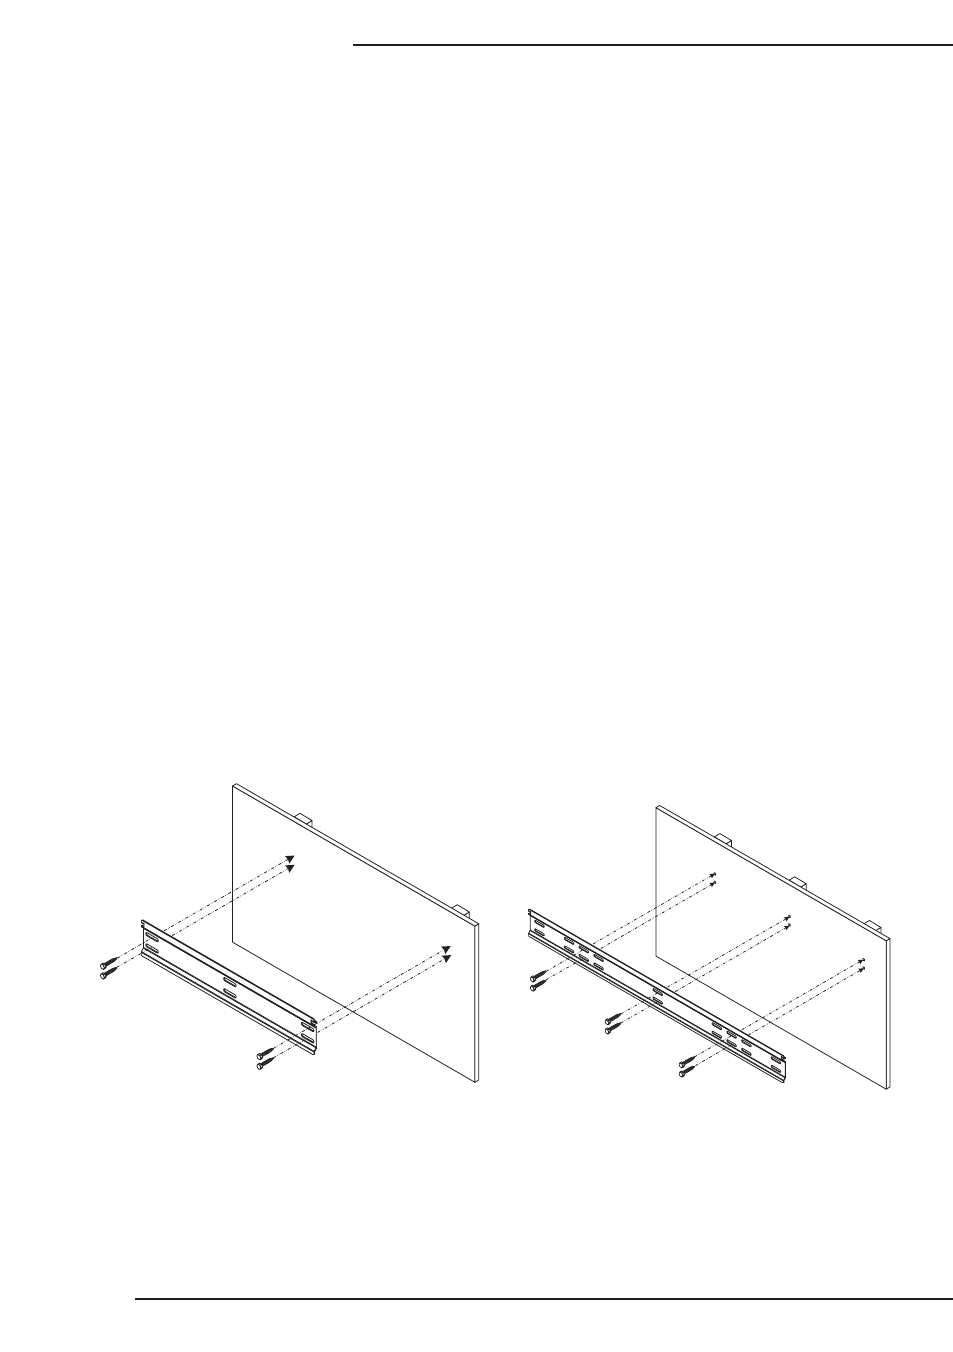
Step 3. Mount the Wall Bracket Assembly
The wall plate is fastened to a stud wall using the included lag screws (A). Be sure to
use the correct number of screws to fasten your mount as listed below:
Model:
SM-RAZOR-T-M:
SM-RAZOR-T-L:
SM-RAZOR-T-XL:
Number of Lag Screws:
4 (Figure 4)
4 (Figure 4)
6 (Figure 5)
Mounting on a Stud Wall
A. Pre-drill holes into two wood studs using a 3/16” drill bit. Be sure to drill
into the center of the studs at least 2-1/2” deep. The use of a stud finder is
highly recommended.
B. Insert the lag screws (A) into holes through the wall plate and tighten bolts so
that wall plate is firmly attached, but do not over tighten. (Figures 4 and 5)
Warning:
Over tightening can damage the bolts, greatly reducing their holding strength.
Figure 5
Figure 4
Figure 5