Draw-Tite 66006 HD TRUNNION BAR WT.-DIST. User Manual
Page 5
66006IN-05/29/13 REV L
PCN19360
©2006 TOWING PRODUCTS, INC
Litho in USA
Installation Instructions For Snap Up Bracket
Provides For a Stronger Attachment to the Trailer Frame
TOOLS NEEDED:
Drill
Bits: 7/16”,
9/16” & ¼”
WARNING:
Read all instructions before installing the additional bolt.
Failure to follow all of these instructions may result in death or serious injury!
For Installation or Operation Support contact CPP Technical Service: 1-888-521-0510.
2-
1/4”
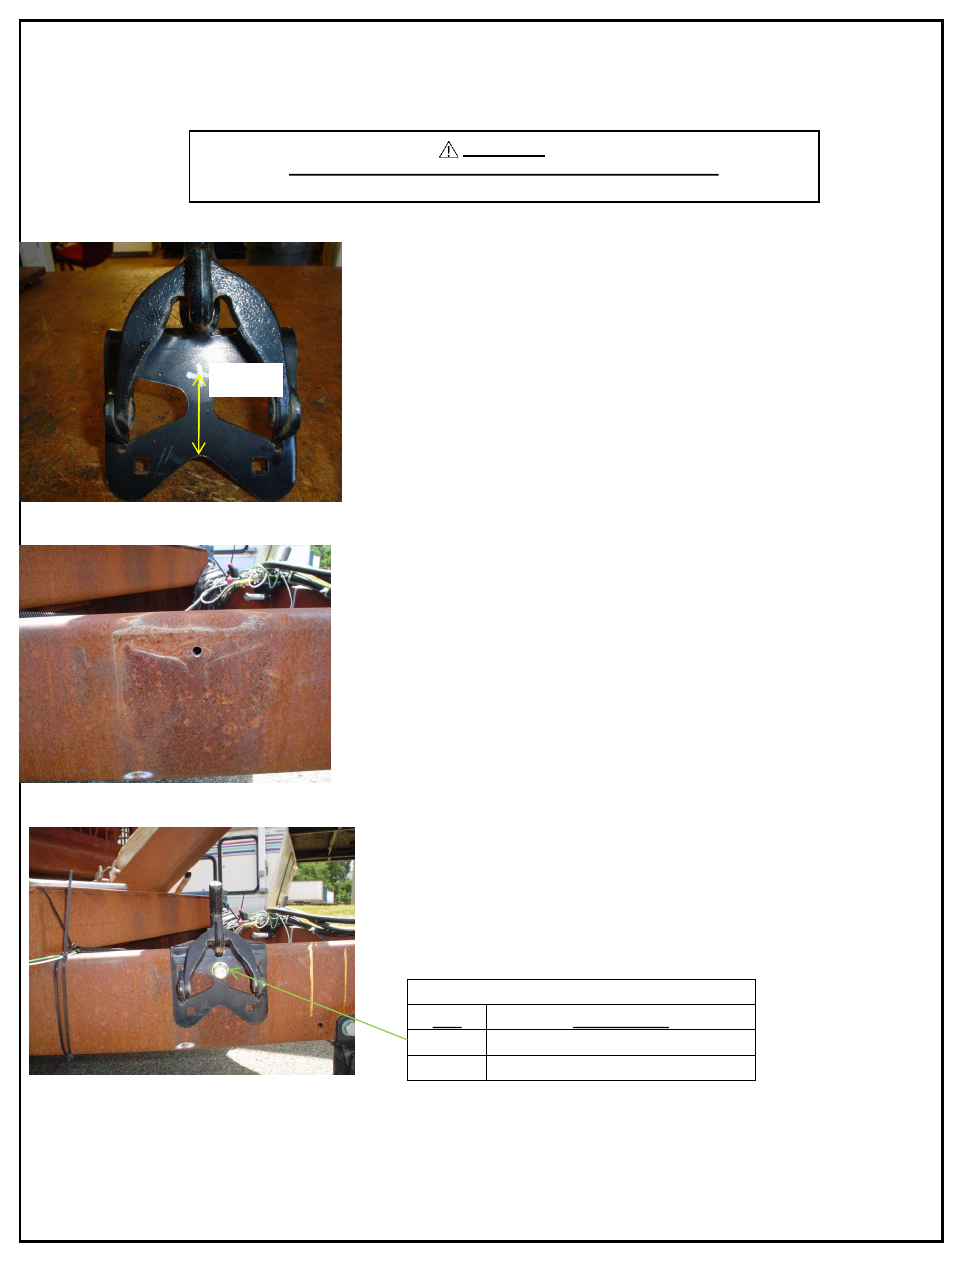
•Installation of an additional bolt into the snap up bracket.
•If your bracket does not already have a hole in this location,
mark the location of the hole to be drilled into the snap up
bracket. Center the hole from left to right and place it 2-
1/4”
above the arc in the bracket. See the picture at left.
•Before the bracket is placed on the frame, drill a 9/16” hole
in the bracket
•Place the bracket in the correct place on the frame as
directed in the product instructions or replace it where it was
if it had already been installed.
•Using the hole in the bracket as a guide, drill a ¼” pilot hole.
Be sure to stay centered in the bracket hole.
• One method to stay centered is to use the 9/16” drill first.
Just put a small dimple into the frame with the 9/16” bit.
Then finish drilling with the ¼” drill bit and then a 7/16” drill
bit to get the final hole. See pilot hole to the left.
•Install the ½” self tapping screw into the hole in the
bracket and frame. Tighten it to 50 ft/lbs.
•Re-tighten the ½” set screw on the inside of the frame.
Turn only ¼ to ½ of a turn after making contact with the
frame.
Cequent Performance Products, Inc.
47912 Halyard Dr. Suite 100
Plymouth, MI 48170
PARTS LIST
QTY
DESCRIPTION
2
1/2" x 1.00" SELF TAPPING SCREW
1
INSTRUCTION SHEET
5
Self Tapping
Screw is available
in service kit
58459 if needed.