Analog Way Orchestra2 User Manual
Page 43
43
8.2 Soft Edge setup
You can also use the «Grid» test pattern in the «Output» - «Test Pattern» menu to help you properly align the
projectors together.
WARNING: Do not use the projectors’ Keystone function to correct image parallelism problems. Using the
Keystone will make it impossible to use the Soft Edge Curves.
7.
If you are setting up a multiple units Soft Edge, split all of your sources to input each one in the same input#
on each unit (eg.: split your DVD player to input it on input #5 on all of your units).
8.
In the «Input» menu, set the corresponding «Input Type» for each input.
9.
In the «Soft Edge» menu, select the appropriate Soft Edge «Type»: Horizontal or Vertical.
10.
In the «Soft Edge» - «Test Pattern» menu, select the «SE Centering» pattern.
11.
In the «Soft Edge - «Covering» menu, adjust the covering so that the 2 dashed lines of the test pattern line
up to make one straight line in the middle of the Soft Edge.
If you can not get a perfectly straight line, set the covering as best as possible and then adjust the projectors
with their Lens Shift to get a perfectly straight line.
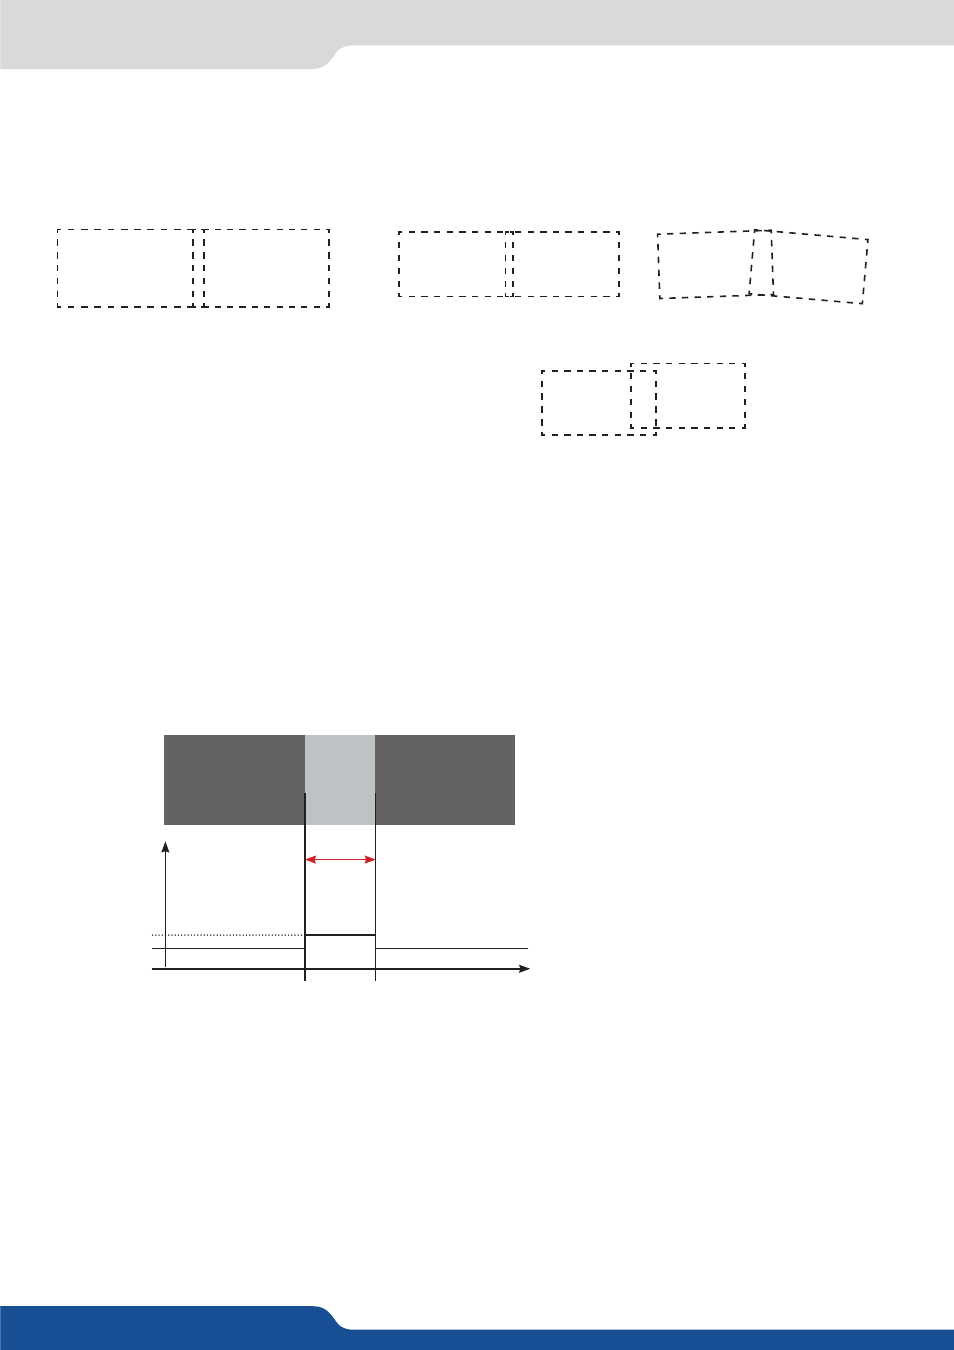
☺
Projectors well aligned.
Top and bottom not aligned.
Too small covering area.
Edges not paralleled
Covering Area
Light Gray
Dark Gray
Dark Gray
Luma level
Screen
Black
Light Gray
Dark Gray
The solution consists in adjusting the
BLACK LEVELS of the image outside the
covering area.
12.
In the «Soft Edge» - «Test Pattern» menu, select «OFF» to remove the test pattern.
13.
In the «Soft Edge» - «Black Levels» - «Level Tint» menu, adjust the «Left» and «Right» menus to get the
luminance in the left and right areas of the projection to match the luminance of the overlapping area.
This adjustment must be done on a black projection (no sources).
This adjustment will be made easier if you are in the darkest environment possible.
14.
If during the black level adjustments, thin white columns appear on the left and right edges of the over-
lapping area, you can correct them by adjusting the Left and Right areas in the «Soft Edge» - «Black
Levels» - «Left-Right Area» menu.
15.
In the «Soft Edge» - «Test Pattern» menu, select the «H Grey Scale» pattern if you are in Horizontal Soft
Edge or the «V Grey Scale» pattern if you are in Vertical Soft Edge.
16.
In the «Soft Edge» menu, activate the «Blending» menu.
17.
In the «Soft Edge» - «Curves» menu, adjust the Soft Edge Curve with the «X1, Y1, X2, Y2» adjustments,
so that the luminance of the projection becomes uniform throughout the projection area (entire screen).