3 show configuration, 2 show settings, 1 screen setup – Analog Way Orchestra2 User Manual
Page 21: 2 edit devices
21
For the Orchestra² to start piloting your external device(s), you must create a show to work in. The show
will hold parameters for any connected device (as well as all other show parameters such as inputs, outputs,
screens, presets...).
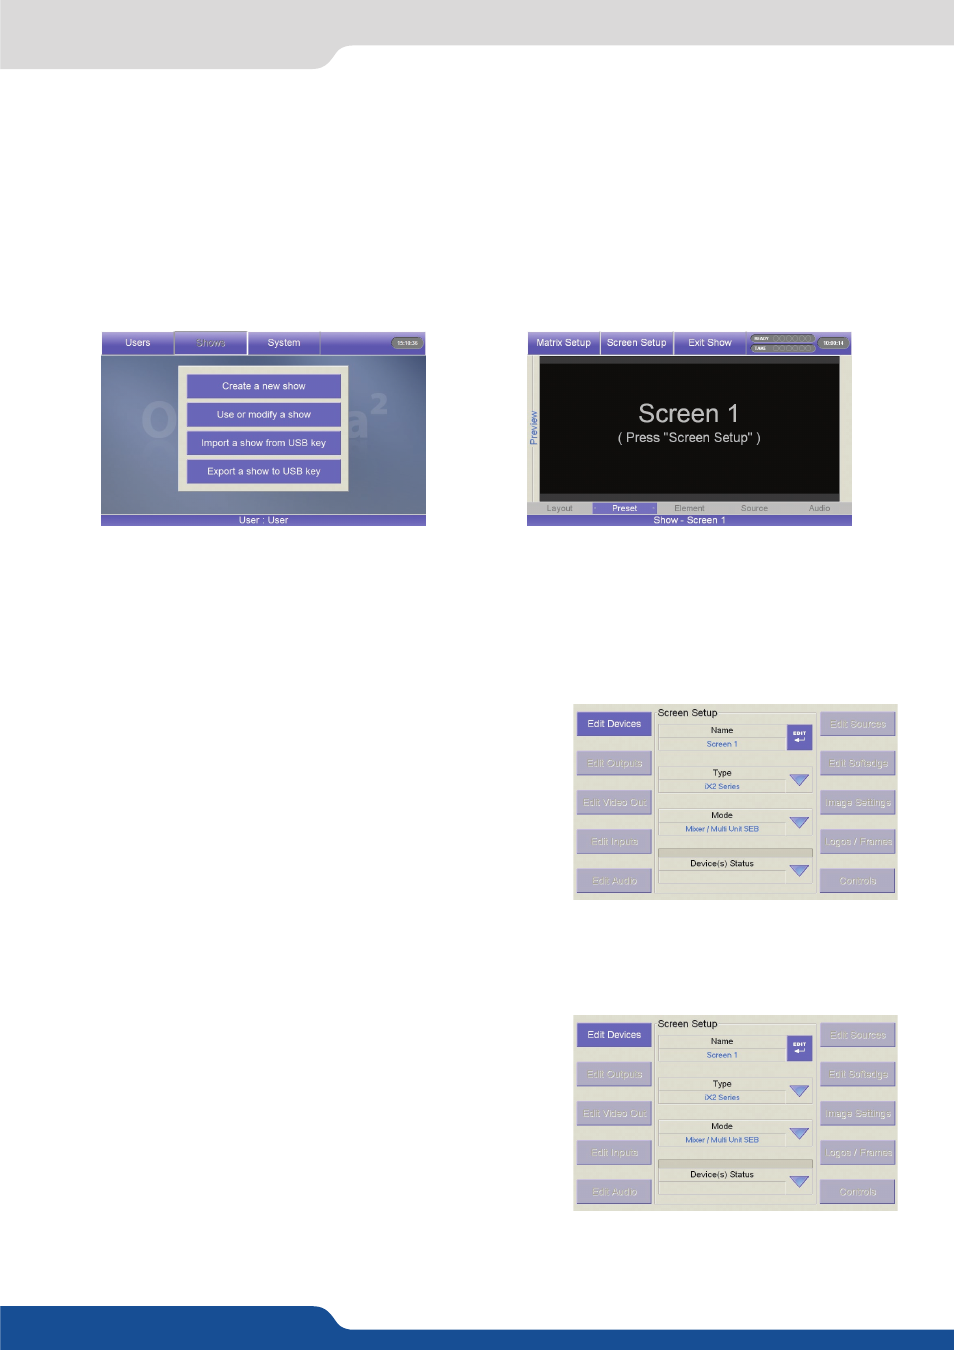
1.
Press the Shows button on the touch screen, then press Create a New Show.
2.
The Orchestra² will display the Show Edit screen, which allows you to name the new show as required.
When you have chosen a show name, press the
OK
button to validate your choice. The Orchestra² will
display a blank show page.
For the Orchestra² to pilote external devices, they must be set up as Screens. To setup a Screen, do the
following:
1.
Select the next available screen (#1 to #6) in the Screen section
of the Orchestra². The Screen button will blink, and a display
of your empty screen will appear on the Orchestra² touch
screen.
2.
On the Orchestra² touch screen, press Screen Setup to enter
the Screen configuration page, then press Edit if you wish
to give your Screen a different name than the default name
(Screen #1 to #6). Change the name of your Screen accordingly,
and press the
OK
button to validate and return to the Screen
Setup page.
To add a device to a Screen, activate it, and start piloting it, do the following:
1.
In the Type dropdown menu on the touch screen, select the
kind of device you want to use in your Screen (in this case a
Di-VentiX II).
2.
In the Mode dropdown menu on the touch screen, select the
mode you want to use the device in (in this case Mixer Mode).
NOTE: Screen parameters other than Edit Devices will not be
available until a device is stored into a Screen.
3.
Press Edit Devices, and press Add, the touch screen will display a page which will let you select the device
you want the Orchestra² to pilote. Press Edit to give the device a different name than the default name,
select the communication protocol the device is configured in, and change LAN settings if required.
4.2 Show settings
4.1.3 Show configuration
4.2 Show settings
4.2.1 Screen setup
4.2.2 Edit devices