3 output configuration, 4 video out configuration – Analog Way Orchestra2 User Manual
Page 22
22
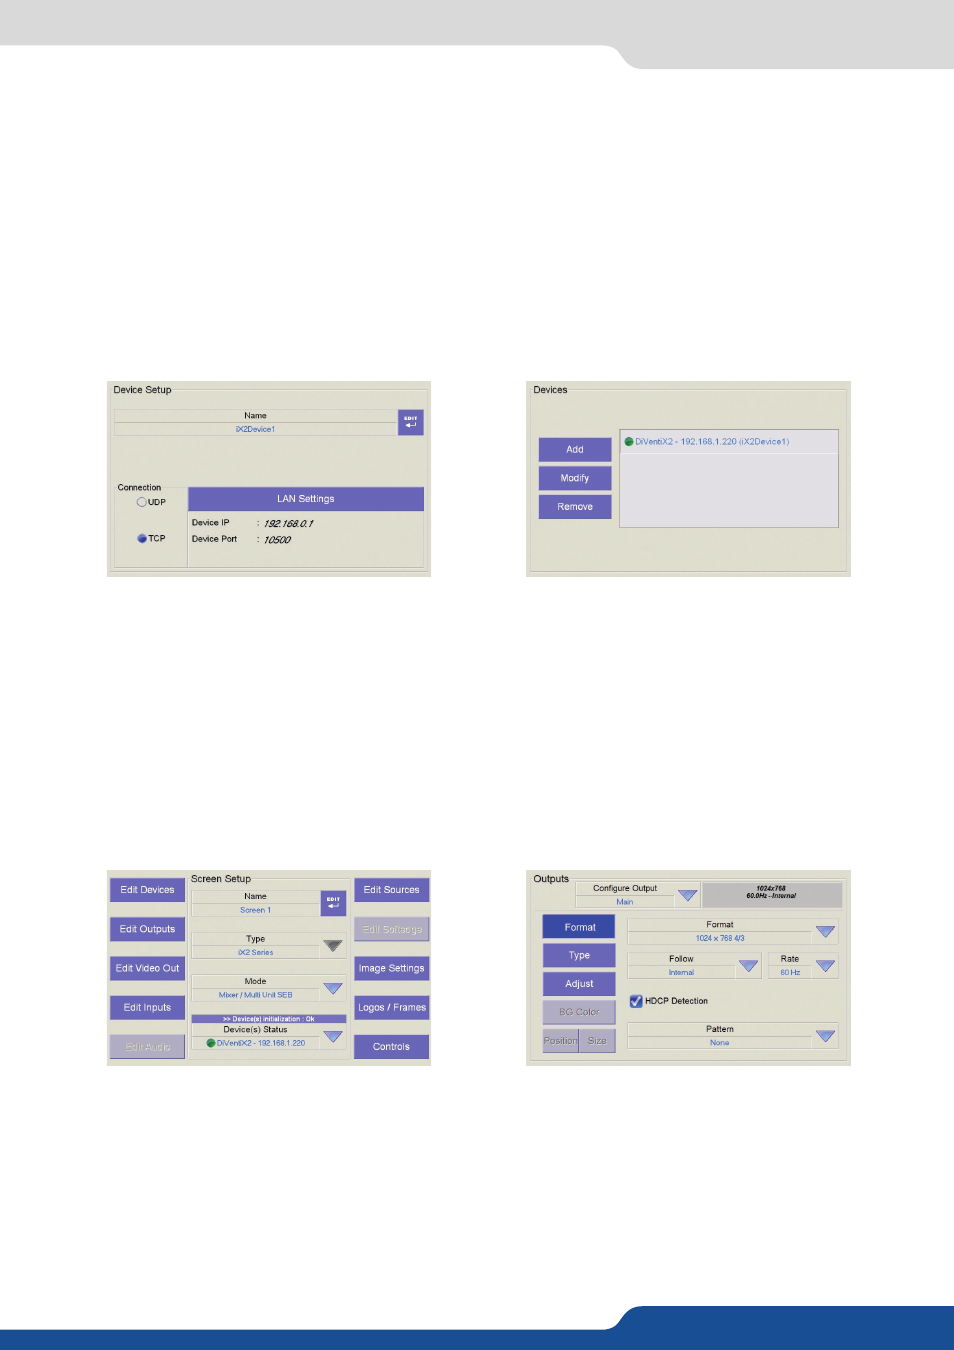
Once your device has been added into a Screen, you can configure its outputs.
1.
On the Screen Setup page of the Orchestra², press
Edit Outputs
. The format screen is displayed by default.
2.
Select the output, Main or Preview you wish to configure, then select the output format (resolution),
output rate, needed. On certain devices, you can also disable/enable the HDCP detection on the outputs.
3.
Press
Pattern
, and select a pattern from the dropdown menu to check your output settings are properly
configured. When you are satisfied, press
Pattern
again, and choose none to revert to your image on
screen.
4.
Press
TYPE
to select the type of signal
5.
Press
ADJUST
to tweak the Gamma value of the output selected.
The Video Out tab will be available only if the slave device has an optional video card installed (for example a
Di-VentiX II with option VO-8044).
1.
In the Screen Setup page of the Orchestra², press Edit Video Out.
2.
Select the display mode for the slave device video out card, then select the output format (resolution),
output rate, and signal type. On certain devices, you can also disable/enable the HDCP detection on the
outputs.
4.2 Show settings
NOTE:
• Make sure LAN settings match those of your device.
• Only TCP and UDP protocols are supported on the Orchestra². We recommend using the TCP protocol.
4.
Press the
OK
button to confirm and return to the Devices page. The Orchestra² will connect to the device.
Press the
OK
button to return to the Screen Setup page.
NOTE:
• Screen parameters should all be available now that a device has been added into the current Screen.
• To control several Di-VentiX II in soft edge, add the Di-VentiX II devices in Mixer Mode in only one screen.
You should have several Di-VentiX II into the Edit Devices menu.
4.2.3 Output configuration
4.2.4 Video Out configuration