SM Pro Audio V-Machines User Manual
Page 9
V-‐Machine Operating Manual
Page 9 of 88
SM Pro Audio
classic analog synth into a soaring string section, or from a reverb effect to a vocoder.
Traditional hardware synthesizers, samplers, and sound modules are great, but many of
today’s
software
instruments
have
much
more
to
offer
–
cutting-‐edge
synthesis
technologies,
detailed
voicing
parameters,
and
more.
With
literally
hundreds
of
commercial
and
free
VST
instruments widely available, the sonic possibilities of the V-‐Machine are endless.
The V-‐Machine lets you harness the flexibility of software in a reliable purpose-‐built hardware
unit.
Capable
of
the
low-‐latency
MIDI-‐to-‐audio
throughput
demanded
by
performing
musicians,
it
represents
the
new
breed
of
technology
based
music
instruments.
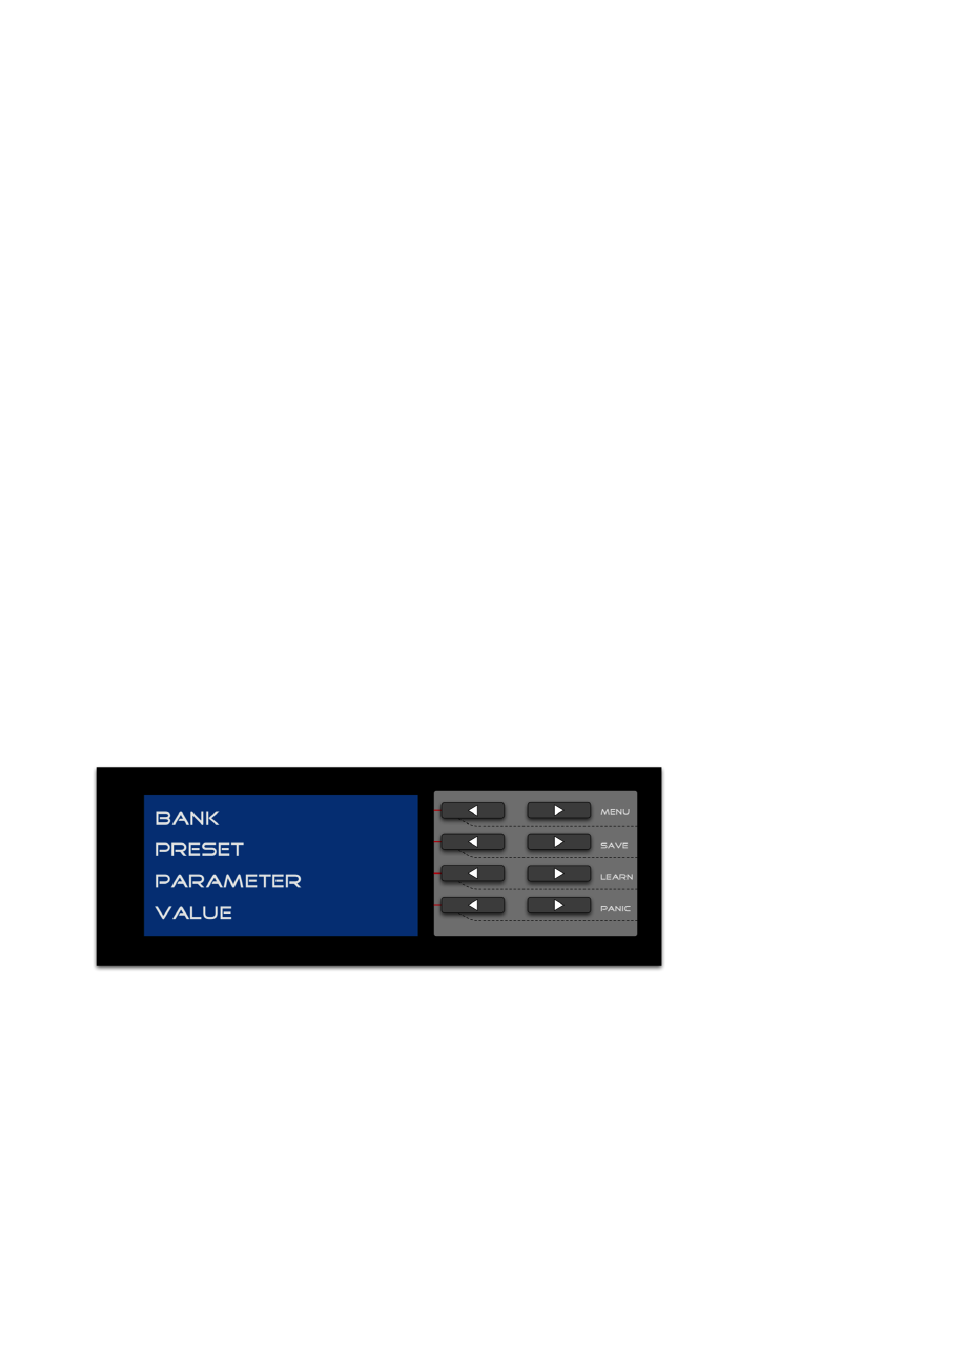
2.4 Front Panel
The
V-‐Machine’s
front
panel
(see
Figure
2)
displays
four
lines
of
text,
in
large
letters
that
are
easy
to
read
onstage:
1. The top line shows the currently selected Bank. The V-‐Machine can contain several
Banks of sounds (depending on the amount of memory each Bank requires).
2. The second line shows the currently selected Preset within the current Bank. Only one
Preset can be active (producing sound) at any given time.
3. The third line shows the parameter that is selected for editing within the Preset. Most of
the parameters of the plugin instruments and effects that you’ve loaded into the V-‐
Machine
can
be
edited
directly
from
the
V-‐Machine’s
panel
–
no
need
to
hook
the
V-‐
Machine
to
a
computer
to
edit.
4. The bottom line shows the current value of the selected parameter. If the Parameter in
Line 3 is “Patch,” the name of the currently selected Patch is displayed.
5. In addition, the stereo audio input meter, stereo audio output meter, and a system CPU
usage meter are visible at the right edge of the display.
The LCD display and control buttons on the V-Machine.
By
pressing
the
left
or
right
arrow
button
next
to
any
of
the
first
three
lines,
you
can
navigate
through
the
currently
available
Banks,
the
Presets
within
a
Bank,
the
editable
parameters
of
any
Preset,
and
the
Patches
within
a
preset.
By
pressing
the
left
or
right
button
next
to
the
bottom line, you can change the value of the currently displayed parameter.
When you select a new Bank or Preset, you’ll see the words Load and Back in the lower right
corner
of
the
display.
If
you
want
to
load
the
Preset
whose
name
is
displayed
in
the
second
line,
press
the
left
arrow
next
to
the
Load
button.
If
you
change
your
mind,
press
the
left
arrow
next
Figure 2
Figure 2