SM Pro Audio V-Machines User Manual
Page 16
V-‐Machine Operating Manual
Page 16 of 88
SM Pro Audio
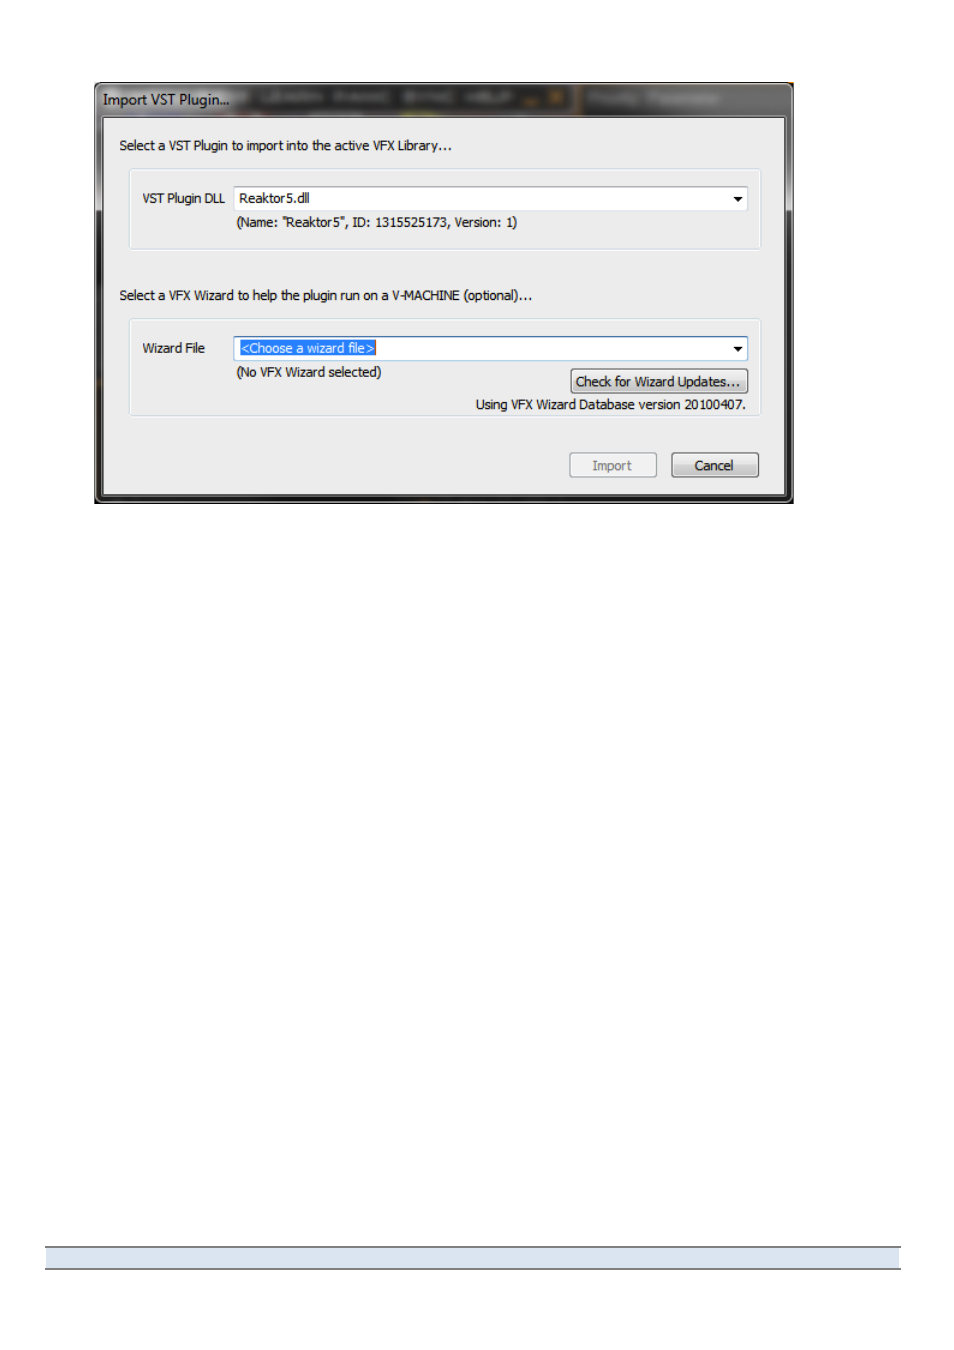
Figure 5
The
Import
VST
Plugin
dialog
box
is
where
you’ll
choose
VST
plugins
to
import
into
the
VFX
Application,
and
also
locate
Wizard
Files
that
will
insure
they’re
compatible
with
the
V-Machine.
5. If you have already installed the plugin in your PC, you can choose it from the drop-‐
down “VST Plugin DLL” list.
6. If the plugin you want to import is not installed on your Windows computer, your best
option is to take a detour and install the plugin. You may be able to import simple
freeware
plugins
(on
either
Mac
or
PC)
without
installing
them,
but
installing
them
first
is
usually
a
good
idea.
7. In the lower field of the dialog box, choose the Wizard File that matches your plugin’s
name
and
version
number
from
the
drop-‐down
menu.
Before
doing
this,
you
may
want
to
click
the
Check
for
Wizard
Updates
button.
The
Wizard
File
will
be
downloaded
from
the
SM
Pro
Audio
website
(of
course,
your
computer
needs
to
be
connected
to
the
internet).
For
more
about
Wizard
Files,
and
what
to
do
if
you
don’t
see
a
file
in
this
drop-‐down, see 2.15 About Wizard Files on page 20.
8. If all goes well, you’ll shortly see a dialog box informing you that the plugin has been
imported
successfully.
Click
on
the
orange
triangle
in
Slot
A
again
and
select
your
newly
imported
plugin
from
the
drop-‐down
menu.
It
will
be
inserted
into
Slot
A.
9. Now that you have something to listen to, it’s time to check the status of the VFX
Application’s
MIDI
and
audio
connections.
This
is
only
necessary
in
Windows,
as
the
Macintosh
version
handles
audio
and
MIDI
connections
automatically.
In
Windows,
click
on
the
VFX
icon
in
the
upper
left
corner
of
the
main
window
(or
right-‐click
anywhere
on
the
MENU/SAVE/LEARN
button
bar)
to
open
the
main
menu
(see
Figure
6).
From
this
menu, choose Options.