Maintenance and modifications, cont’d, Computer input select audio, Co mpu ter inp ut sel ect au dio – Extron Electronics HSA 822M User’s Manual User Manual
Page 19
Maintenance and Modifications, cont’d
HSA 822M • Maintenance and Modifications
HSA 822M • Maintenance and Modifications
9
.
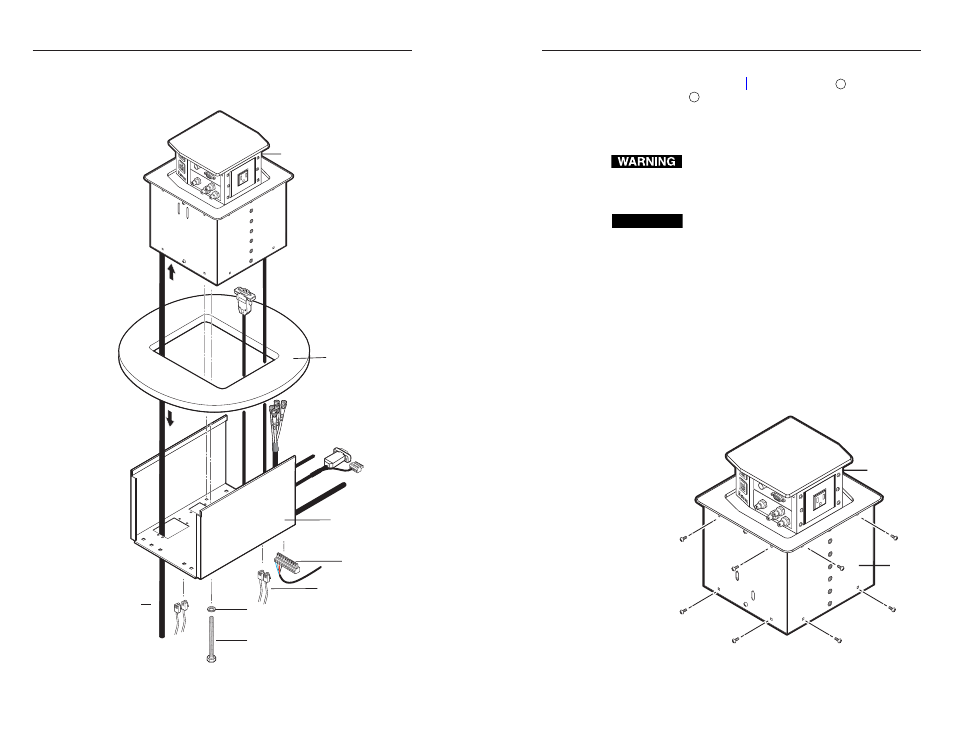
On the underside of the table, remove the two bolts that
secure the clamshell to the surface mount enclosure and
remove the clamshell (figure 3-5).
Mounting
Surface
Clamshell
Full Thread
Mounting Bolts
AAP Cables
Flat Washer
Power Cord
RJ-45 Connectors
Control and Status
Connector
Network (TP)
Cables
COMPUTER
INPUT
SELECT
AUDIO
HSA 822
Enclosure
Figure 3-5 — Removing the HSA 822M from the table
3-9
3-8
10
.
From the underside of the enclosure, reach into the cable
access holes (figure 3-1 on page 3-2, item
3
), and cut the
tie wraps (
5
) that route the AAP cables and network
(CAT 6) cables inside the enclosure. Carefully pull the
cables through and out the bottom of the HSA.
11
.
Lift the enclosure out of the table.
The flanged edges of the top of the surface enclosure
are sharp when the HSA is removed from the table.
Exercise caution when handling to prevent personal
injury.
CAUTION
The flanged edges of the top of the surface enclosure
are bevelled to an ultra-fine thickness of less than
0.04 (4/100)" (approximately 1 mm). These edges
are soft and can be easily nicked or bent. Exercise
caution when handling and mounting the
enclosure. Mishandling can damage the appearance
of the enclosure.
The surfaces of the HSA enclosure have screws and
other protruding hardware that could damage fine
furniture. Do not rest the enclosure on unprotected
furniture.
12
.
Remove and retain the four screws in the corners of each
side’s surface of the enclosure shroud “cube” (figure 3-6).
Remove the two halves of the shroud.
CO
MPU
TER
INP
UT
SEL
ECT
AU
DIO
HSA 822M
Enclosure
Remove (16)
screws.
Shroud
Figure 3-6 — Removing the shroud