Cabling the enclosure, Estraints. see “cabling the enclosure” on, Installation, cont’d – Extron Electronics HSA 822M User’s Manual User Manual
Page 12
HSA 822M • Installation
HSA 822M • Installation
Installation, cont’d
3
.
From the underside of the table, bolt the clamshell to the
enclosure with two bolts of optimum length (included)
(see figure 2-1 on page 2-3).
4
.
Experiment with AAP cable positioning between the
enclosure and the clamshell to ensure that the cables do
not rub against the edges of the AAP cable access hole and
to ensure that the cable pull does not restrict the
movement of the top panel. Figure 2-7 shows the cables
routed to the side, which proved effective in tests at Extron.
Secure the AAP cables at the circled location.
Figure 2-7 — HSA 822M AAP cable routing in the
clamshell
5.
Use tie wraps to secure the AAP cables to the tie-down
holes in the clamshell shown on figure 2-7.
Cabling the Enclosure
2
4
4
6
7
3
5
8
8
1
1
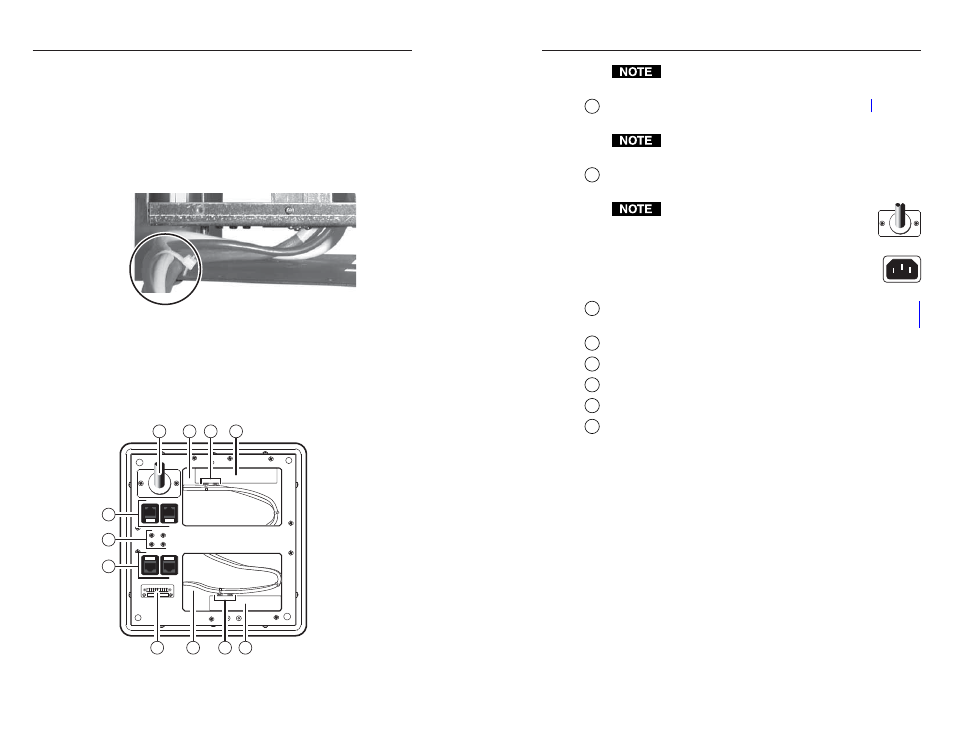
Figure 2-8 — HSA 822M underside features
2-10
Items marked with an asterisk (*) have limited
accessibility once the clamshell is installed.
1
RJ-45 connectors
— See “Cabling the RJ-45 connectors” on
page 2-12.
All RJ-45 connectors are teminated in accordance with
the TIA/EIA T 568 A standard.
2
AC power connector
— Connect the enclosure to the
appropriate AC power source:
For US domestic versions, this power cord is
permanently connected to the HSA.
Connect the power cord to a 125 VAC,
60 Hz, 10 A power source.
For international versions, this power cord is a
removable IEC power cord. Connect the cord
to a 220-250 V, 50-60 Hz, 10 A power source.
3
Control and status captive screw connector
control and status captive screw connector” on page 2-13.
4
Cable access holes*
5
Spare AAP/RJ-45 panel screws*
6
Power supply assembly*
7
Control board assembly*
8
Cable tie-downs*
2-11