Installing the converters, Qs882a converter installation, Install the qs882a converters – GE Industrial Solutions CPS2500D +-190V User Manual
Page 35: Figure 5-5: align the qs882a converter, Figure 5-6: qs800a with all cables attached
CPS2500D +/-190V Downstream System
Issue 4 January 2008
Installation 5 - 7
Installing the Converters
QS882A Converter
Installation
QS882A Converters mount in the QS800 shelf. Note that numbering starts
from the left and is correlated to the marking on the 5-pin protector block
cabinet input wiring panels.
Warning: You must properly protect yourself against ESD discharge prior
to installing the QS882A Controller.
Note: There is an ESD cord connection located on the right side of the shelf.
Install the QS882A
Converters
This procedure is used to install each QS882A Converter.
Step
Action
1
Remove the QS882A converter from its shipping container.
2
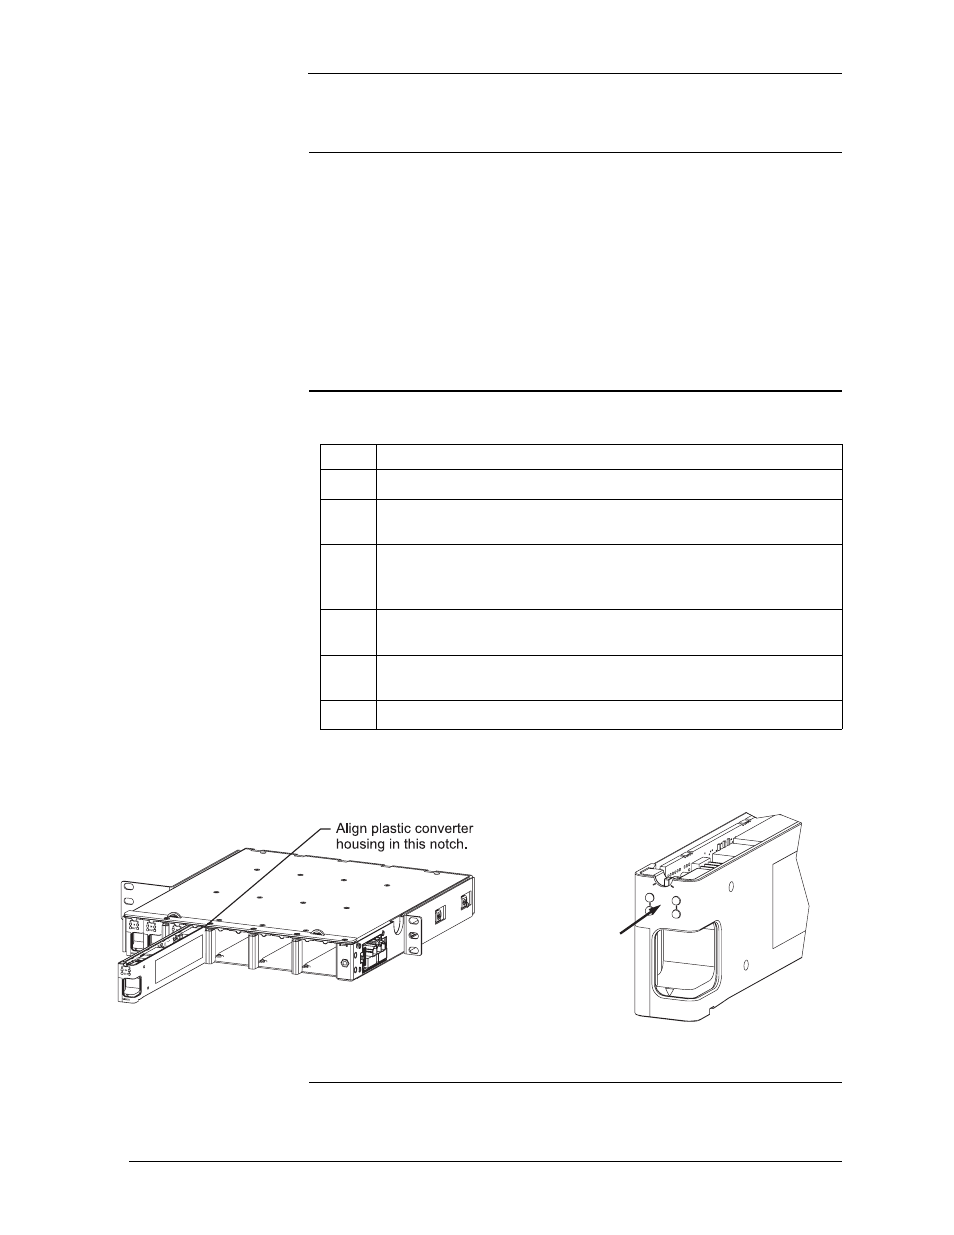
Align the plastic converter housing on the right and insulated
circuit board on the left.
3
Guide the converter into the first available slot by positioning the
plastic converter housing in the notch on the top right edge of the
opening. See Figure 5-5.
4
Slide the converter into the shelf until it is fully seated in the
connector on the rear of the CPS shelf.
5
Push the display faceplate into the shelf until the latch on the top of
the converter housing catches. See Figure 5-6.
6
Repeat this process as needed for your application.
Figure 5-5: Align the QS882A Converter
QS882A
A
B
IN
OUT
Push in until
latch clicks
Figure 5-6: QS800A with All Cables Attached