Cps2500 cable install, Figure 5-3: esd ground jack, Figure 5-4: qs800a with all cables attached – GE Industrial Solutions CPS2500D +-190V User Manual
Page 34: Install the cps2500d shelf
CPS2500D +/-190V Downstream System
5 - 6 Installation
Issue 4 January 2008
Install the CPS2500D Shelf
(continued)
CPS2500 Cable
Install
Follow the steps below to route cables to and from the QS800A shelf.
Step
Action
1
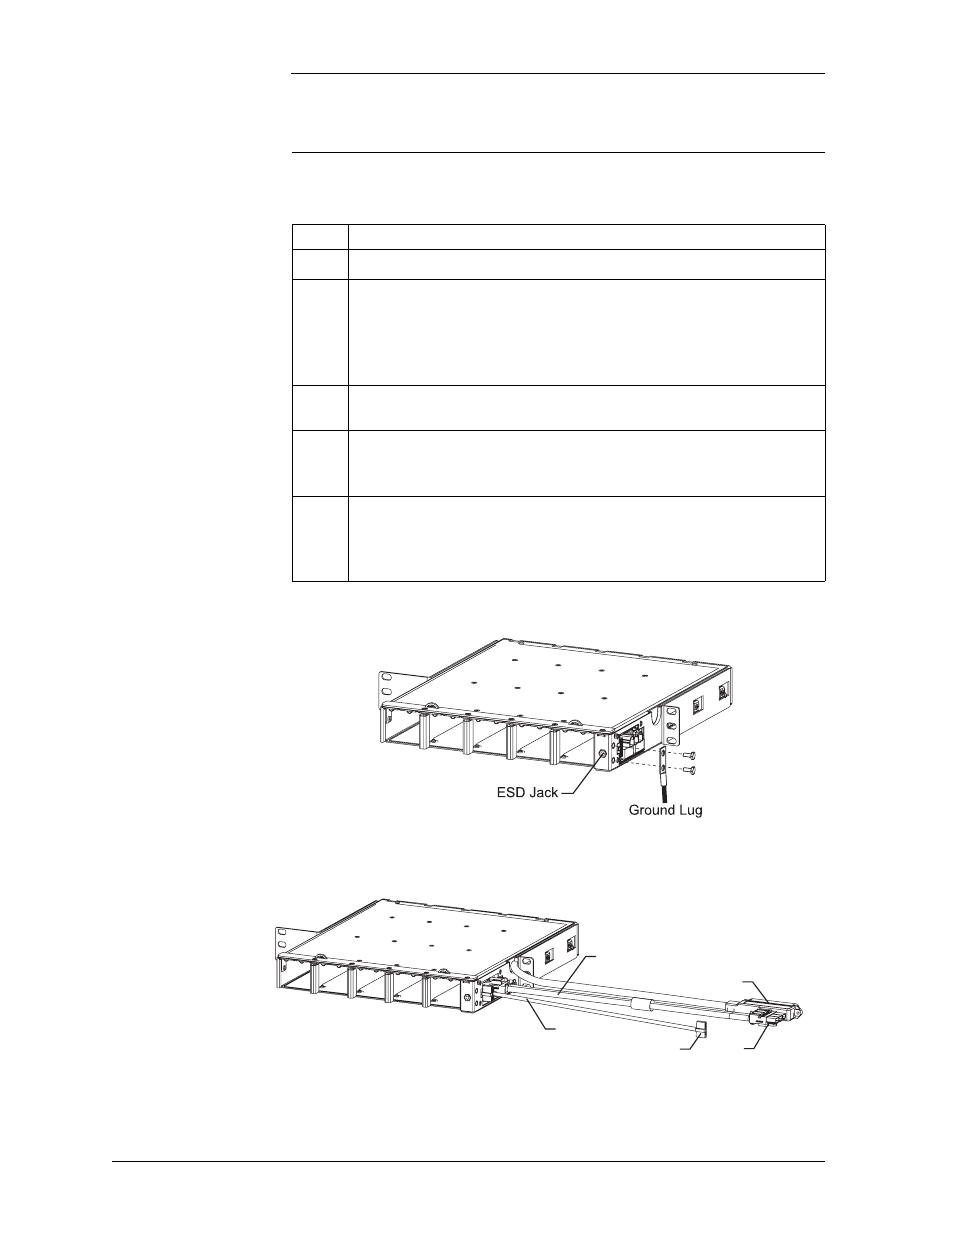
Insert ESD wrist strap pin into ESD jack shown in Figure 5-3.
2
Connect the ground lug to the shelf as shown in Figure 5-3. Use two
10-32 by 5/8 inch or shorter threaded fasteners and a double hole lug
with holes on 5/8 inch centers to secure a 6 AWG ground lead to the
location on the right of the shelf just in front of the power output
connectors. Torque to 30 inch –lbs.
3
Locate the 2 included cable sets that came with the shelf and the
pigtailed 50 pin connector that is permanently attached to the shelf.
4
Attach the 2 included cable sets, 848744961 and 848745547, to the
QS800A Shelf as shown in Figure 5-4. The connectors are keyed so
that they only fit in the correct way.
5
Attach the terminal ends of each cable, labeled P800 for input +/-
190V, P700 for -48V out, and P321 for signals out, to the using
equipment according the Figure 5-4 and documentation for the using
equipment.
Figure 5-3: ESD Ground Jack
Figure 5-4: QS800A with All Cables Attached
848744961
848745547
P321
P700
P800