Rack mounting, 1 place one of the hubs on a level surface, with t, 2 position a bracket over the mounting holes on on – 3Com 100 TX User Manual
Page 17: Figure2-1 attaching a bracket for rack mounting, 3 insert the two screws and tighten with a screwdr, 4 repeat steps 2 and 3 for the other side of the h, 5 mount the hub in the rack and secure it with sui, Figure2-2 rack mounting a single hub, Rack mounting 2-3, Installing the hub 2-3
Installing the Hub
2-3
Rack Mounting
The hub is supplied with two brackets and four screws for rack mounting in
a standard 19-inch rack. The four rubber feet that are shipped with each
hub are not used for rack mounting.
To mount the hub in a rack, follow these steps, which assume you are
stacking two or more hubs in a rack:
1 Place one of the hubs on a level surface, with the front panel facing you.
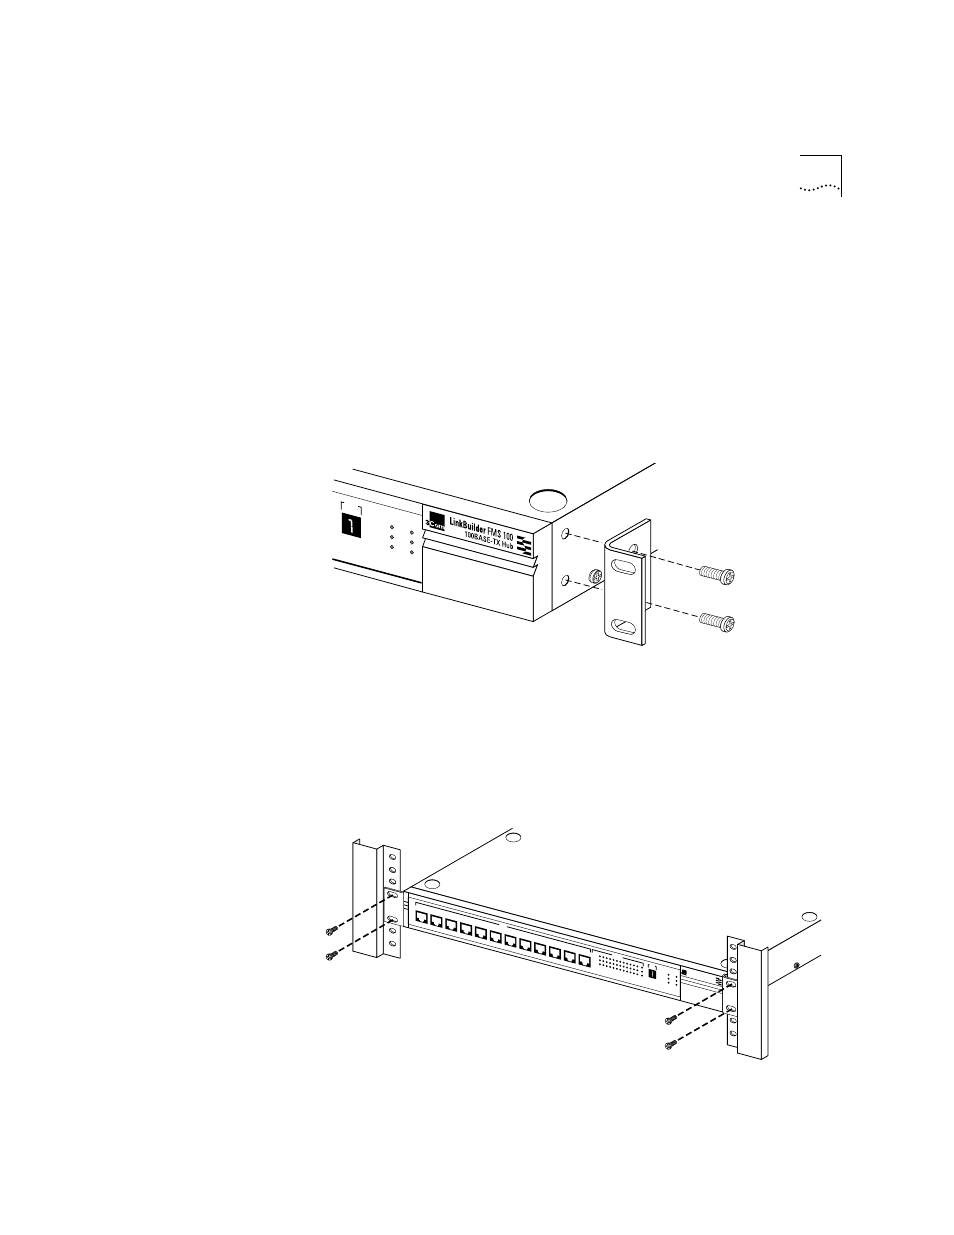
2 Position a bracket over the mounting holes on one side of the unit, as
.
Figure 2-1 Attaching a Bracket for Rack Mounting
3 Insert the two screws and tighten with a screwdriver.
4 Repeat steps 2 and 3 for the other side of the hub.
5 Mount the hub in the rack and secure it with suitable screws, as shown in
Figure 2-2 Rack Mounting a Single Hub
UNIT
CLSII
3C250-TX/
Ι
CLSI
PWR
FAN FAIL
OVERTEMP
COLLISION
®
®
1x
2x
3x
4x
5x
6x
7x
100BT
STATUS
8x
9x
10x
11x
12x
1 2
3 4
5 6
7 8
9 10 11
12 13
ACTIVITY
UNIT
LINK
PARTITION
CLSII
3C250-TX/
CLSI
PWR
FAN FAIL
OVERTEMP
COLLISION
LinkBuilder FMS 100
100BASE-TX Hub