Installation, Brick panel installation, Inst alla tion – Regency P40 User Manual
Page 31
Regency
®
P40-1 Direct Vent Gas Fireplace
31
INST
ALLA
TION
INSTALLATION
IMPORTANT
Dangerous operating conditions may
occur if the panels are broken.
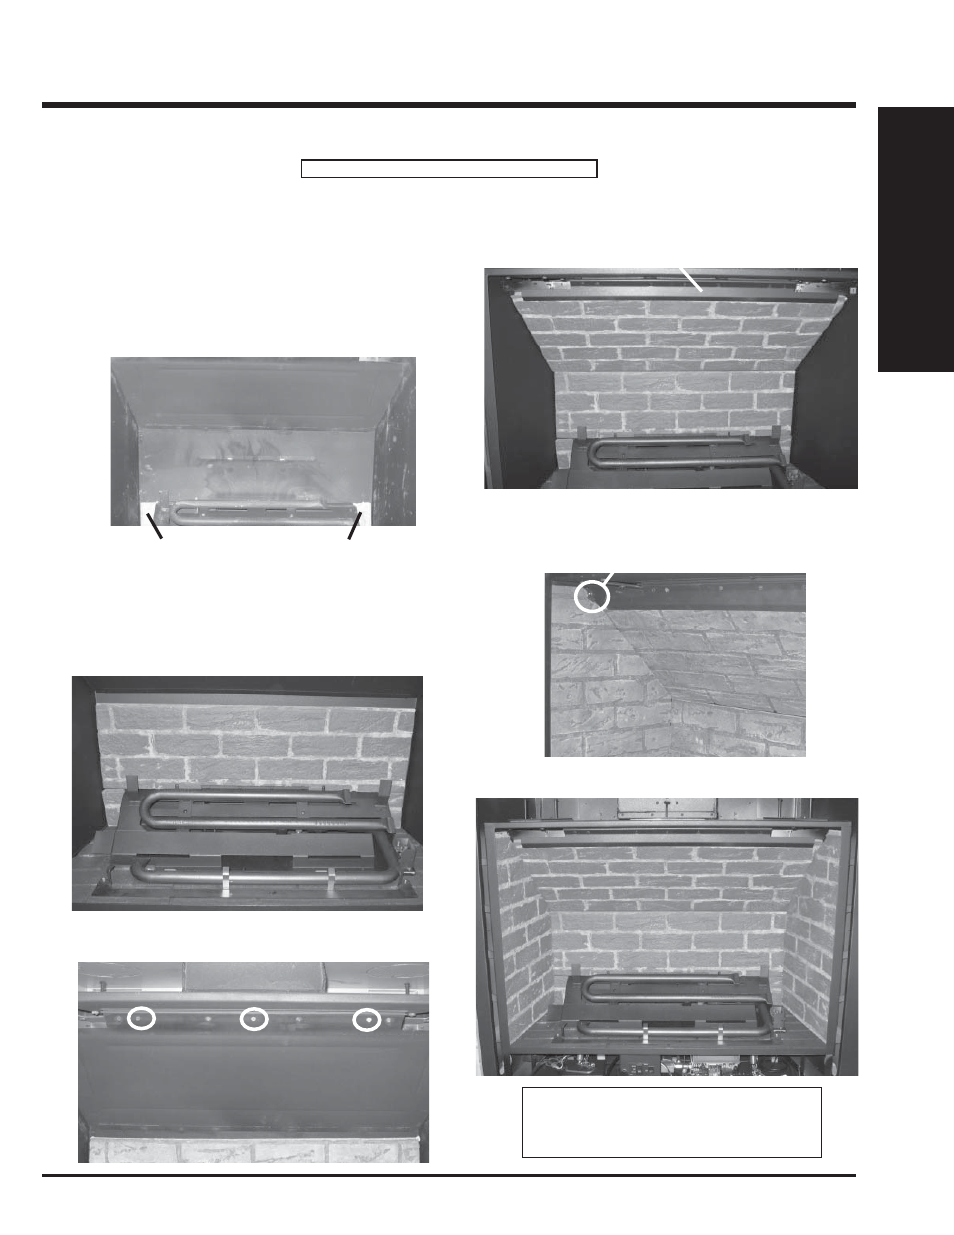
1) Unwrap the Brick Panels from the protective wrapping.
2) Ensure that the logs are not in the unit.
3) Place the 2 small Back Brick Panels at the base of the fi rebox on
the left and right side of the burner assembly.
Note: Ensure that the full brick pattern is on the bottom and the half
brick pattern is on top to line up (approximately) with grout lines on
side brick panels.
4) Insert the Back Brick Panel by slipping it between the back wall
of the fi rebox and the burner assembly, sitting it on the small back
brick panels installed in step 3.
Left Side Small
Back Brick Panel
Right Side Small
Back Brick Panel
5) Remove the Top Brick Panel Bracket by removing the 3 screws.
6) Place the Top Brick Panel over the back brick panel and secure with
the top brick panel bracket.
7) Remove the screw on the left side of the fi rebox. Place the left side
brick panel in position and secure using the brick tab and screw. Repeat
for right side brick panel.
Brick Tab
Back Brick Panel
Top Brick Panel
Bracket
Top Brick Panel
Brick Panels Completely Installed
BRICK PANEL INSTALLATION
Must install 1 set of brick panels with the P40.