Installation, Inst alla tion – Regency P40 User Manual
Page 27
Regency
®
P40-1 Direct Vent Gas Fireplace
27
INST
ALLA
TION
INSTALLATION
CONVERSION KIT #502-969 FROM NG TO LP
LP Conversion Kit Contains:
Qty. Part #
Description
1
910-462
LP Conversion Coil
1 910-037
LP Pilot Orifi ce
1 904-345
Orifi ce #53
1 904-575
Orifi ce #55
1 904-529
Allen Key
1 918-590
LP Conversion Decal
1 908-528
Red Propane Label
1 918-587
Instruction Sheet
THIS CONVERSION MUST BE DONE BY A QUALIFIED GAS FITTER
IF IN DOUBT DO NOT DO THIS CONVERSION !!
1)
Turn control knob to the OFF position;
Shut off the gas supply to the valve;
Unplug the power source.
2)
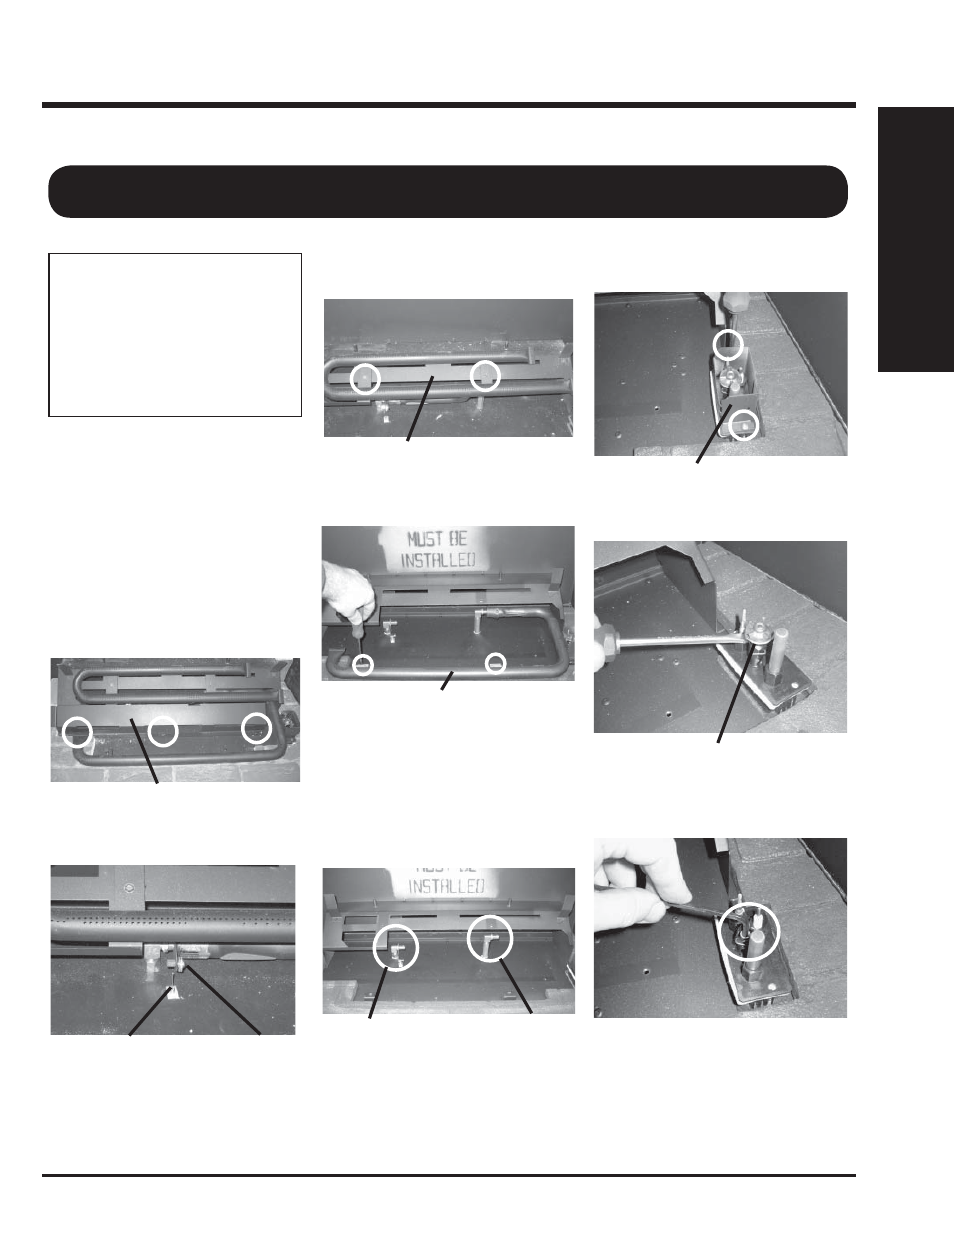
Remove the louvers and the fl ush door.
3)
Remove the logs.
4)
Remove the Steel Fender, by loosening
the retaining srews on both sides and slid-
ing it out of place.
5)
Remove the front air box by undoing the 3
screws.
6)
Loosen the air shutter adjustment screw and
pull out the air shutter adjustment wire.
7)
Remove the 2 screws on the back burner.
8)
Slide the burner to the right and lift out.
9)
Remove the front burner by removing the 2
screws. Lift the burner up and swing to the
right and slide out.
10)
Replace the rear burner orifi ce with #53,
using a 1/2" wrench. See image below.
Use another wrench to hold onto the elbow
behind the orifi ce.
11)
Replace the front burner orifi ce with #55,
using a 1/2" wrench. See image below.
Use another wrench to hold onto the elbow
behind the orifi ce.
12)
Remove the pilot shield by removing the 2
screws.
Pilot Shield
13)
Remove the pilot head from the assembly
using a fl at head screw driver to pop out.
Pilot Head
14)
Remove the NG pilot orifi ce with the Allen
Key and replace with LP pilot orifi ce. Reat-
tach pilot head and clip.
Back Burner
Front Air Box
Air Shutter
Adjustment Wire
Air Shutter
Adjustment Screw
Rear Burner
Orifi ce
Front Burner
Orifi ce
Front Burner