Process map for installing and configuring an srg, The figure – Nortel Networks SRG50 User Manual
Page 26
26
Chapter 2 SRG50 overview
NN40140-500
NN40140-500
Process map for installing and configuring an SRG
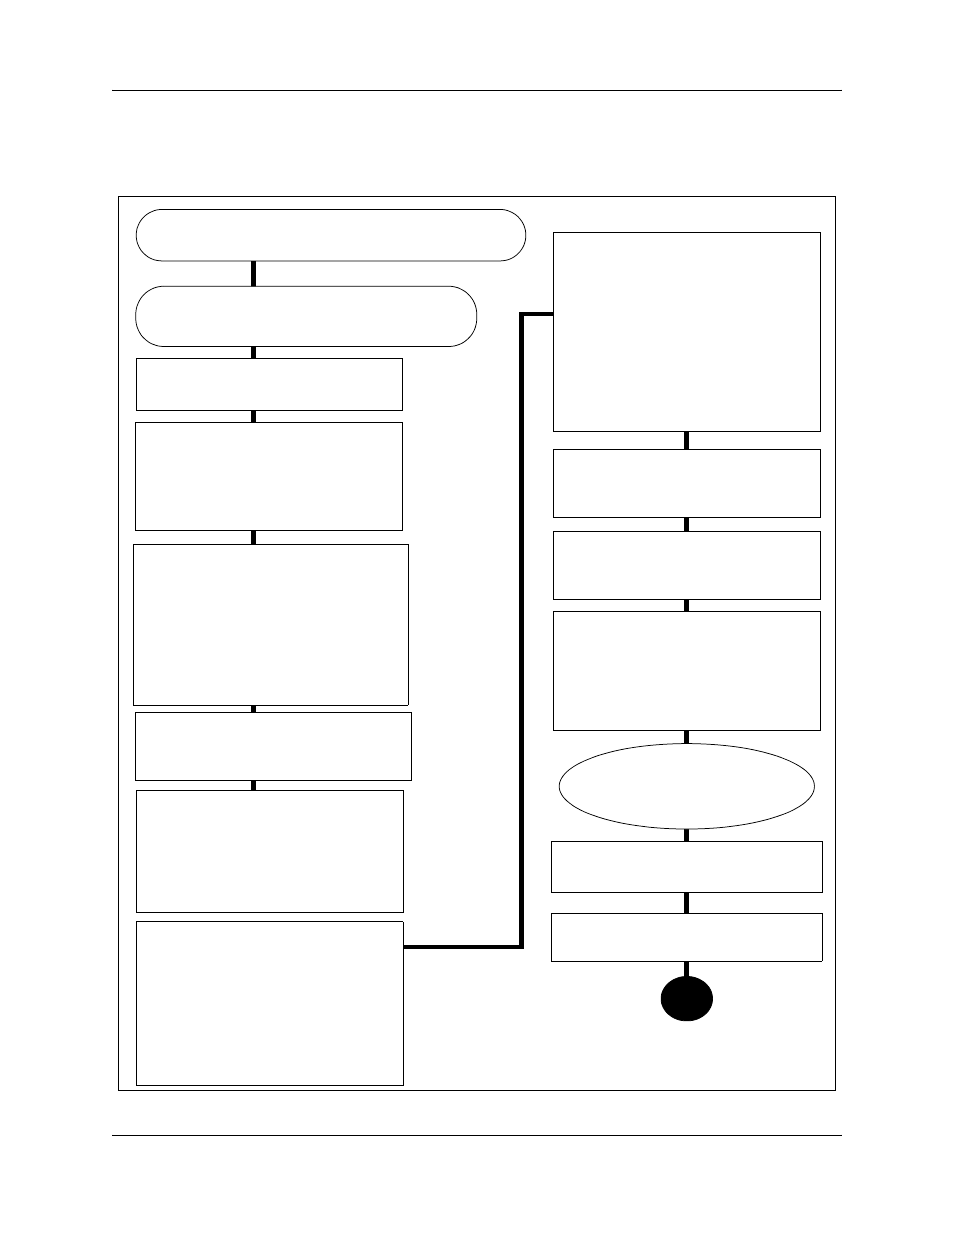
Figure 3 Process map for installing and configuring an SRG
Locate the BCM50 that will be
converted to the SRG.
Install the physical components,
including media bay modules,
cabling, telephones, and
peripherals, as per the Installation
and Maintenance Guide.
The main office is installed and running and the
information to support SRG has been configured.
Complete the initial installation,
connect the SRG to the LAN (as
required) and WAN (to main office),
and test the SRG system, as per the
Installation and Maintenance Guide
(NN40020-302).
Configure the basic parameters of the
BCM50 as per the Installation
Checklist and Quick Start Guide. (see
the Installation and Maintenance
Guide (NN40020-302) and the
Administration Guide (NN40020-600)).
Set up SRG administration, and
carry out non-SRG-specific
networking and device configuration
as per the Administration Guide
(NN40020-600), the Networking
Configuration Guide (NN40020-603),
and the Device Configuration
Guide (NN40020-300).
You have reviewed the SRG and BCM50
system requirements and documentation.
Install and configure attached
devices. See
configuring the IP telephones. See
PSTN access and analog devices
page 79 when setting up analog
trunks and devices.
Configure the server-specific data for
the main office call server (see the
documentation for your call server).
Set up the private VoIP network, as
per
Set up the IP telephones for SRG
operation, as per
Test the telephones and analog
equipment in normal mode.
Familiarize users with the services for
local mode. (
Troubleshoot any registration issues
(
Register each telephone
with the main office and the
SRG.