Adjusting frequency and phase, Making a checkerboard pattern with paint – Planar M46L User Manual
Page 43
Adjusting Frequency and Phase
m40L/m46L Installation & Configuration Guide
33
Adjusting Frequency and Phase
Frequency and Phase are mostly adjusted for computer sources and must be made
using the computer that has, or will have, program content. Although Frequency and
Phase can also be adjusted for component sources, it is not usually necessary.
If you press the
SETUP
button, the automatic adjustment of Frequency and Phase is
usually good enough. (See "Auto Setup Options" on page 61.) If the image shows
vertical banding, adjust the Frequency. If the image has noticeable horizontal streaks
moving through the image, adjust the Phase. If automatic adjustment is not good
enough, this is how to do it manually.
Note:
If you perform an automatic adjustment of Frequency and Phase, be aware that Auto
Setup Options rely on the content displayed on the screen. You will get best results with
something that has a lot of changes, such as a checkerboard pattern.
Making a Checkerboard Pattern With Paint
You will need to display a checkerboard pattern from the source computer. You can
make one with the Windows Paint program.
1
Choose Image > Attributes to open a dialog box.
2
In the Units section, choose pixels. In the Color section, choose Black and White.
3
Set the Width and Height in pixels to match the native resolution of the Planar
display.
4
When you click OK, the program gives you a warning about losing color. Click Yes.
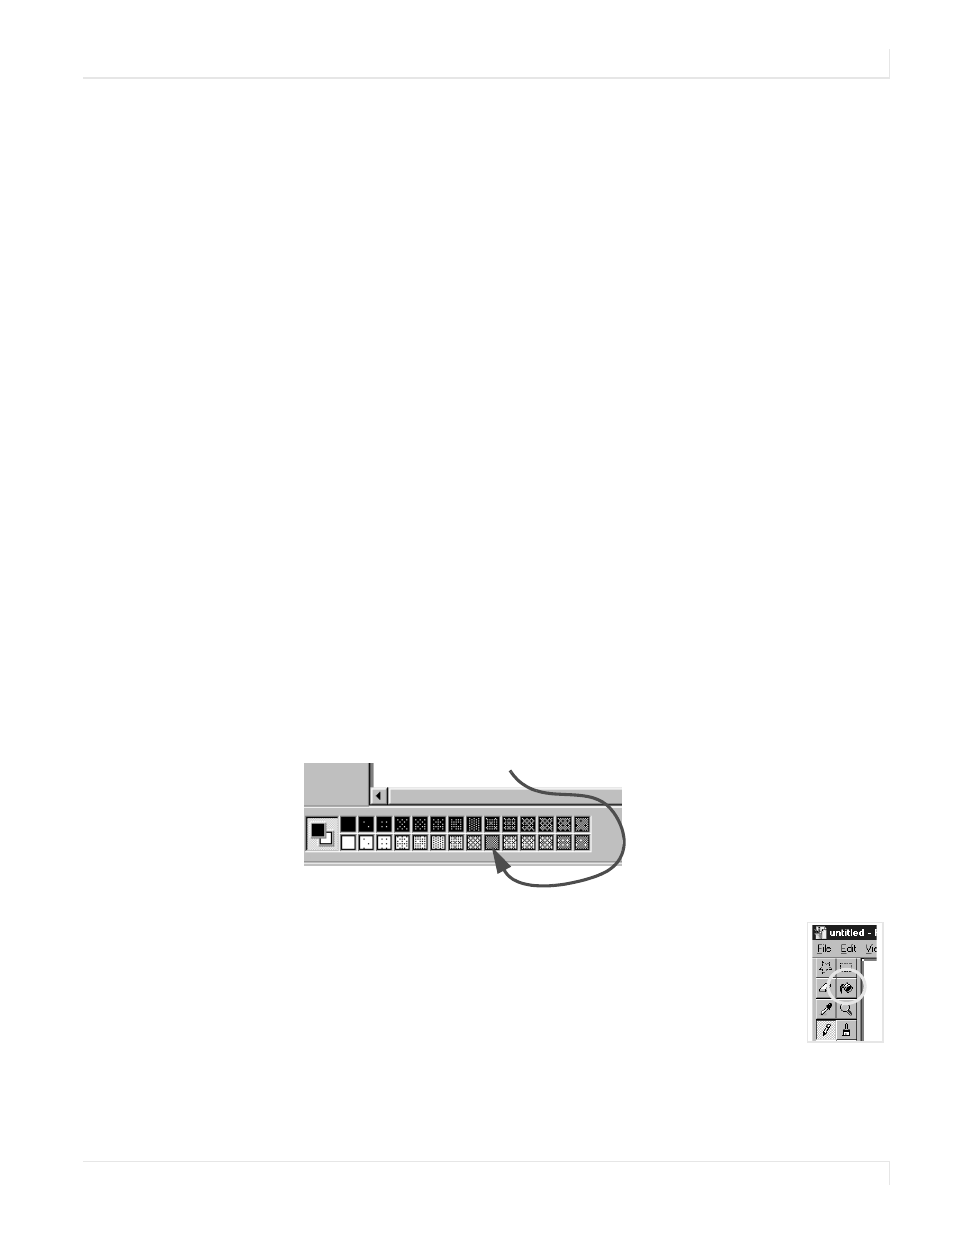
5
At the bottom of the window, click on the checkerboard pattern. This is the 9th
box from the left on the bottom row.
6
Choose the paint bucket icon and click in the picture area. It will fill
with a checkerboard pattern.
7
Save this picture as a bit map (.BMP) file to the hard drive so you can use it again.