Hcf paper end sensor removal, Hcf paper size sensors (1, 2) removal – Lexmark 5056 User Manual
Page 61
4-60
Service Manual
5056-XXX
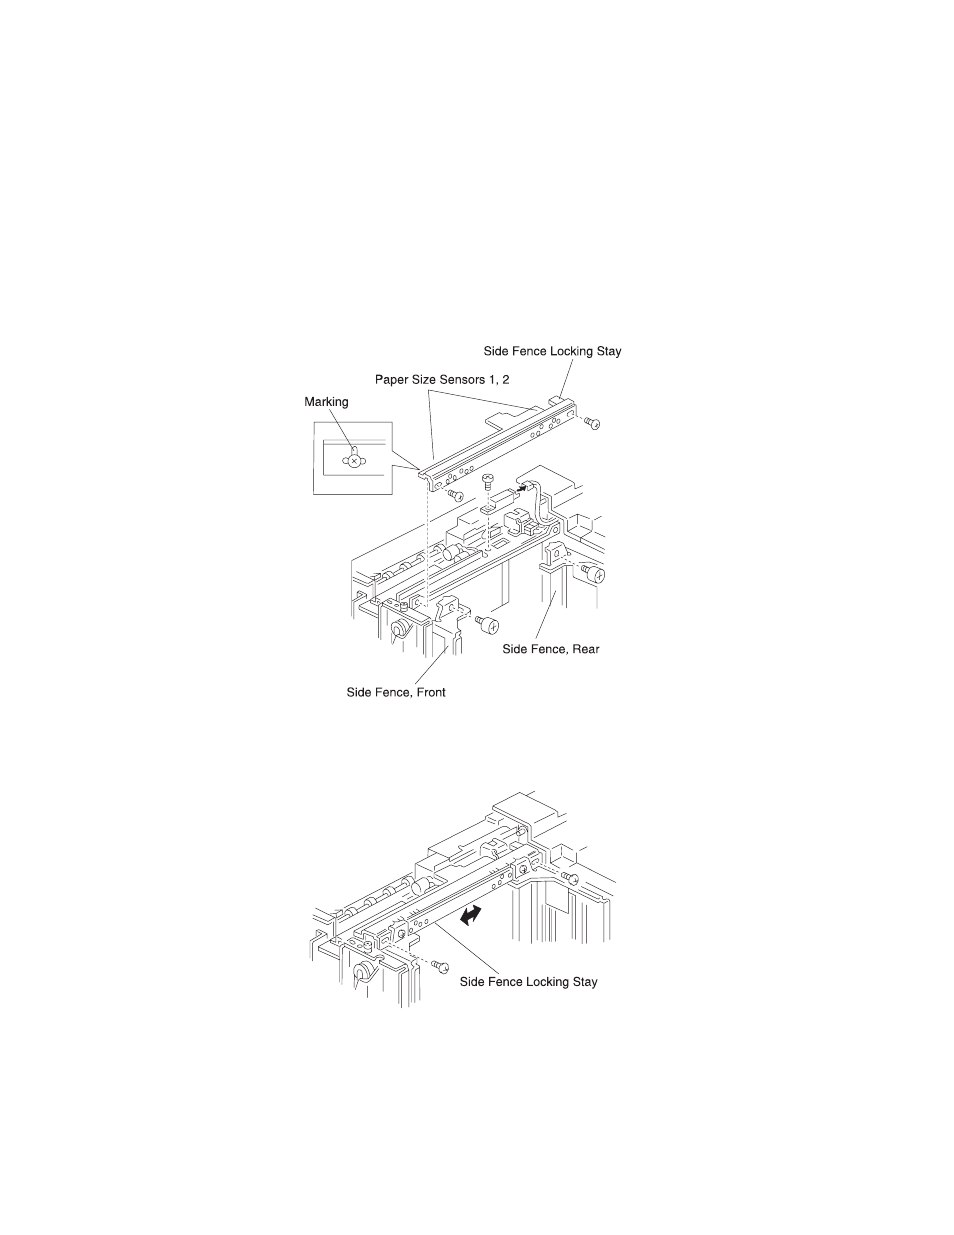
HCF paper end sensor removal
HCF paper size sensors (1, 2) removal
1.
Cover the paper level sensor with your hand, and press the down button. The tray moves down. Lower the
tray until the down sensor turns on.
2.
Remove the front cover and transfer cover.
3.
Remove the two screws on the front and rear sides of the side fence.
4.
Mark the locking position of the side fence locking stay.
5.
Remove the two screws on the side fence locking stay.
6.
Remove the screw and connector from paper end sensor, and remove the sensor.
7.
Remove the screw and connector from the clamp plane, and remove the paper size sensors 1 and 2.
Notes
:
•
To prevent damage to the stay, hold the stay when removing the sensors.
•
Be sure the side registration is not shifted, which may occur with the dismounting and mounting of the
locking stay. If it is shifted, relocate the stay toward the front or rear to adjust.
- E260d (142 pages)
- 6600 Series (173 pages)
- 10N0227 (1 page)
- Z12 (2 pages)
- 301 (144 pages)
- NO. 35 (1 page)
- Z65n (111 pages)
- dn2 (217 pages)
- 10E (144 pages)
- Z2300 (54 pages)
- 230 (213 pages)
- 310 Series (2 pages)
- PRO700 (24 pages)
- C 720 (18 pages)
- C520 (145 pages)
- X656 MFP (104 pages)
- Prospect Pro207 (27 pages)
- 337 (258 pages)
- OptraImage 242 (207 pages)
- T64x (6 pages)
- C524 (146 pages)
- 4098-001 (70 pages)
- 1200 Series (21 pages)
- X650 Series (8 pages)
- 5300 (179 pages)
- 302 (274 pages)
- 4549 (235 pages)
- 202 (320 pages)
- 4076-0XX (89 pages)
- 10N0016 (1 page)
- 5025 (171 pages)
- 1361760 (1 page)
- C 546dtn (6 pages)
- Interpret S400 (40 pages)
- x6575 (2 pages)
- 27S2156-001 (2 pages)
- MENUS AND MESSAGES C522 (55 pages)
- Z35 (101 pages)
- Z25 (24 pages)
- series x5100 (77 pages)
- Z82 (105 pages)
- 2500 Series (76 pages)
- 1200 (208 pages)
- Z33 (114 pages)
- 7600 Series (181 pages)