Top unit removal, Transfer belt removal – Lexmark 5056 User Manual
Page 44
Repair information
4-43
5056-XXX
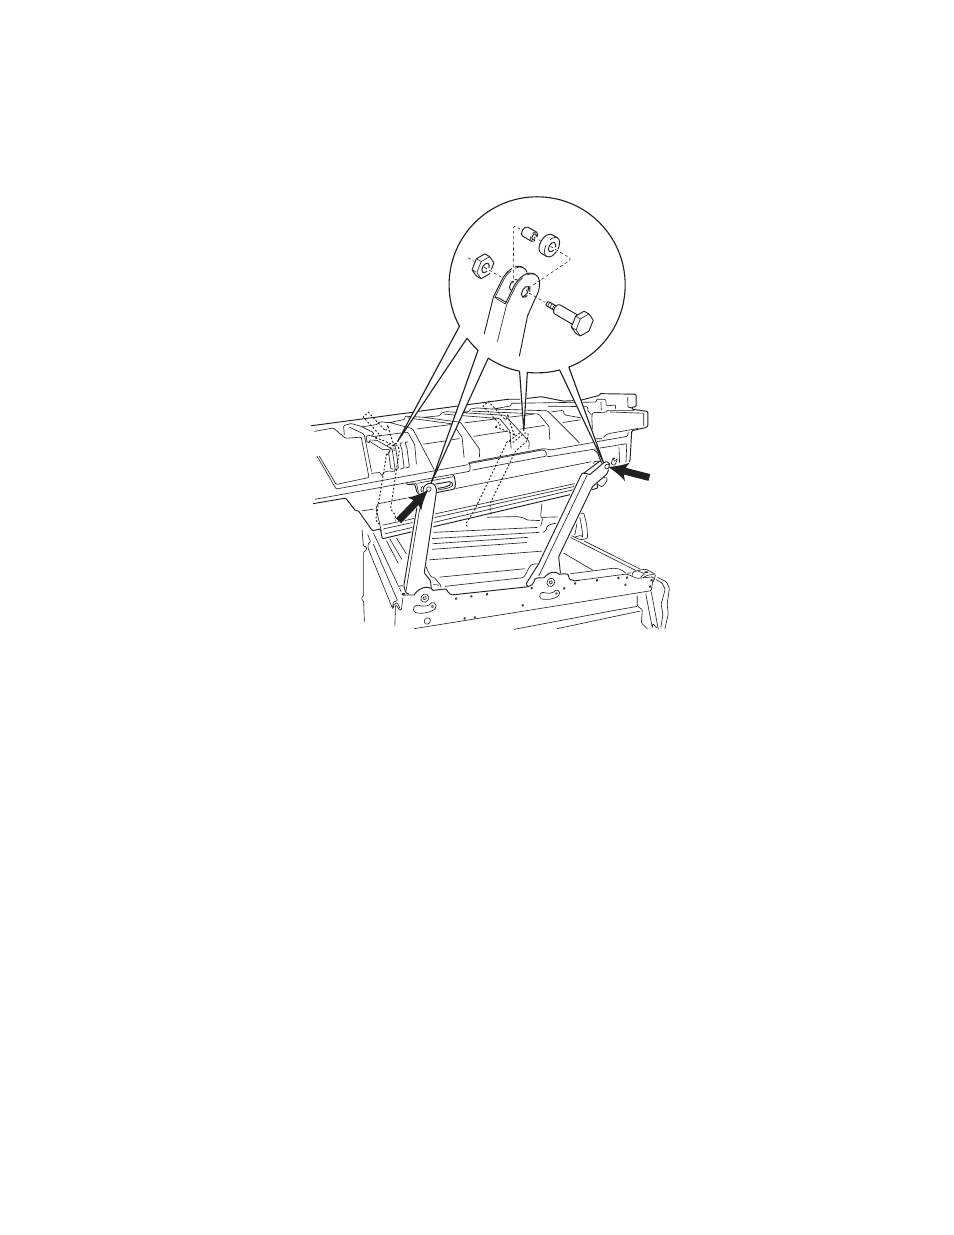
Top unit removal
1.
Open the top unit, and remove the top cover and face-down guide assembly.
2.
Remove the screws, and remove the top unit.
Transfer belt removal
Transfer belt removal has been simplified with a redesign of the changing shaft linkage to the belt up / down
clutch. The supplies menu no longer needs to accessed to remove the transfer belt unit.
Note:
If the operator panel is inoperable, or if you have an unrecoverable error code, this procedure can still be
used.
1.
Turn the printer off, along with any optional devices connected to the printer.
2.
Open the front cover and top unit.
Warning:
Do not touch, drop, or place anything on the transfer belt. Touching the surface of the transfer belt or
placing items on the belt may cause damage.
- E260d (142 pages)
- 6600 Series (173 pages)
- 10N0227 (1 page)
- Z12 (2 pages)
- 301 (144 pages)
- NO. 35 (1 page)
- Z65n (111 pages)
- dn2 (217 pages)
- 10E (144 pages)
- Z2300 (54 pages)
- 230 (213 pages)
- 310 Series (2 pages)
- PRO700 (24 pages)
- C 720 (18 pages)
- C520 (145 pages)
- X656 MFP (104 pages)
- Prospect Pro207 (27 pages)
- 337 (258 pages)
- OptraImage 242 (207 pages)
- T64x (6 pages)
- C524 (146 pages)
- 4098-001 (70 pages)
- 1200 Series (21 pages)
- X650 Series (8 pages)
- 5300 (179 pages)
- 302 (274 pages)
- 4549 (235 pages)
- 202 (320 pages)
- 4076-0XX (89 pages)
- 10N0016 (1 page)
- 5025 (171 pages)
- 1361760 (1 page)
- C 546dtn (6 pages)
- Interpret S400 (40 pages)
- x6575 (2 pages)
- 27S2156-001 (2 pages)
- MENUS AND MESSAGES C522 (55 pages)
- Z35 (101 pages)
- Z25 (24 pages)
- series x5100 (77 pages)
- Z82 (105 pages)
- 2500 Series (76 pages)
- 1200 (208 pages)
- Z33 (114 pages)
- 7600 Series (181 pages)