Eraser removal – Lexmark 5056 User Manual
Page 22
Repair information
4-21
5056-XXX
5.
Disconnect the affected LED printhead connectors from the printhead controller board. Remove the screw
from the ground wire located on the LED printhead.
6.
Remove the LED printhead and the cables from the printer.
When replacing the LED printhead, replace the corresponding EEPROM, shipped with the printhead, on
the printhead controller board.
Note:
The LED printhead light intensity values do not have to be entered for the printer.
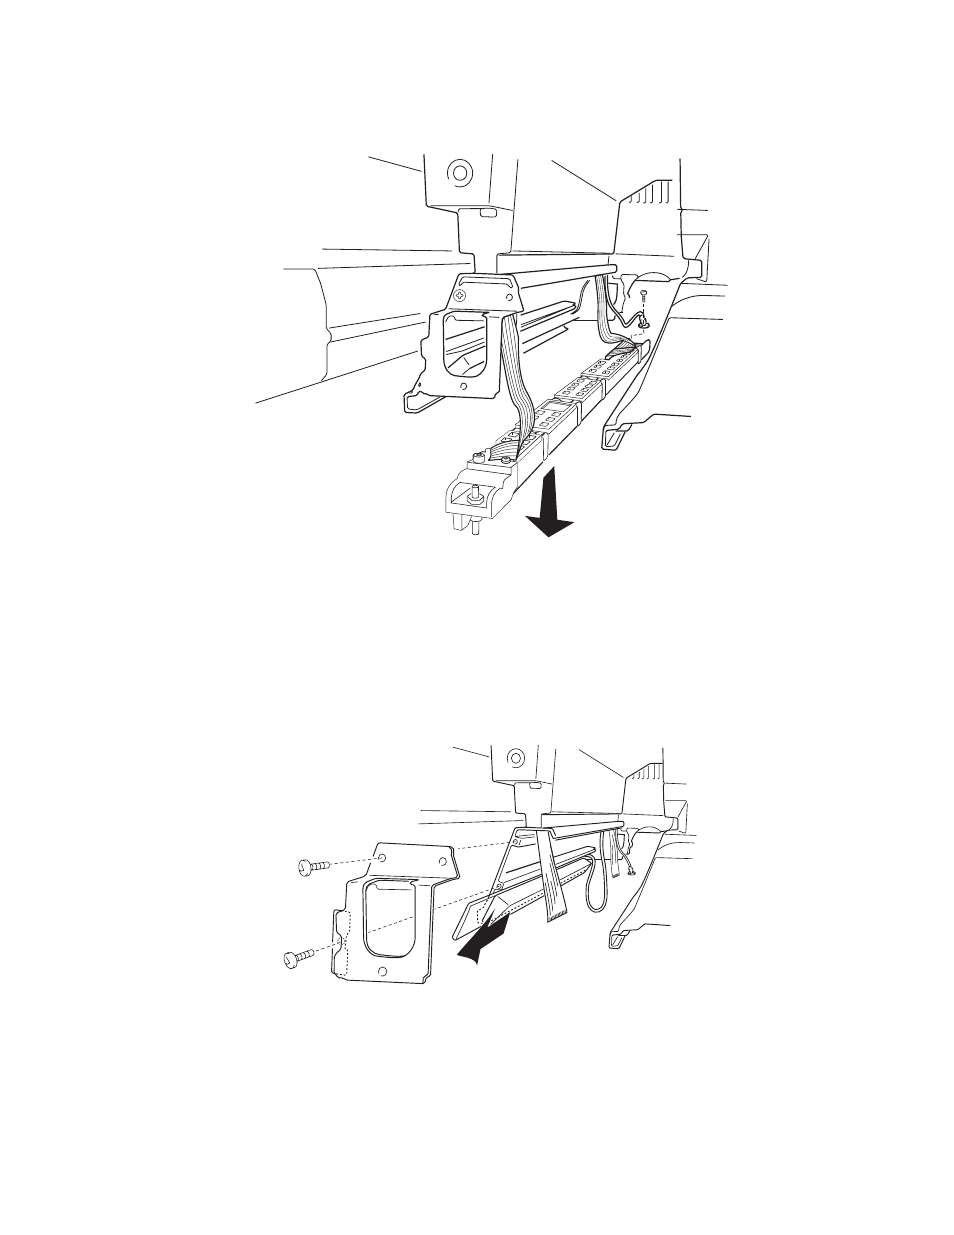
Eraser removal
1.
Remove the appropriate printheads (see
“LED printhead removal” on page 4-20
). Spread a cloth over
the transfer belt to protect it from damage.
2.
Remove the two screws from HSP holder, and remove the holder.
3.
Remove the top cover.
4.
Disconnect the eraser cable from the printhead controller board.
C–CN06
M–CN05
Y–CN07
K–CN08
5.
Carefully thread the eraser cable through the upper unit and remove the eraser.
- E260d (142 pages)
- 6600 Series (173 pages)
- 10N0227 (1 page)
- Z12 (2 pages)
- 301 (144 pages)
- NO. 35 (1 page)
- Z65n (111 pages)
- dn2 (217 pages)
- 10E (144 pages)
- Z2300 (54 pages)
- 230 (213 pages)
- 310 Series (2 pages)
- PRO700 (24 pages)
- C 720 (18 pages)
- C520 (145 pages)
- X656 MFP (104 pages)
- Prospect Pro207 (27 pages)
- 337 (258 pages)
- OptraImage 242 (207 pages)
- T64x (6 pages)
- C524 (146 pages)
- 4098-001 (70 pages)
- 1200 Series (21 pages)
- X650 Series (8 pages)
- 5300 (179 pages)
- 302 (274 pages)
- 4549 (235 pages)
- 202 (320 pages)
- 4076-0XX (89 pages)
- 10N0016 (1 page)
- 5025 (171 pages)
- 1361760 (1 page)
- C 546dtn (6 pages)
- Interpret S400 (40 pages)
- x6575 (2 pages)
- 27S2156-001 (2 pages)
- MENUS AND MESSAGES C522 (55 pages)
- Z25 (24 pages)
- Z35 (101 pages)
- series x5100 (77 pages)
- Z82 (105 pages)
- 2500 Series (76 pages)
- 1200 (208 pages)
- Z33 (114 pages)
- 7600 Series (181 pages)