Removing the sas/sata raid riser-card assembly, Installing the sas/sata raid riser-card assembly, Removing – Lenovo RD210 User Manual
Page 98: Installing, Sas/sata, Raid, Riser-card, Assembly
If
you
have
other
options
to
install
or
remove,
do
so
now.
Otherwise,
go
to
Removing
and
installing
the
SAS/SATA
RAID
riser-card
assembly
To
remove
and
install
the
SAS/SATA
RAID
riser-card
assembly,
complete
the
steps
in
this
section.
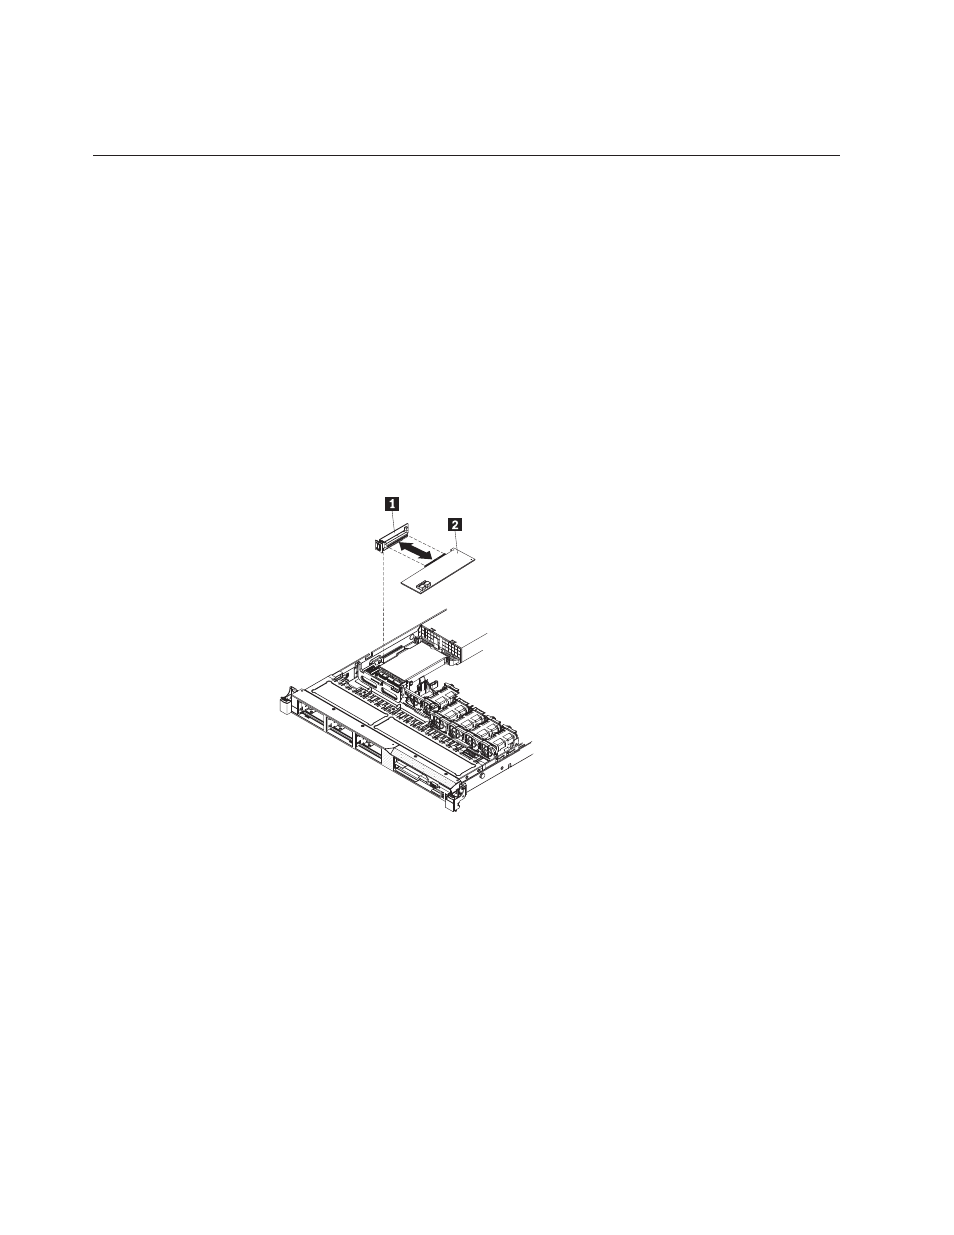
Removing
the
SAS/SATA
RAID
riser-card
assembly
To
remove
the
SAS/SATA
RAID
riser-card
assembly,
complete
the
following
steps:
1.
Read
the
safety
information
in
and
2.
Turn
off
the
server
and
peripheral
devices
and
disconnect
all
power
cords;
then,
remove
the
cover
(see
3.
Disconnect
the
cables
from
the
connectors
on
the
SAS/SATA
controller;
then,
grasp
the
controller
and
pull
it
out
of
the
connector
on
the
RAID
riser-card
assembly.
4.
Remove
the
flash
device
from
the
SAS/SATA
RAID
riser
card
1 ,
if
one
is
installed.
1
SAS/SATA
riser
card
2
ServeRAID-BR10i
controller
5.
If
you
are
instructed
to
return
the
RAID
riser-card
assembly,
follow
all
packaging
instructions,
and
use
any
packaging
materials
for
shipping
that
are
supplied
to
you.
Installing
the
SAS/SATA
RAID
riser-card
assembly
To
install
the
SAS/SATA
RAID
riser-card
assembly,
complete
the
following
steps:
1.
Read
the
safety
information
in
and
2.
Turn
off
the
server
and
peripheral
devices
and
disconnect
the
power
cords
and
all
external
cables;
then,
remove
the
server
cover
(see
3.
Reinstall
the
SAS/SATA
adapter,
if
one
was
removed.
82
ThinkServer
RD210
Types
3795,
3796,
3818,
and
3819:
Installation
and
User
Guide