Installing a cd/dvd drive, Installing, Cd/dvd – Lenovo RD210 User Manual
Page 111: Drive
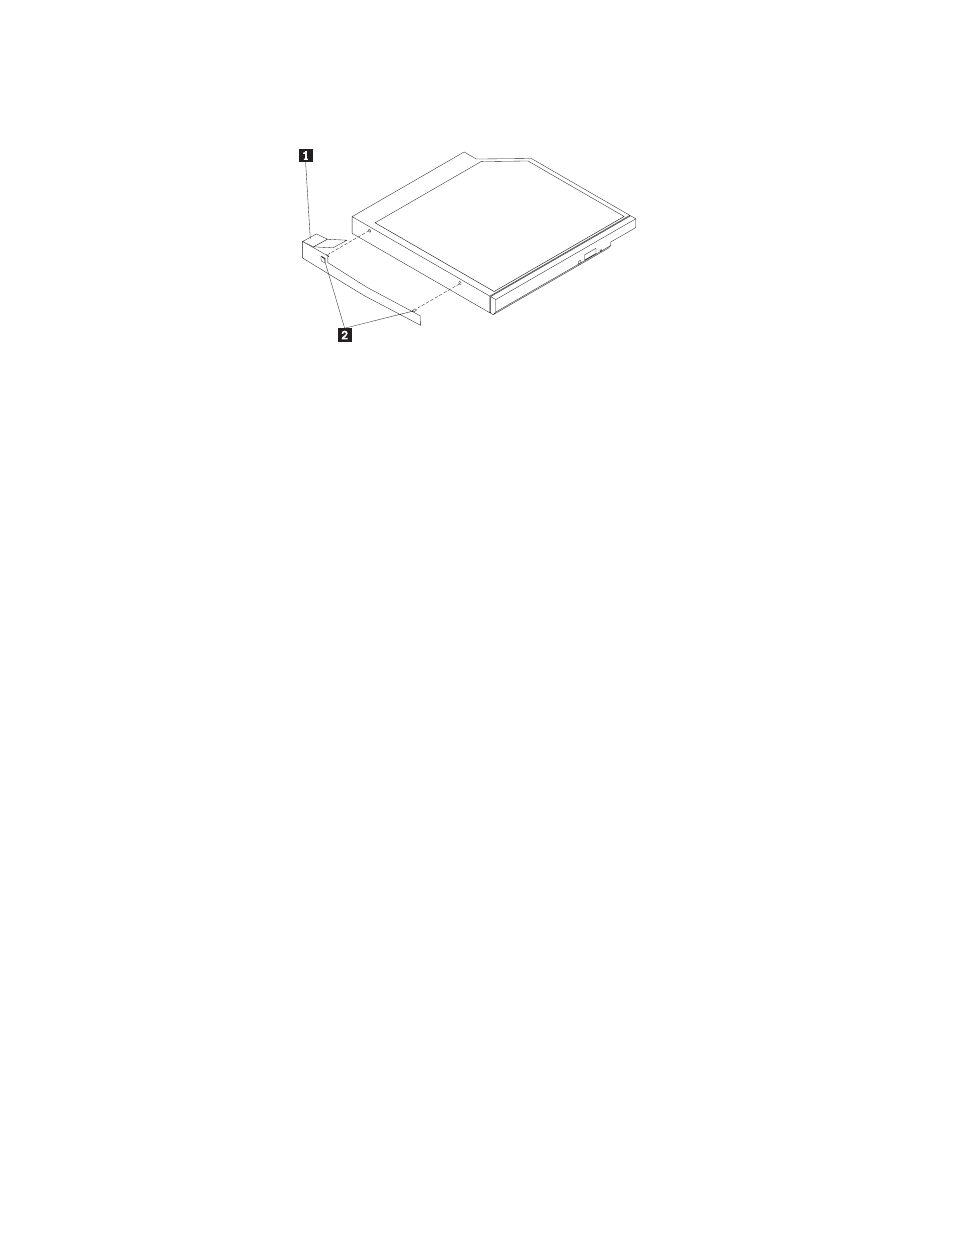
5.
Slide
the
drive-retention
clip
1
from
the
side
of
the
drive
2 .
Save
the
clip
to
use
when
you
install
the
replacement
drive.
1
Drive-retention
clip
2
Alignment
pins
6.
If
you
are
instructed
to
return
the
CD/DVD
drive,
follow
all
packaging
instructions,
and
use
any
packaging
materials
for
shipping
that
are
supplied
to
you.
Installing
a
CD/DVD
drive
The
following
notes
describe
the
type
of
drives
that
the
server
supports
and
other
information
that
you
must
consider
when
you
install
a
hard
disk
drive.
v
Locate
the
documentation
that
comes
with
the
drive
and
follow
those
instructions
in
addition
to
the
instructions
in
this
chapter.
v
Make
sure
that
you
have
all
the
cables
and
other
equipment
that
are
specified
in
the
documentation
that
comes
with
the
drive.
v
The
server
supports
one
ultra-slim
SATA
optical
drive.
The
server
comes
standard
with
a
CD/DVD-ROM
installed.
If
you
need
to
replace
a
CD/DVD
drive,
complete
the
following
steps:
1.
Read
the
safety
information
in
and
2.
Turn
off
the
server
and
peripheral
devices
and
disconnect
all
power
cords.
3.
Remove
the
cover
(see
4.
Disconnect
the
drive
cable
from
the
system
board.
5.
Locate
the
blue
release
tab
1
on
the
rear
of
the
drive;
then,
while
you
press
the
tab,
push
the
drive
2
toward
the
front
of
the
server.
Chapter
5.
Installing
optional
devices
and
replacing
customer
replaceable
units
95