Installing the microprocessor 2 air baffle, Removing and installing the dimm air baffle, Removing the dimm air baffle – Lenovo RD210 User Manual
Page 64: Installing, Microprocessor, Baffle, Removing, Dimm
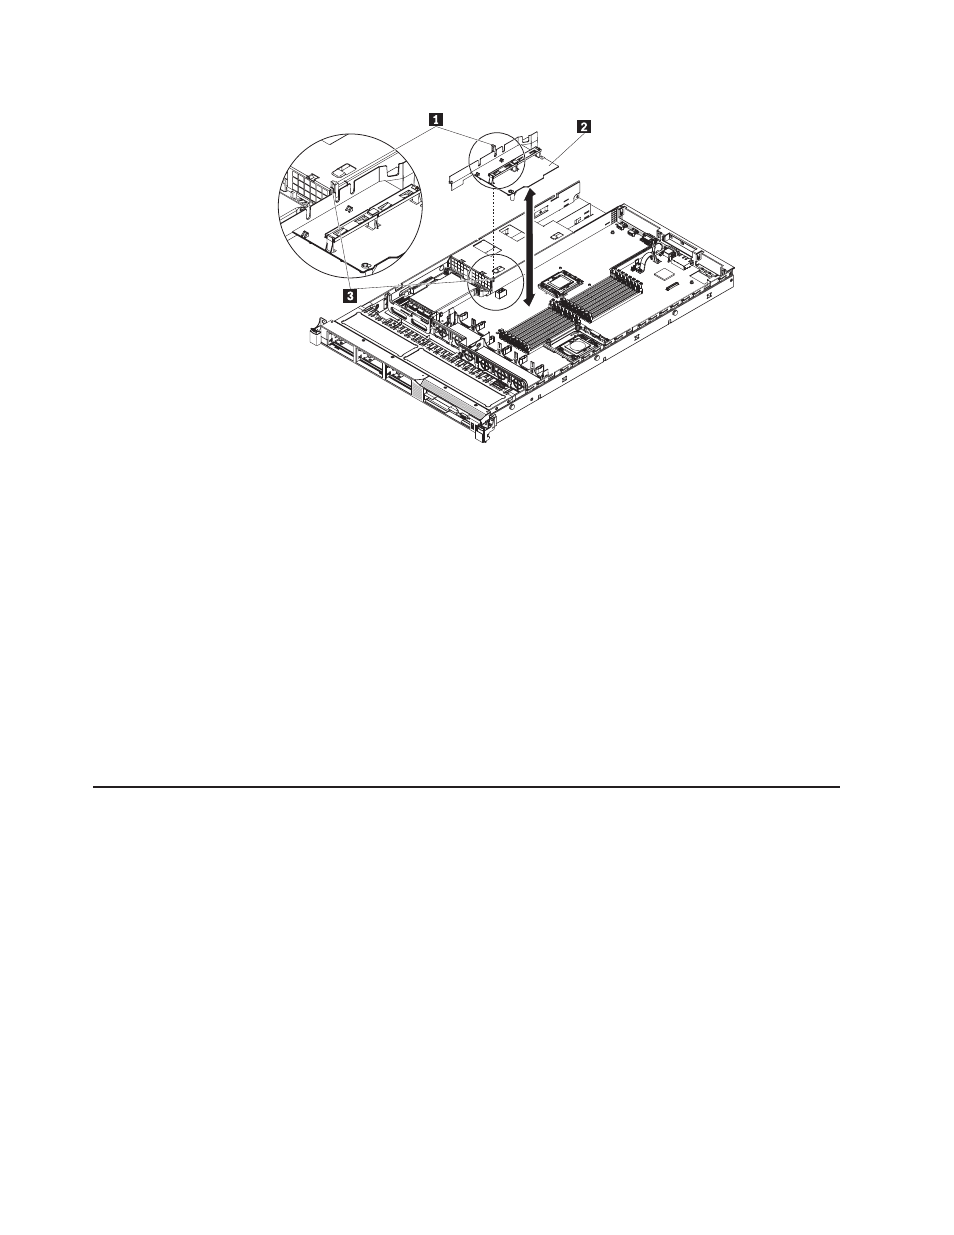
Installing
the
microprocessor
2
air
baffle
To
install
the
microprocessor
2
air
baffle
(if
you
removed
it),
complete
the
following
steps:
1.
Read
the
safety
information
in
and
2.
Turn
off
the
server
and
peripheral
devices
and
disconnect
the
power
cords
and
all
external
cables,
if
necessary.
3.
Align
the
microprocessor
2
air
baffle
tab
with
the
hole
on
the
side
of
the
power-supply
cage;
then
insert
the
tab
into
the
hole
on
the
cage
(make
sure
that
the
front
end
of
the
air
baffle
is
lined
up
with
the
blue
press
point
tab
on
the
left
of
fan
6).
Press
the
air
baffle
down
until
the
it
is
securely
seated.
4.
Install
the
cover
see
5.
Reconnect
the
power
cords
and
any
cables
that
you
removed.
6.
Turn
on
the
peripheral
devices
and
the
server.
Removing
and
installing
the
DIMM
air
baffle
To
remove
and
install
the
DIMM
air
baffle,
complete
the
steps
in
this
section.
Removing
the
DIMM
air
baffle
To
remove
the
DIMM
air
baffle,
complete
the
following
steps:
1.
Read
the
safety
information
in
and
2.
Turn
off
the
server
and
peripheral
devices
and
disconnect
the
power
cords
and
all
external
cables.
Note:
When
you
disconnect
the
power
source
from
the
server,
you
will
lose
the
ability
to
view
the
LEDs
because
the
LEDs
will
not
be
lit
with
the
power
source
removed.
Before
disconnecting
the
power
source,
make
a
note
of
which
LEDs
are
lit,
including
the
LEDs
that
are
lit
on
the
operation
information
panel,
the
EasyLED
panel,
and
LEDs
that
are
lit
inside
the
server
on
the
system
board;
then,
see
the
Hardware
Maintenance
Manual
for
information
on
how
to
solve
the
problem.
48
ThinkServer
RD210
Types
3795,
3796,
3818,
and
3819:
Installation
and
User
Guide