Removing and installing a hot-swap fan assembly, Removing a hot-swap fan assembly, Removing – Lenovo RD210 User Manual
Page 95: Installing, Hot-swap, Assembly
5.
Route
the
power
cord
through
the
handle
so
that
it
does
not
accidentally
become
unplugged.
6.
Connect
the
power
cord
for
the
new
power
supply
to
the
power-cord
connector
on
the
power
supply.
7.
Connect
the
other
end
of
the
power
cord
to
a
properly
grounded
electrical
outlet.
8.
Make
sure
that
the
ac
power
LED
and
the
dc
power
LED
on
the
power
supply
are
lit,
indicating
that
the
power
supply
is
operating
correctly.
The
two
green
LEDs
are
to
the
right
of
the
power-cord
connector.
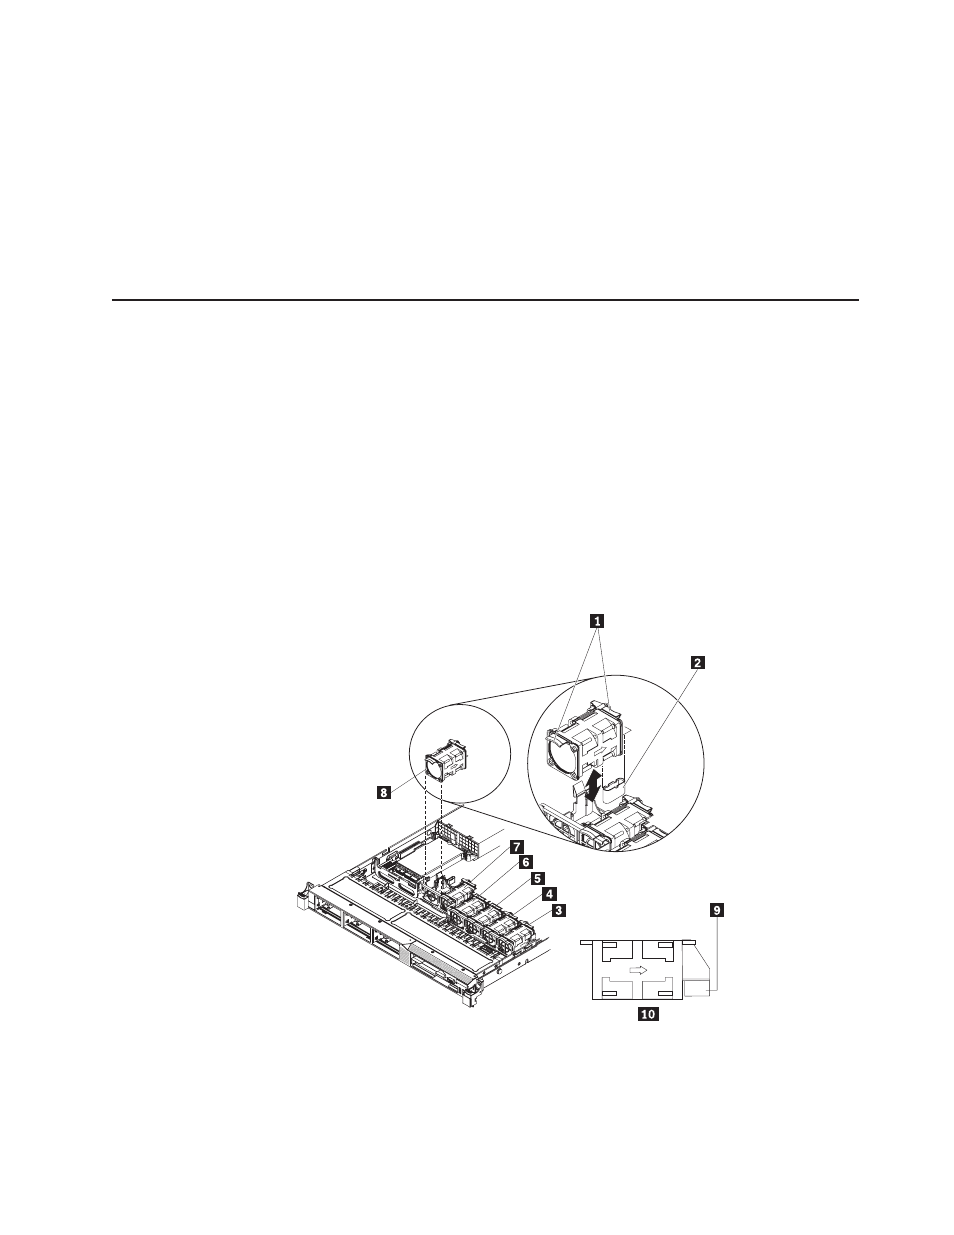
Removing
and
installing
a
hot-swap
fan
assembly
The
server
supports
up
to
six
hot-swap
cooling
fans.
Removing
a
hot-swap
fan
assembly
Attention:
To
ensure
proper
server
operation,
replace
a
failed
fan
within
30
seconds.
To
remove
a
hot-swap-fan,
complete
the
following
steps:
1.
Read
the
safety
information
in
and
2.
Remove
the
cover
(see
The
LED
near
the
connector
of
the
failing
fan
assembly
is
lit.
3.
Disconnect
the
cable
of
the
failing
fan
from
the
connector.
Chapter
5.
Installing
optional
devices
and
replacing
customer
replaceable
units
79