Removing and installing the bezel, Removing the bezel, Installing the bezel – Lenovo RD210 User Manual
Page 124: Removing, Installing, Bezel
v
Take
the
battery
retention
clip
and
place
it
underneath
the
other
tab
while
pressing
release
tab
toward
the
front
of
the
server;
then,
press
it
down
until
it
snaps
in
place
to
hold
the
battery
carrier
firmly
in
place.
6.
Install
the
cover
(see
7.
Slide
the
server
into
the
rack.
8.
Reconnect
the
power
cords
and
all
external
cables,
and
turn
on
the
server
and
peripheral
devices.
Removing
and
installing
the
bezel
To
remove
and
install
the
bezel,
complete
the
steps
in
this
section.
Removing
the
bezel
To
remove
the
bezel,
complete
the
following
steps:
1.
Read
the
safety
information
in
and
2.
Turn
off
the
server
and
peripheral
devices
and
disconnect
all
power
cords.
3.
Remove
the
hard
disk
drives
and
filler
panels
from
the
hard
disk
drive
bays
(see
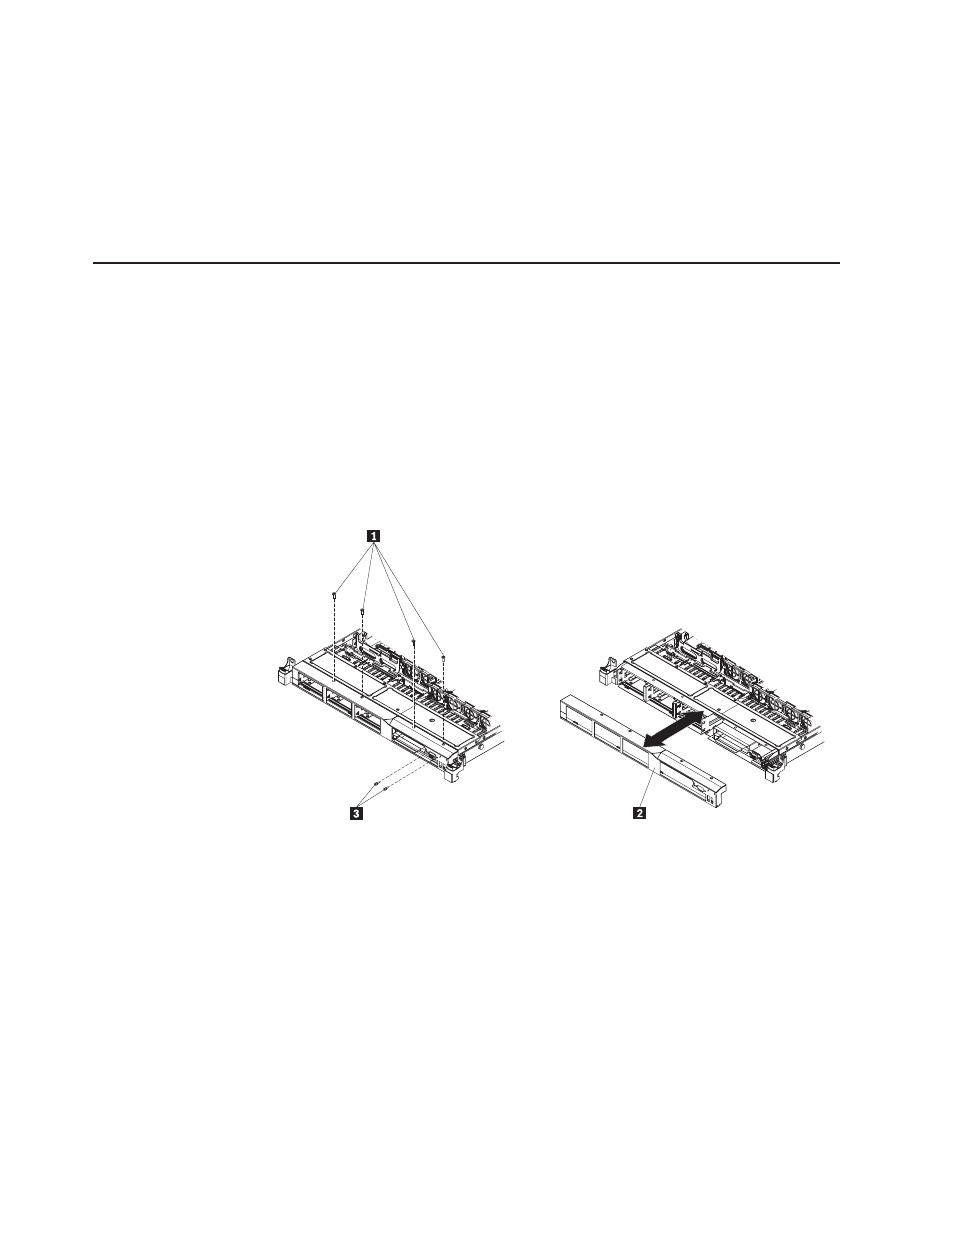
4.
Remove
the
screws
1
from
the
bezel
2 .
5.
Remove
the
screws
from
the
video
connector
3 .
6.
Pull
the
top
of
the
bezel
out
slightly;
then,
rotate
it
downward
until
the
tabs
on
the
bottom
of
the
bezel
disengages
from
the
chassis
and
set
it
aside.
Installing
the
bezel
To
install
the
bezel,
complete
the
following
steps:
1.
Insert
the
tabs
on
the
bottom
of
the
bezel
into
the
holes
on
the
chassis.
2.
Rotate
the
bezel
2
upward
to
the
server
and
reinstall
the
bezel
screws
1 .
108
ThinkServer
RD210
Types
3795,
3796,
3818,
and
3819:
Installation
and
User
Guide