Image adjustment, Computer input – Sanyo PLC-XK3010 User Manual
Page 33
33
Computer Input
Image Adjust Menu
Image Adjustment
Reset
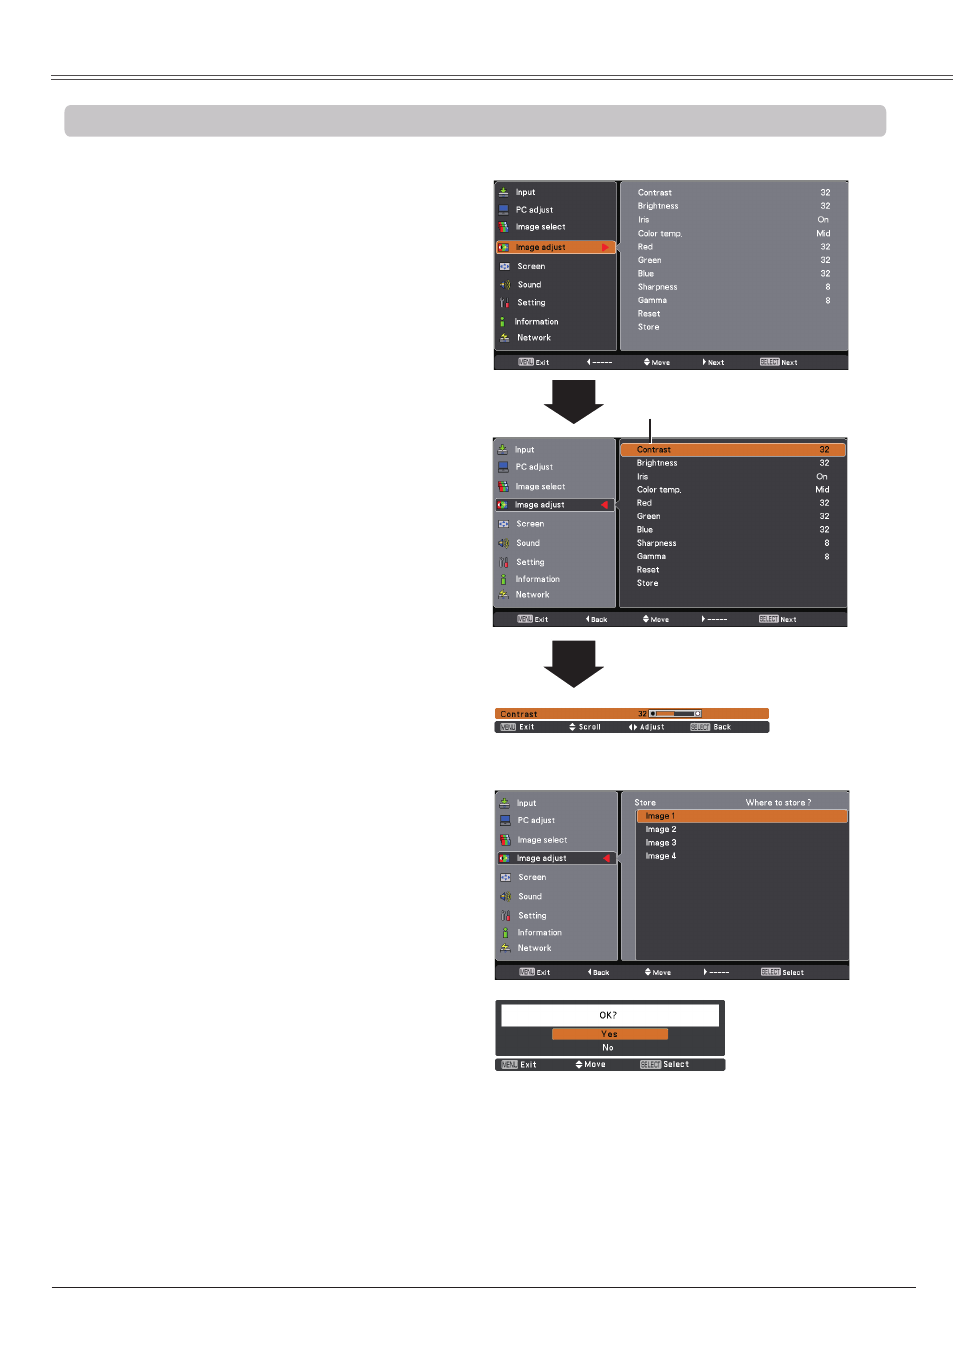
Press the MENU button to display the On-Screen
Menu. Use the Point ▲▼ buttons to select
Image
adjust and then press the Point ► or the SELECT
button.
1
2
Use the Point ▲▼ buttons select the desired item
and then press the SELECT button to display the
adjustment dialog box. Use the Point ◄► buttons
to adjust the setting value.
Note:
• When White balance
Red, Green or Blue is
adjusted,
Color temp . will change to User.
• When
Blackboard(Green) or Colorboard
is selected in Image select,
Color temp . will
change to
Blackboard or Colorboard.
Press the Point ◄ button to decrease the contrast;
press the Point ►button to increase the contrast (from
0 to 63).
Press the Point ◄ button to decrease the brightness;
press the Point ►button to increase the brightness
(from 0 to 63).
Contrast
Brightness
Press the Point ◄ button to lighten R/G/B tone; press
the Point ► button to deepen R/G/B tone (from 0 to 63).
White balance (Red / Green / Blue)
Use the Point ◄► buttons to select the desired Color
temp. level (
XLow, Low, Mid, or High).
Color temp .
Use the Point ◄► buttons to adjust the gamma value
to obtain a better balance of contrast (from 0 to 15).
Gamma
Press the Point ◄ button to decrease the sharpness
of the image; press the Point ► button to increase the
sharpness of the image (from 0 to 15).
Sharpness
To reset the adjusted data, select
Reset and press the
SELECT button. A confirmation box appears and then
select
Yes. All adjustments will return to their previous
figures.
Use the Point ◄►
buttons to adjust the
setting value.
Selected Image mode
Store
To store the adjusted data, select
Store and press the
Point ► or the SELECT button. Use the Point ▲▼
buttons to select one from Image 1 to 4 and press the
SELECT button.
A confirmation box appears and then select
Yes. Stored
data can be called up by selecting an
Image (1-4) in the
Image Mode Selection on page 3.
A confirmation box appears
and then select
Yes.
Store
Press the Point ◄► buttons to select
Off or On.
Off ...... Disabled.
On ...... The iris function is activated.
Iris