Installing designation cards – Mitel 5212 User Manual
Page 28
10
Mitel
®
Model 5212/5224 IP Endpoint User Guide for Inter-Tel
®
5000 Systems
Person
alizi
n
g
Y
o
ur En
d
poi
nt
Installing Designation Cards
If you program buttons on your Model 5212/5224 (see
), you can install a new
paper designation card with the revised button labels. (Paper designation cards are
provided by your system administrator.) You can usually slide the paper designation card
out and replace it without removing the lens (if necessary, see the following instructions to
remove the lens for either model).
If you have a Model 5224, you can remove the lens and install a fixed Mylar
®
designation
card, which has labels for the three menu buttons under the display. Contact your system
administrator for the Mylar designation card.
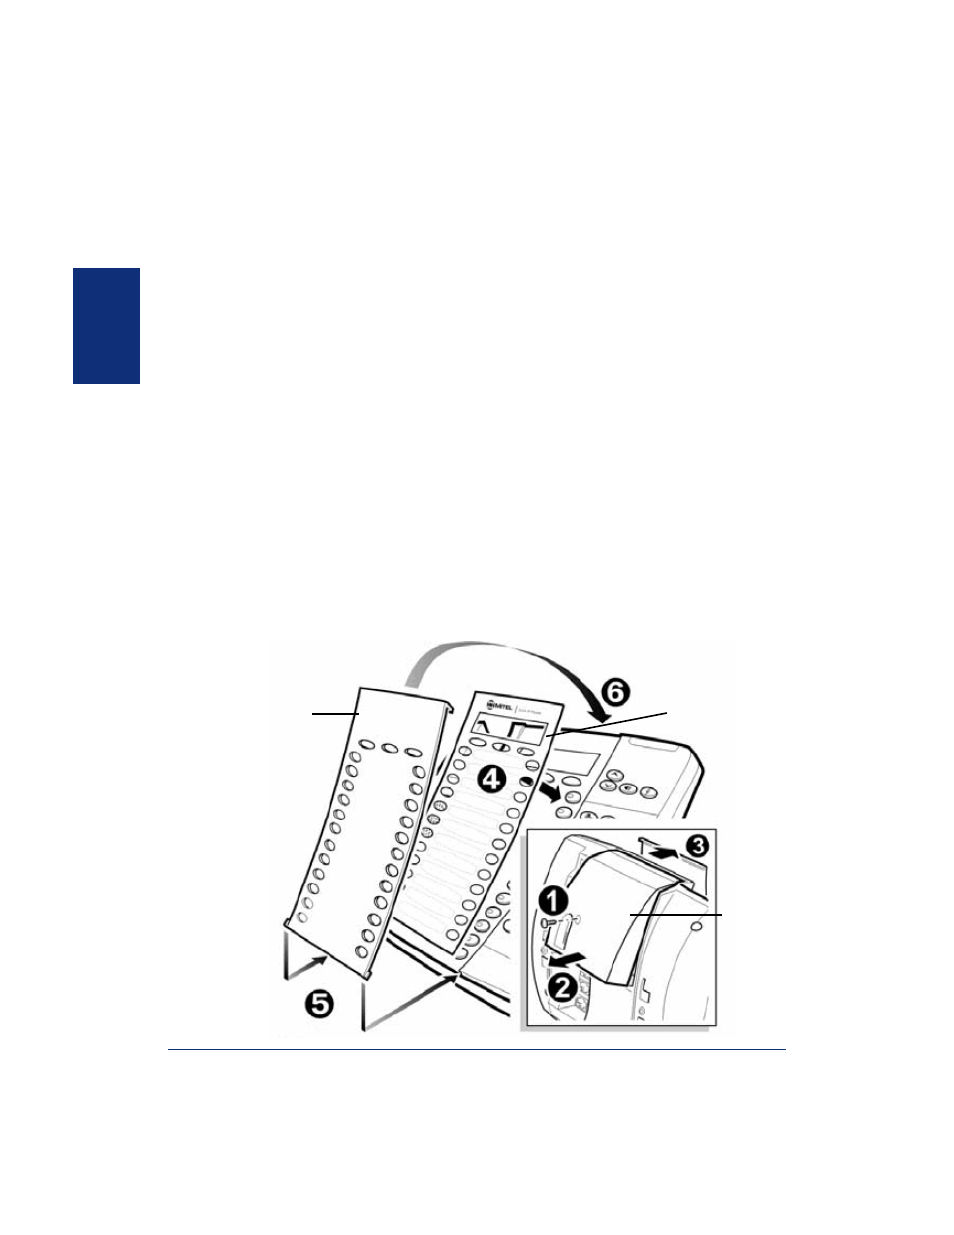
To remove the lens and install the fixed Mylar designation card (Model 5224):
1. Remove the screw that holds the option module on the back of the phone. Keep the
screw in a safe place—you must use it in
2. Lift the lower edge of the option module until you feel the inner tabs release, and
then gently lift the upper edge of the module. (To avoid damaging the module or the
lens, always lift the lower edge of the module first.)
3. Remove the lens by lifting the upper edge, and then sliding the lower edge down.
4. Place the fixed Mylar designation card on the face of the endpoint.
5. Slide the lens tabs into the underside of the endpoint.
6. Snap the lens tightly into place by applying pressure to both the middle and top of
the lens. Secure the option module using the screw from
.
Lens
Fixed Mylar
designation card
Option
module