3 operating keypad panel, 3-1 operation mode, 3-2 setting digital frequency – Fuji Bikes FRENIC 5000G11S/P11S User Manual
Page 36: Stop, Operation mode
4-4
4-3 Operating Keypad Panel
4-3-1
Operation Mode
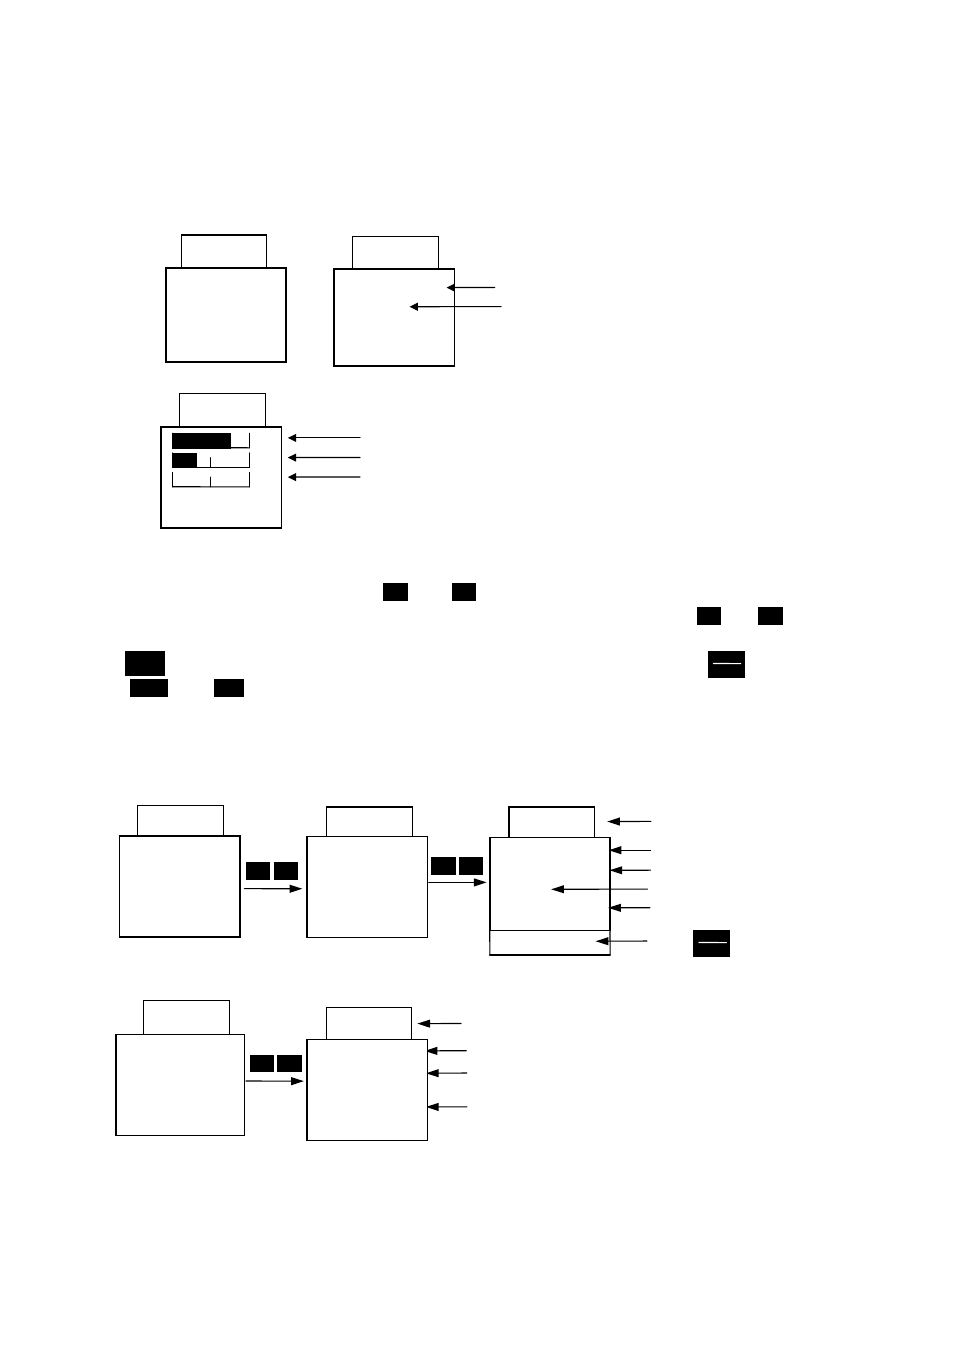
The screen for normal inverter operation includes a screen for displaying inverter operating status
and an operation guide and a screen for graphically displaying the operating status in the form of a
bar graph. Switching between both screens is possible using the E45 function.
1) Operation guide (E45=0)
Rotating direction (no operation command, blank, yes: FWD/REV)
Operating status (no operation command, STOP, yes: RUN)
2) Bar graph (E45=1)
Output frequency (maximum frequency at full-scale)
Output current (200% of inverter rating at full-scale)
Torque calculation value (200% of motor rating at full-scale)
4-3-2 Setting digital frequency
On the operation mode screen, press or to display the set frequency on the LED. Data is
initially incremented and decremented in the smallest possible unit. Holding down or
increases or decreases the speed of increment or decrement. The digit to change data can be selected
using and then data can be set directly. To save the frequency settings, press .
Press and to return to the operation mode.
If keypad panel settings are not selected, the present frequency setting mode appears on the LCD.
When selecting the PID function, PID command can be set with a process value. (Refer to technical
documentation for details).
1)
Digital (keypad panel) settings (F01=0 or C30=0)
2) Other than digital setting
LOCAL
50
− 400
F/D
⇒DATA SET
56.89
STORING.
..
RUN
PRG
⇒ PRG
MENU
F/D
⇒LED SHIFT
60.00
60.00
LOCAL
50
− 400
F/D
⇒DATA SET
60.00
Frequency setting value
Screen explanation
Hz
A
%
Fout/Iout/TRQ
60.00
Present frequency setting mode
Operation guide
60.00
60.00
RUN
PRG
⇒ PRG
MENU
F/D
⇒LED SHIFT
60.00
FWD
Frequency setting value
Screen explanation
Present frequency setting mode
Frequency setting range
Operations guide
When pressed and writing data
SHIFT
>>
STOP
PRG
⇒ PRG
MENU
F/D
⇒LED SHIFT
RUN
PRG
⇒PRG MENU
F/D
⇒LED SHIFT
12+V1
F/D
⇒DATA SET
FUNC
DATA
∧
∨
∧
∨
RESET
PRG
∧
∨
∧
∨
FUNC
DATA
∧
∨