Mechanical disassemblies – Eiki LC-X71 LC-X71L User Manual
Page 7
- 7 -
1
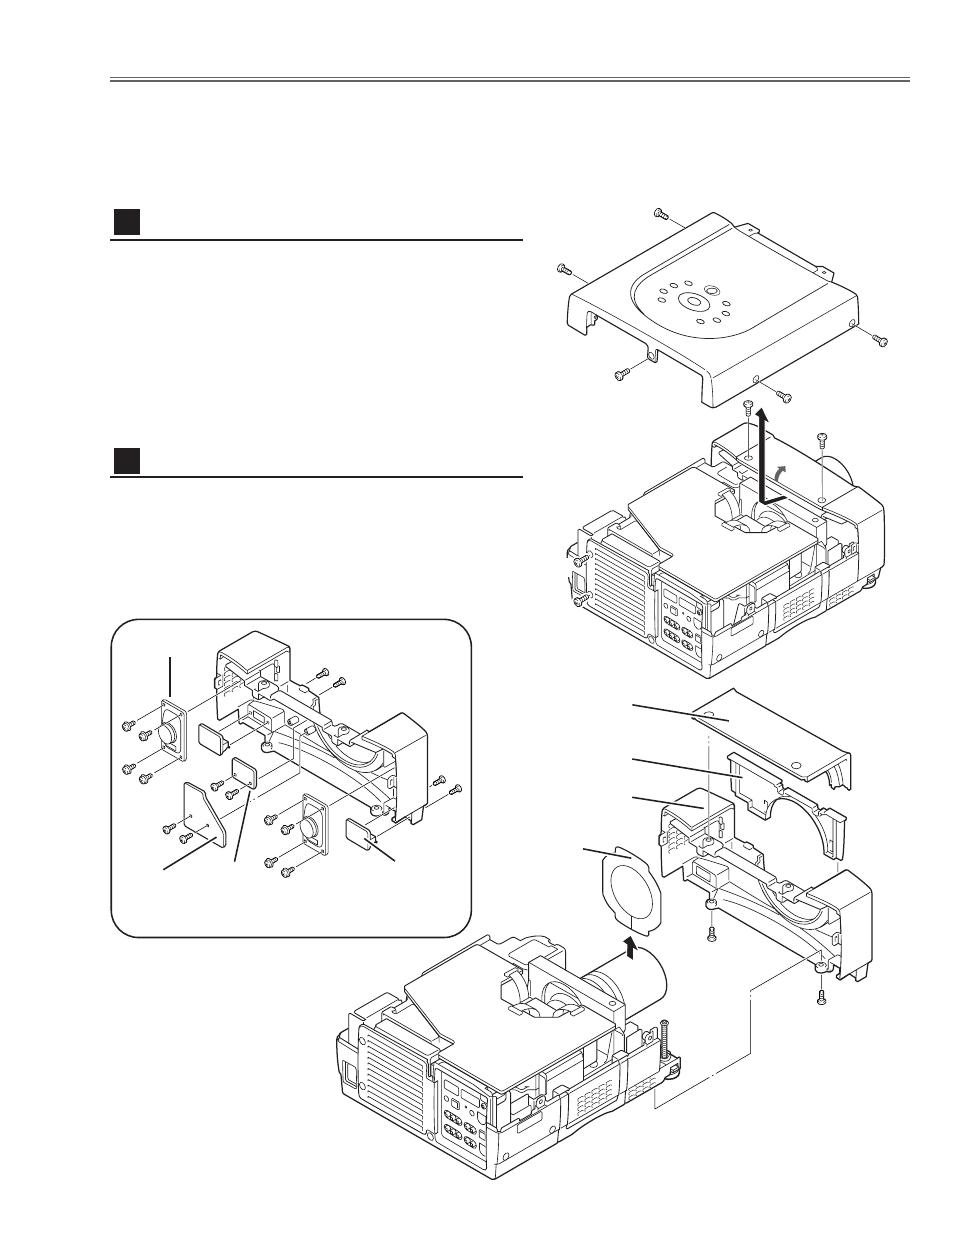
Remove 5 screws
A
, 2 screws
B
, and loosen 2 screws
C, and then
take the Cabinet Top upward off.
Note: If you want to remove the Cabinet Front-Top only,
you do not need to remove screws
A
. Remove 2 screws
B
.
Mechanical Disassemblies
Mechanical disassemble should be made following procedures in numerical order.
Following steps show the basic procedures, therefore unnecessary step may be ignored.
Caution:
The parts and screws should be placed exactly the same position as the original otherwise it may cause loss of
performance and product safety.
Fig.1
1
Remove the Cabinet Front-Top, Lens Cover Holder and
Lens Cover upward off.
2
Remove 2 screws
D
to take the Cabinet Front off.
3
Remove Terminal Boards, SW Board, RC Front Board,
and speakers on the Cabinet Front.
Fig.2-
-1
Cabinet Top removal
1
Cabinet Front removal
2
C
B
A
A
A
A
B
A
D
D
Cabinet Front-Top
Lens Cover Holder
Cabinet Front
Lens Cover
C
Fig.2
-2
SW
Board
Speaker
RC
Front
Board
Terminal
Board