Start printing, 1 up studio interface, Afinia – Afinia H+1 3D Printer User Manual
Page 50: Tudio, Nterface
7.
Start Printing
7.1
Afinia
Studio Interface
Connect your
H+1
to the computer, open
Afinia
Studio
, click
Build
, and then
choose to add a 3D model.
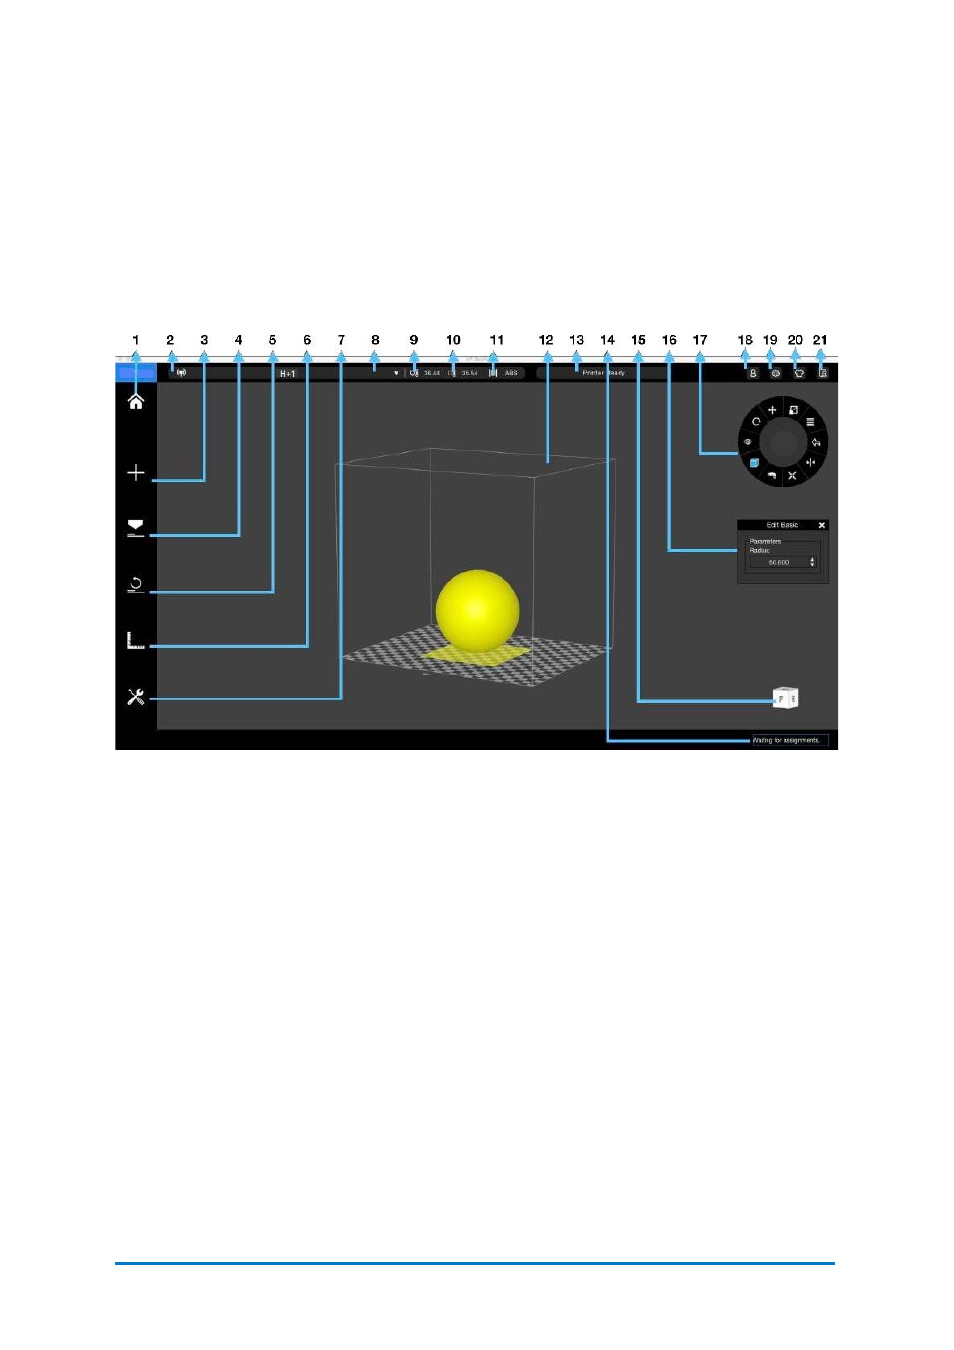
You can use the wheel menu to adjust the model’s profile, use Print Settings to
define the parameters that are used to process the print job.
1. Home
2. Add a Model
3. Print Settings
4. Initialize
5. Calibration
6. Maintenance
7. Printer Connection
Method
8. Connected Printer
Name
9. Nozzle Temperature
10. Build Plate
Temperature
11. Material Type
12. Printer Status
13. My Account
14. Settings
15. Skin
16. Feedback
17. Wheel Menu
18. My Account
19. View Cube
20. Print Queue
After you finish setting up the printing parameters, click
, the model file will be
processed, and sent to the printer for printing.
Contact
Afinia 3D
49
Figure 7.1
Afinia
Studio Interface