Afinia H+1 3D Printer User Manual
Page 37
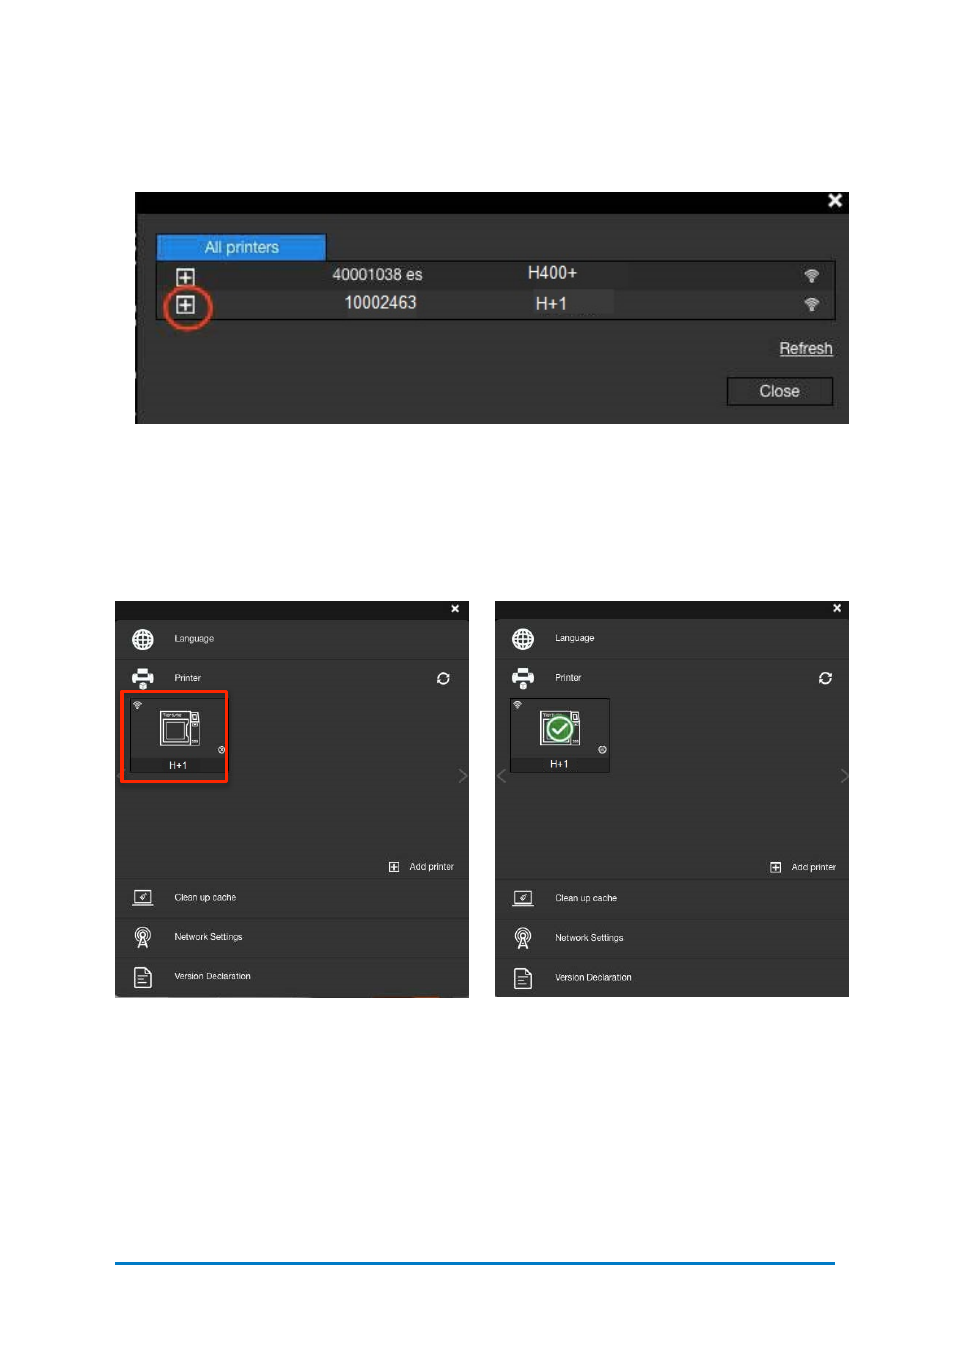
6.
Open
Afinia
Studio, go to
Settings
, click
Printer
, click
Add Printer
, find your
H+1
on the All Printer list, and click + to add your
H+1
.
Using the touchscreen on the
H+1
to setup the
Wi-Fi
connection:
Go to
Config
, click
Network Settings.
Select network name on the list, type in
password if required, and press return. A lock icon appears which means your
H+1
is connected to the desired Wi-Fi network.
You can make further change in the configurations of the Wi-Fi network by clicking
the Information icon. Please refer to page 26.
Contact
Afinia 3D
36
Figure 6.12
All printers
If you cannot find your
H+1
in the printer list, click
Refresh.
7.
An icon of your
H+1
will appear in the
Printer
section, Click the icon a green
check mark representing your
H+1
is connected via Wi-Fi successfully will appear
on
top of the
H+1
icon.
Figure 6.13
H+1
Icon
Figure 6.14
Added
H+1
Icon