Afinia H+1 3D Printer User Manual
Page 39
6.
Change the nozzle:
Tools: A Nozzle Wrench
Preparation: Withdraw the filament, and wait, until the extruder cools
to 200°C
before
taking any further actions.
7.
Replacing the nozzle:
Make sure the nozzle is around 200°C, then use
the nozzle wrench to unscrew the
nozzle, then screw the replacement
nozzle back to the extruder.
8.
Update the software:
Connect your printer to the computer, open
Afinia
Studio on your computer, click
Build
on
the left menu, click
Maintenance
, find
Nozzle Diameter
, click the
dropdown menu
to set the matching size.
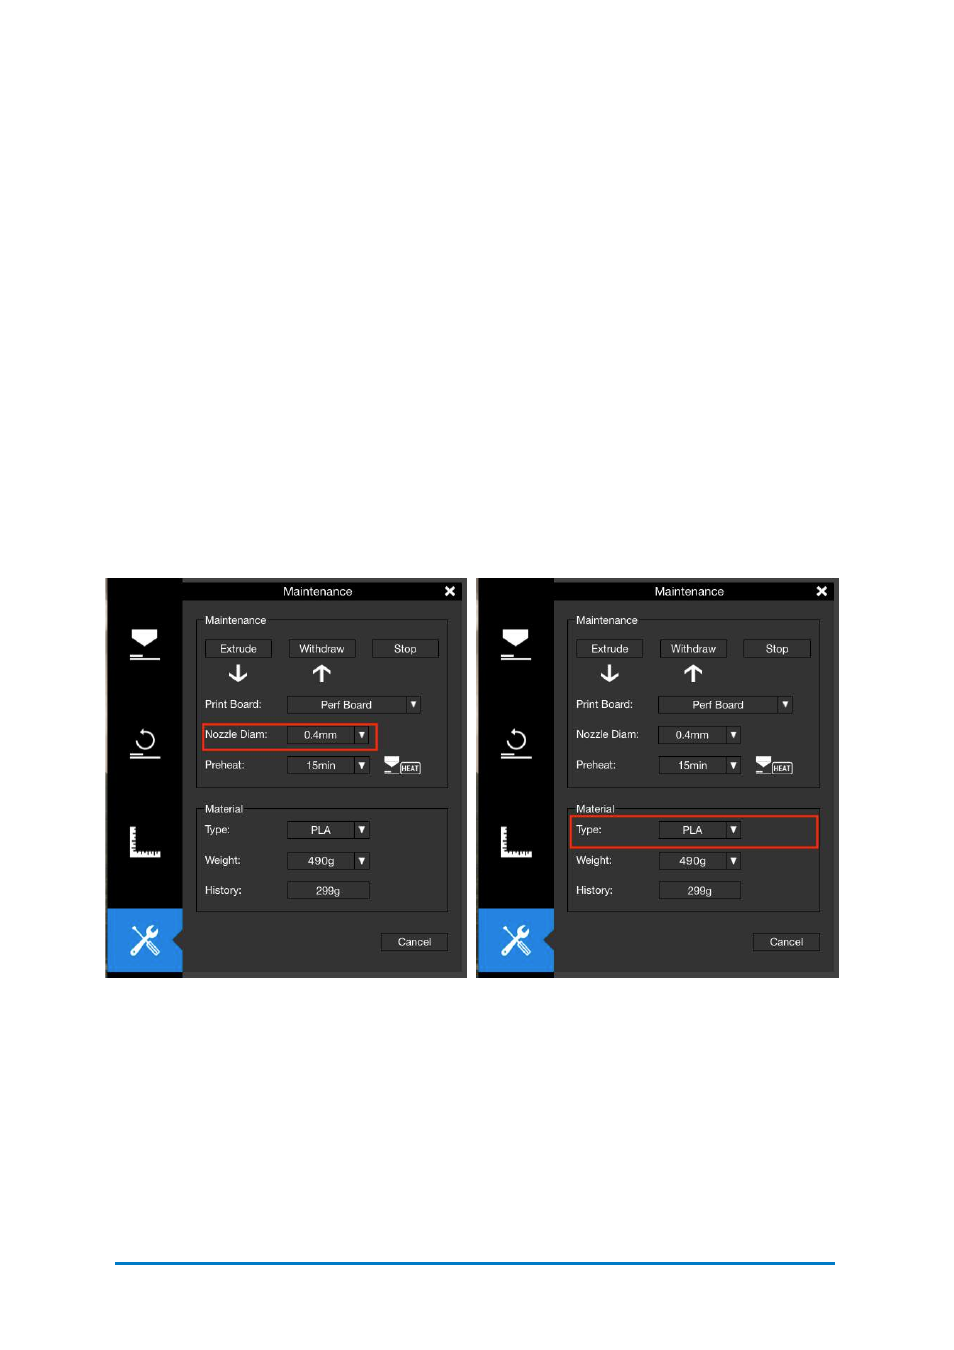
Notice:
After you change the nozzle or material in the extruder, it is necessary for
you to do the following steps to update the settings on the software.
a.Connect the computer to your printer, and open UP Studio software.
b.Click
UP
on the left side menu, go to
Maintenance
.
c.Choose the
Material Type
, and then select the available
Nozzle Diameter
.
Contact
Afinia 3D
38
Figure 6.15
Material Type
Figure 6.14
Nozzle Diam
Notice:
After changing the nozzle or extruder head, please run the Nozzle Height
Detection routine as the nozzle height may have changed.