Correcting image shape with arc correction – Epson PowerLite 685W 3500-Lumen WXGA Ultra-Short Throw 3LCD Projector User Manual
Page 83
83
4.
Select the
Geometry Correction
setting and press
Enter
.
5.
Select the
Quick Corner
setting and press
Enter
. Then press
Enter
again.
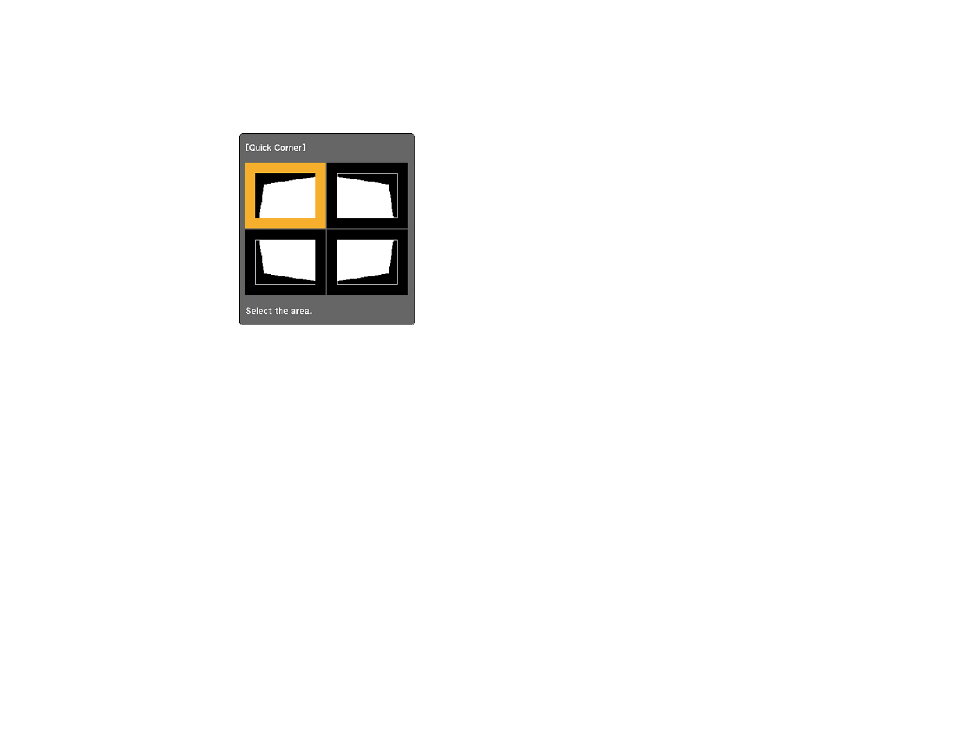
You see the Quick Corner adjustment screen:
6.
Use the arrow buttons on the projector or the remote control to select the corner of the image you
want to adjust. Then press
Enter
.
7.
Press the arrow buttons to adjust the image shape as necessary.
8.
When you are finished, press
Esc
.
Parent topic:
Correcting Image Shape with Arc Correction
You can use the projector's Arc Correction setting to adjust the curve or arc of the sides of your image.
1.
Turn on the projector and display an image.
2.
Press the
Menu
button.
See also other documents in the category Epson Projectors:
- 70c (2 pages)
- MOVIEMATE 72 (70 pages)
- 71c (86 pages)
- 6110I (16 pages)
- 53c (108 pages)
- 480i (259 pages)
- LS47P1 (138 pages)
- EH-TW2800 (64 pages)
- EB-1725 (116 pages)
- EB 1735W (116 pages)
- 21L (21 pages)
- Livingstation HDTV LCD Projection Television LS57P2 (6 pages)
- EB-W10 (2 pages)
- 76C (111 pages)
- 9100i (122 pages)
- Cinema 200+ (80 pages)
- EB-84 (121 pages)
- ELPMBATA (11 pages)
- POWERLITE 1810P (2 pages)
- ANSI LUMENS 2000 (2 pages)
- ELP-3300 (110 pages)
- 7000 (2 pages)
- ELP-800UG (120 pages)
- EB G5200WNL (6 pages)
- 7250 (2 pages)
- 735C (2 pages)
- ELPMBC01 (6 pages)
- 81p (116 pages)
- Z8455WUNL (256 pages)
- ELP-3000 (103 pages)
- ELPLP29 (75 pages)
- 8100i (120 pages)
- 62c/82c (113 pages)
- 2500 Lumens (10 pages)
- 1080 (76 pages)
- 5300 (5 pages)
- DREAMIO EMP-TW700 (60 pages)
- 8500 UB (4 pages)
- DREAMIO EH-TW4400 (66 pages)
- POWERLITE HOME 10+ CPD-1790-4R2 (44 pages)
- BrightLink 450Wi (186 pages)
- 505c (141 pages)
- 810p (120 pages)
- EB-G5350 (131 pages)
- ELPMBPJF (10 pages)