RISCO Group ACUS User Manual
Page 39
ACUS Quick Start Guide
Uncontrolled
when
printed
©
RISCO
Group
38
Figure 42: Category Selection for Users
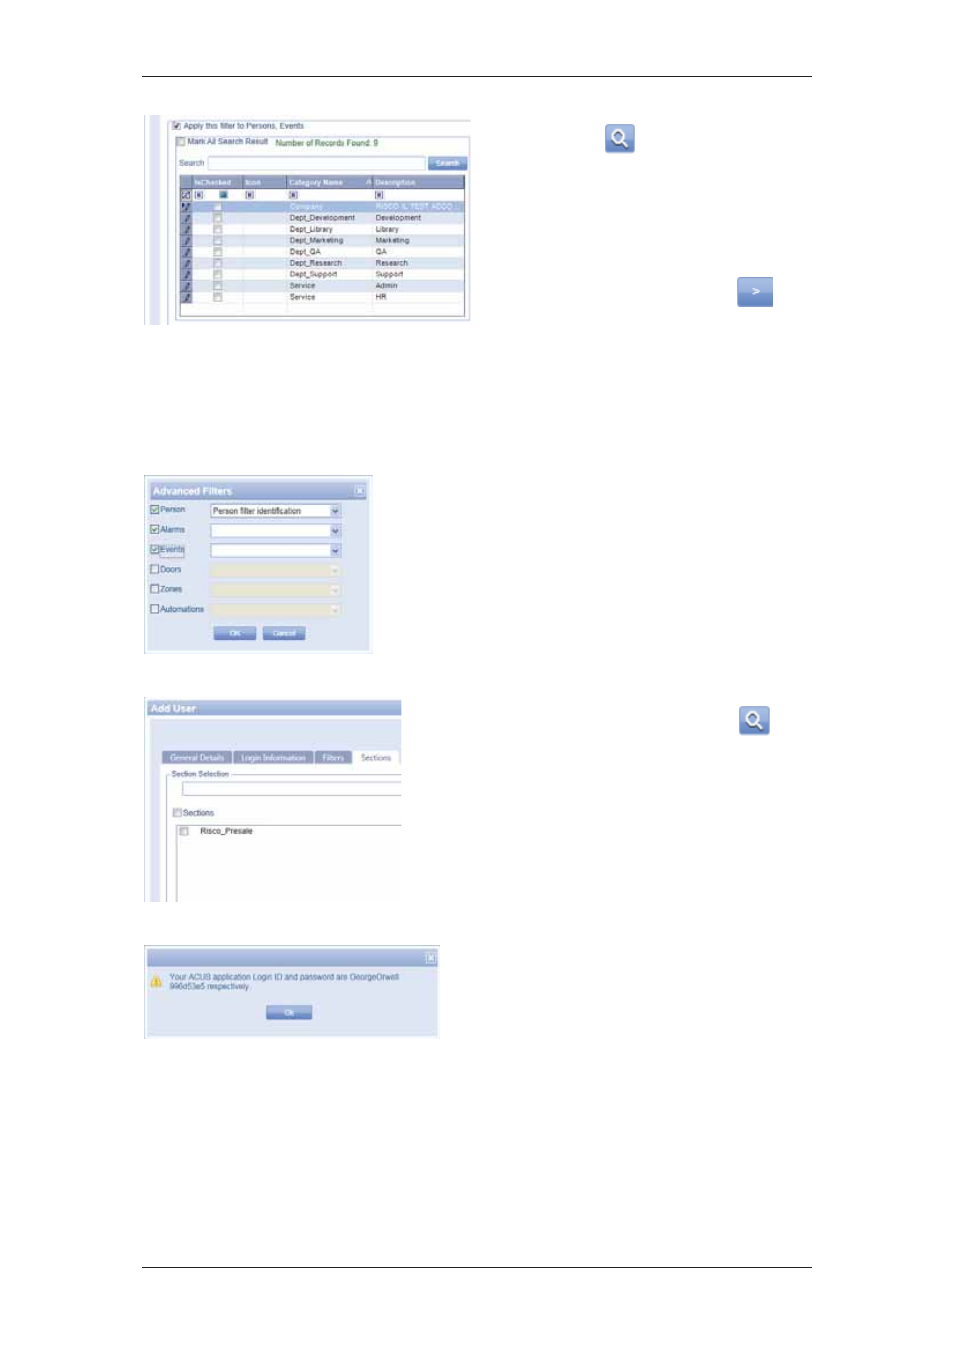
23. Click
(Search). The list of
categories in the section is
displayed. You may select the
Mark All Search Result to make
all categories in the list for the
user.
24. Select the check boxes against
the categories and click
to
move to the adjacent area.
25. Click Advanced to apply filters to
the user. The Advanced Filters
dialog box appears. You may
apply filter for Person, Alarms,
Events, Doors, Zones and
Automations.
26. Select the check box against the filter options as
per your requirements and select the appropriate
filter from the drop-down list.
27. Click OK. The filters are applied.
28. Click the Sections tab. The following tab appears.
Figure 43: Advanced Filters
Figure 44: Sections for New User
29. Enter the search criteria and click
(Search). The results matching the specified
criteria appear in the Sections area.
30. Select the section that you want the user to
be able to access and move to the Selected
Sections area. You may select the Selected
Sections check box to select all the sections
present in that area.
31. Select the check boxes against the sections
and click Save.
The system displays a message. The Login ID and
password for using ACUS are displayed. Ensure
that you inform the user.
32. Click Ok. A new user is created.
Figure 45: New User Created
For more details on how to add users and customize roles, refer to section,
18 Managing
ACUS Users and User Roles
in the
ACUS User Manual
.