RISCO Group ACUS User Manual
Page 23
ACUS Quick Start Guide
Uncontrolled
when
printed
©
RISCO
Group
22
Figure 10: Filter
1. On
the
Login Wizard Welcome page, click Door
Filter. The Door Filters dialog box appears.
2. Select the search category from the Search drop-
down list and enter the criteria in the adjacent field.
For example, select Door Filter and enter “New”.
3. Click
Search. The Door Filters matching the specified
criteria appear under the Door Filter in the left area of
the dialog box.
You may duplicate or delete filter from here. You can click
to view the filters under each
type of filters.
To add a door filter:
Figure 11: Add Door Filter
1. On
the
Login Wizard Welcome page, click Door
Filter. The Door Filters dialog box appears.
2. Click
Add.
3. Select
Door Filter from the Filter Type drop-down
list.
4. Enter the door filter name in the Name field.
5. Select
the
Private check box to mark this filter
private. No other user apart from you will be able to
edit or delete this filter if it is marked private. Other
users will be able to view the filter only.
Note: Even if it is marked as private, the private filter can be edited by the user who has
created the current logged on user.
The criteria area allows you to add more conditions to the filters. You can maximum 12
criteria’s to any filter. To add criteria’s to the filter:
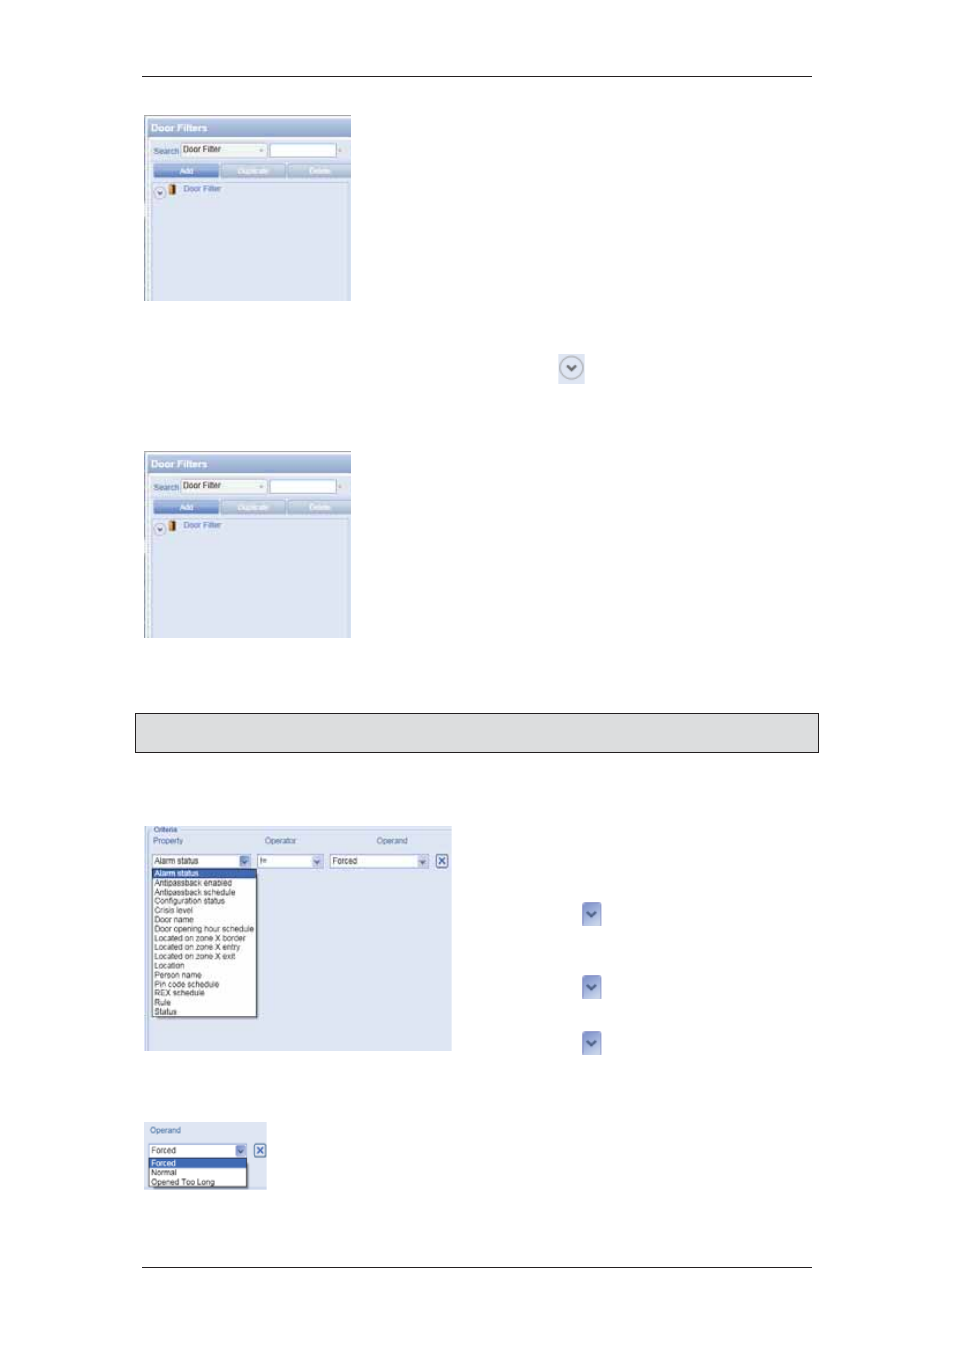
Figure 12: List of Properties for Door Filter
6. Select the property from the Property
list. For door filter, the properties
available are:
7. Click to select the required
property from the list. For example,
select Alarm Status.
8. Click to select the operator.
Select =.
9. Click to select the operand from
the list. The available options are
displayed in the following figure.
10. Select Forced from the list.
11. Click Add Criteria to add another criterion. The following figure
appears.
Figure 13: Door Filter Operand