Installation and connection – Sealey VS8221 User Manual
Page 10
Page 10
Original Language Version
VS8221 Issue:2(I) - 06/08/13
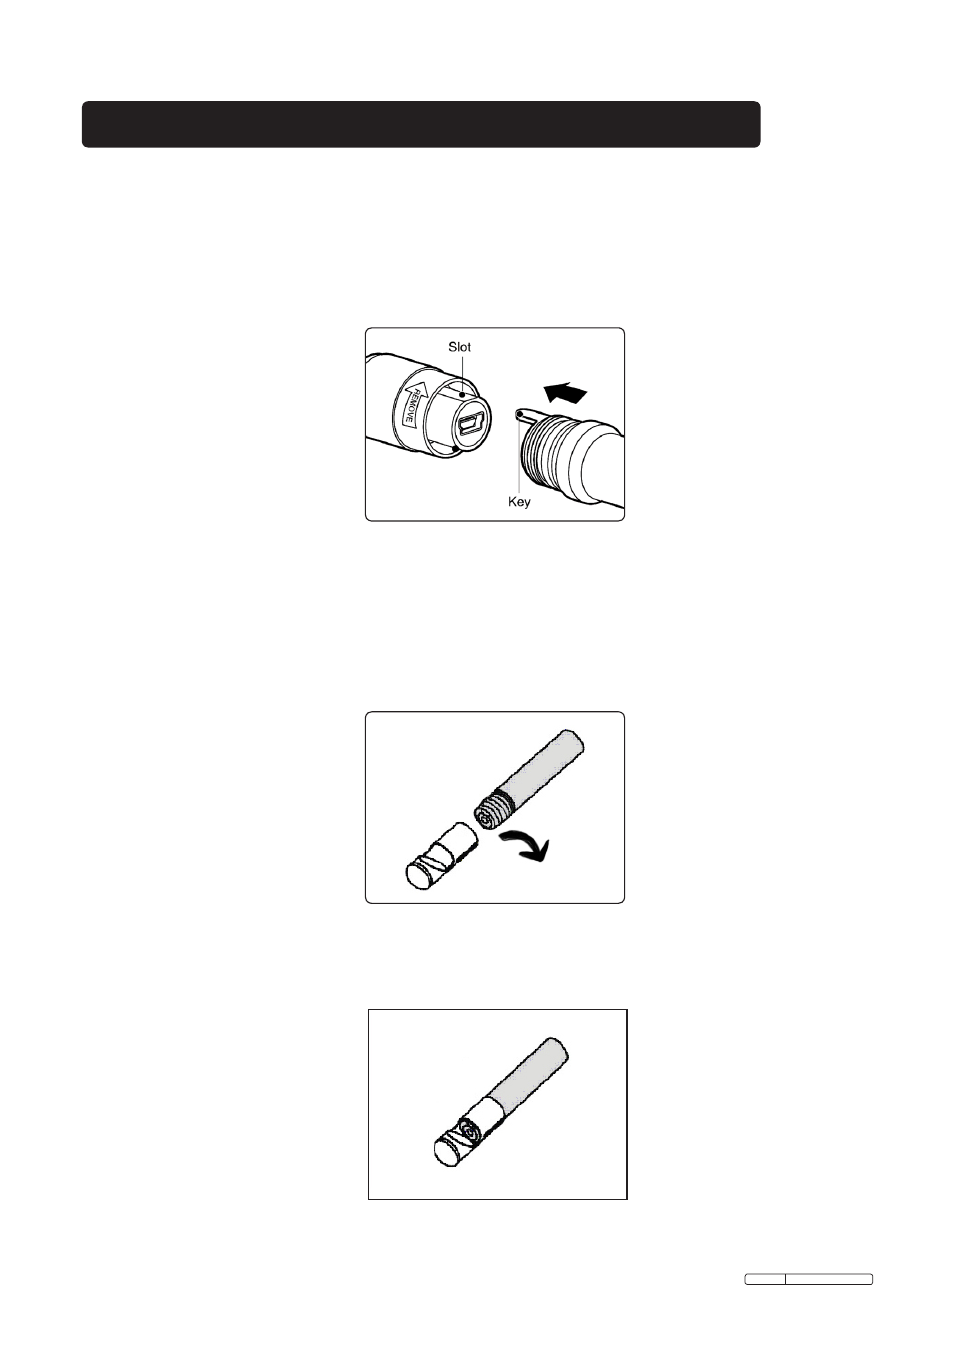
3.1. The Imager Head and Cable Installation
To use the tool, the imager head and cable must be connected to the display
unit. To connect the cable to the display unit, make sure that the key and slot
(Fig.4) are properly aligned. Once they are aligned, tighten the knurled knob to
hold the connection firmly in place.
Fig.4
3.2. Accessories Installation
Accessories include a magnet and a mirror
(Fig.2). Both are attached to the
imager head in the same manner. Hold the accessory and the imager head as
shown in
Fig.5.
Fig.5
Screw the accessory onto the tip of the imager head.
Fig.6
3. Installation and Connection
See also other documents in the category Sealey Tools:
- SA661 (4 pages)
- VS726 (4 pages)
- VS7021 (2 pages)
- SM14 (4 pages)
- VS392 (2 pages)
- VS726 (2 pages)
- GSA6000 (4 pages)
- VS710 (2 pages)
- VS392 (2 pages)
- SA615 (4 pages)
- VS726 (2 pages)
- SM14 (3 pages)
- VS392 (2 pages)
- VS7021 (3 pages)
- VS726 (2 pages)
- VS726 (2 pages)
- SA53 (2 pages)
- SA695 (4 pages)
- ATB1530 (1 page)
- SA651 (3 pages)
- SA919 (1 page)
- GSA25 (4 pages)
- SA673 (4 pages)
- SA650 (4 pages)
- SA58 (4 pages)
- SA653 (4 pages)
- GSA671 (4 pages)
- SA231 (4 pages)
- S01004 (4 pages)
- SA6005 (4 pages)
- SA58 (4 pages)
- SA656 (4 pages)
- SA654 (3 pages)
- SA12/S (3 pages)
- SA613 (4 pages)
- SA120 (2 pages)
- SA14 (4 pages)
- SA151 (4 pages)
- SA43 (4 pages)
- SA241 (4 pages)
- SA152 (4 pages)
- SA44 (3 pages)
- SA96 (2 pages)
- S01047 (5 pages)
- SA27 (4 pages)