4 transporting the inverter using a crane fork – SMA SC 500CP-US User Manual
Page 44
7 Transporting the Inverter
SMA America, LLC
44
SCCP-US-IA-US_en-41
Installation Manual
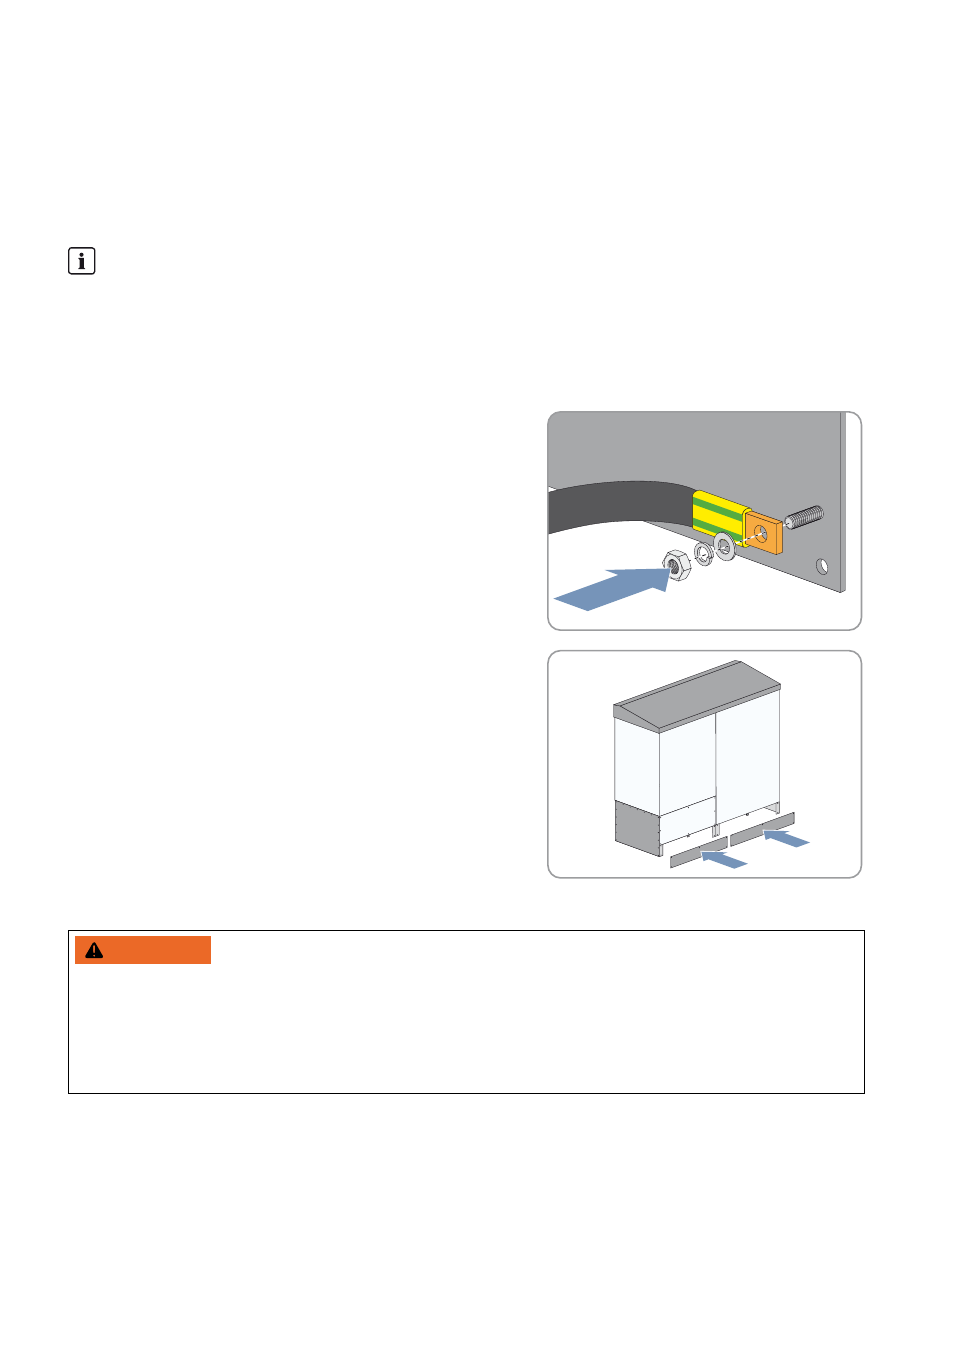
7.3 Mounting the Rear Kick Plates for Installation in Electrical Equipment
Rooms
The actions described in this section only need to be performed if you install the inverter in an electrical equipment room.
Attach the kick plates to the rear of the inverter before you install and align the inverter in an electrical equipment room.
Once the inverter has been installed, there may no longer be sufficient room for mounting the kick plates.
Procedure:
1. Position the kick plates on the rear side of the inverter.
2. Fasten the grounding straps on the rear kick plates.
Torque: 6 ft.-lbs. to 8 ft.-lbs. (8 Nm to 10 Nm).
3. Fasten the kick plates on the inverter using all eight screws. Use a
suitable TX screwdriver. Torque: 1.5 ft.-lbs. to 2.5 ft.-lbs
(2 Nm to 3 Nm).
7.4 Transporting the Inverter Using a Crane Fork
Requirements:
☐ The crane and crane fork must be designed to take the weight of the inverter.
☐ The crane fork must be properly coupled to the crane.
☐ The kick plates of the inverter must be disassembled.
Transporting the inverter after the rear kick plates are mounted
After the kick plates are mounted, you can no longer transport the inverter with a forklift truck or a crane fork. With
mounted rear kick plates, you must use a crane for transportation (see Section 7.7 "Transporting the Inverter Using
:$51,1*
Danger of crushing if the inverter tips over
With the kick plates mounted at the rear side of the inverter, the supporting surface of the inverter is insufficient for the
forks of the crane fork. Vibrations during transport may cause the inverter to slip off the crane fork and tip over. This
may result in death or serious injury.
• When the kick plates are mounted, always transport the inverter with suitable lifting accessories.