Cycle parameters – HEIDENHAIN TNC 320 (77185x-01) Cycle programming User Manual
Page 402

Touch Probe Cycles: Automatic Workpiece Inspection
16.13 MEASURE PLANE (Cycle 431, DIN/ISO: G431)
16
402
TNC 320 | User's Manual Cycle Programming | 3/2014
Cycle parameters
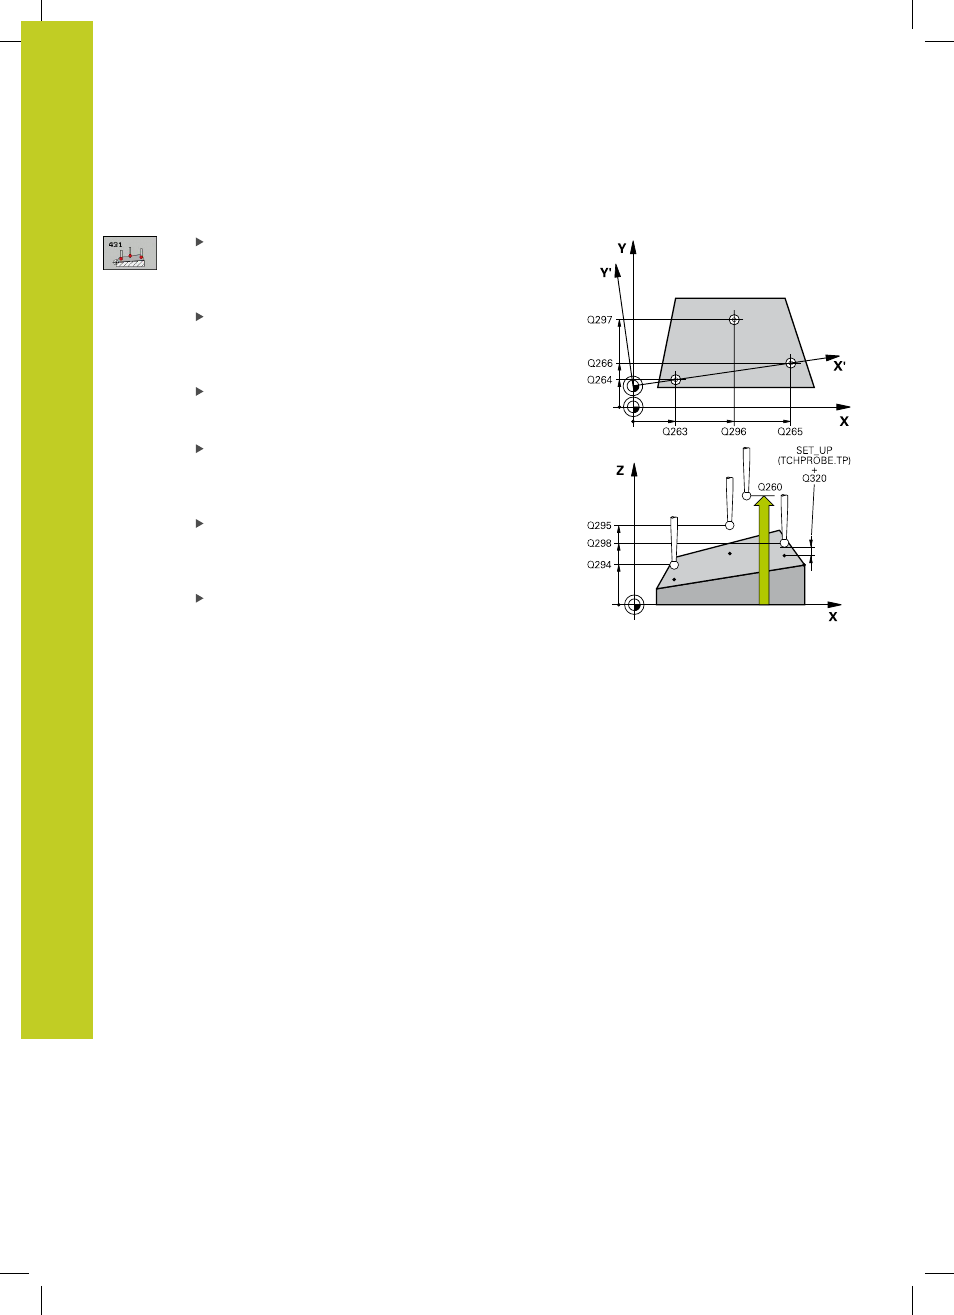
1st meas. point 1st axis Q263 (absolute):
Coordinate of the first touch point in the reference
axis of the working plane. Input range -99999.9999
to 99999.9999
1st meas. point 2nd axis Q264 (absolute):
Coordinate of the first touch point in the minor axis
of the working plane. Input range -99999.9999 to
99999.9999
1st meas. point 3rd axis Q294 (absolute):
Coordinate of the first touch point in the touch probe
axis. Input range -99999.9999 to 99999.9999
2nd meas. point 1st axis Q265 (absolute):
Coordinate of the second touch point in the
reference axis of the working plane. Input range
-99999.9999 to 99999.9999
2nd meas. point 2nd axis Q266 (absolute):
Coordinate of the second touch point in the minor
axis of the working plane. Input range -99999.9999
to 99999.9999
2nd meas. point 3rd axis Q295 (absolute):
Coordinate of the second touch point in the touch
probe axis. Input range -99999.9999 to 99999.9999
