Pdr200, pdr300, and pdr400 installation, Connecting the cd-rom drive, Pdr200, pdr300, and pdr400 installation – Grass Valley Profile CD-ROM Drive User Manual
Page 18
PDR200, PDR300, and PDR400 Installation
18
CD-ROM Instructions
PDR200, PDR300, and PDR400 Installation
This section provides instructions for connecting the CD-ROM drive to your
Profile system and installing the CD-ROM driver in Windows NT 4.0.
Connecting the CD-ROM Drive
To connect the CD-ROM drive:
1. Shut down your Windows NT session and power off the Profile system.
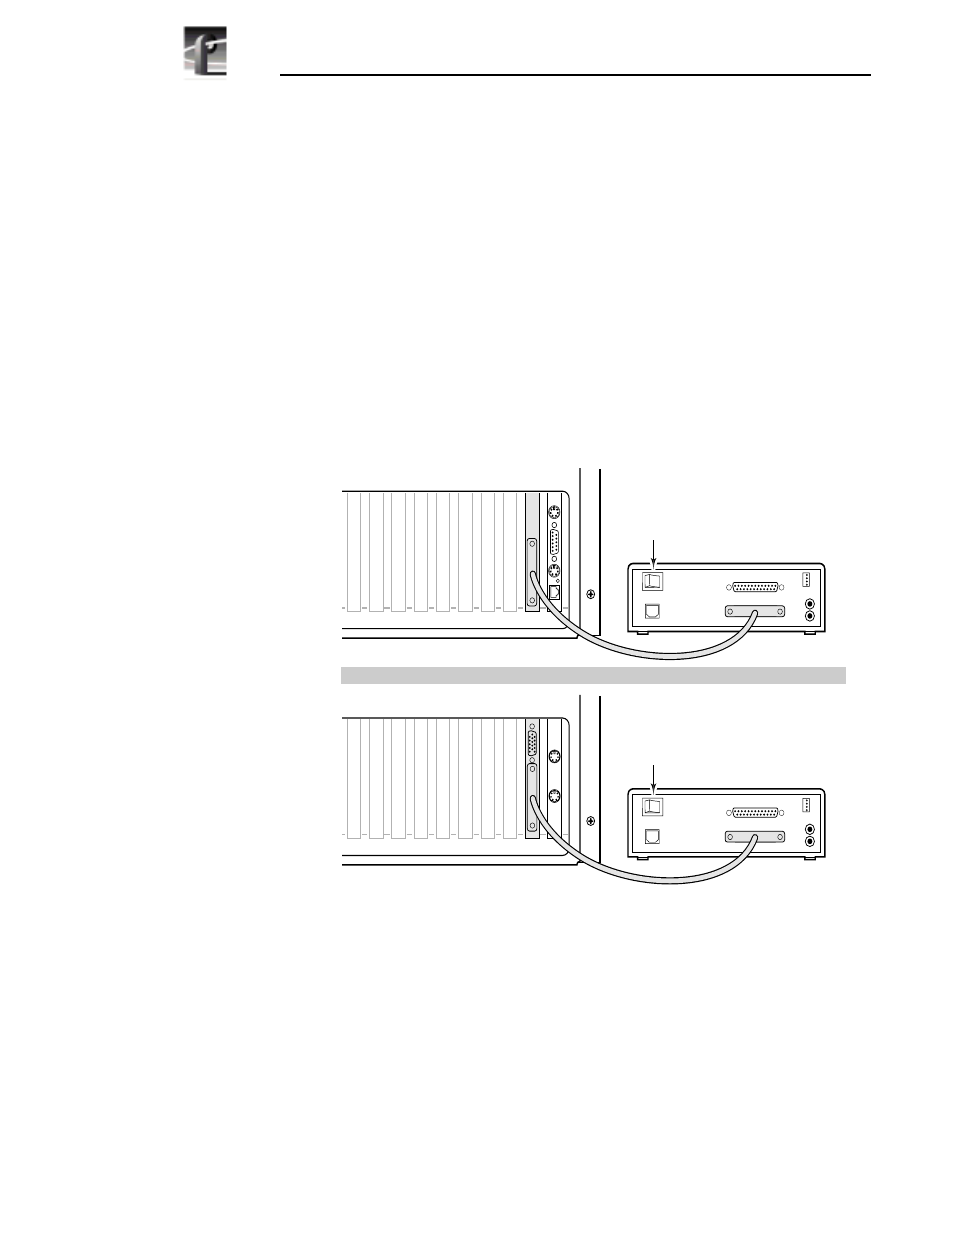
2. Connect one end of the parallel cable to the CD-ROM drive’s
TO COMPUTER
connector and the other end to the parallel port on the Profile system as shown
in Figure 1.
3. Connect power to the CD-ROM drive using the universal power supply and one
of the four power supply cables provided with the kit.
4. Turn on the CD-ROM drive power switch and power up the Profile system.
Figure 1. CD-ROM drive cabling for the PDR200, PDR300, and PDR400
J1
J6
J7
J4 J3
J2
J5
J9 J8
J10
J1
J6
J7
J4 J3
J2
J5
J9 J8
J10
9897-13
TO COMPUTER
TO PRINTER
DC PWR IN
AUDIO
Power
Switch
TO COMPUTER
TO PRINTER
DC PWR IN
AUDIO
Power
Switch
OR