6 replacing the process heater, Warning – AEC WD 350 through WD3000 Dehumidifying Dryers User Manual
Page 54
3. Using a shop vacuum, carefully remove all desiccant from each tower.
Important!
You should properly dispose of any discarded desiccant.
Consult local disposal regulations for more information.
4. Inspect each lower desiccant screen and insulation liner for tears or burn-through spots.
Replace as needed.
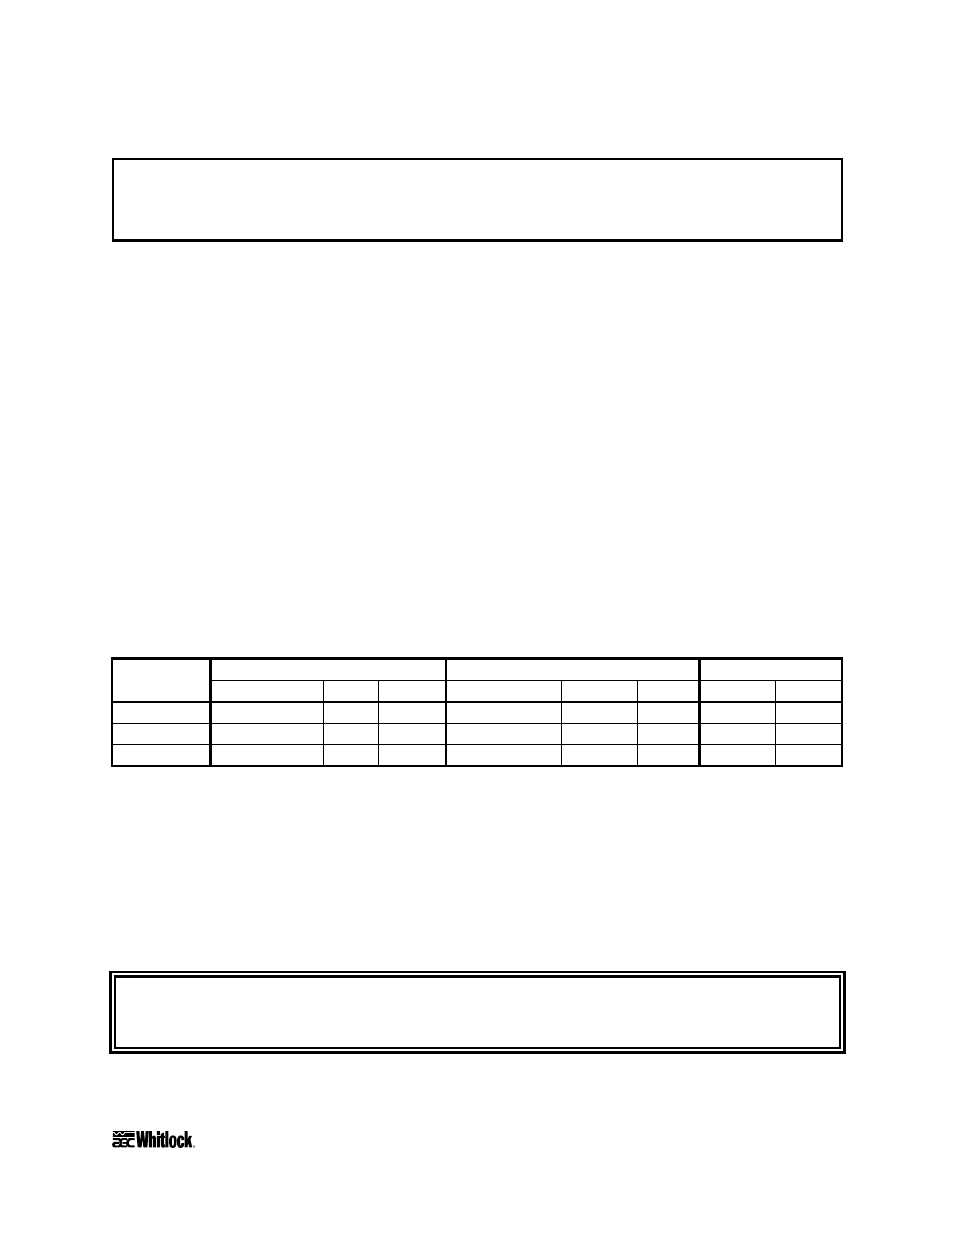
5. After cleaning each chamber, add a level layer of half the large bead desiccant on top of
the screen. Next, carefully add the full amount specified per bed of small bead desiccant.
Amounts are listed in the Required Desiccant Amounts per Bed table below. Smooth the
top level, and finally add another layer of the remaining large bead desiccant to the top.
Make sure this layer is level and smooth.
6. Repeat the previous step for the other bed.
7. Inspect the gaskets on the valve assembly. Replace as needed.
8. Remove heater elements from the heater plate assembly.
9. Re-install the valve and reconnect actuator wiring.
Figure 15
Required Desiccant Amounts per Bed
Dryer
Large bead (Type 13X)
Small bead (Type 13X)
Total per bed
model
Part no.
lbs.
Kg
Part no.
lbs.
Kg
lbs.
Kg
WD10MR W00018050 1.0 0.454 W00018051 3.0 1.362 4.0 1.816
WD25MR W00018050 2.0 0.908 W00018051 7.0 3.178 9.0 4.086
WD50MR W00018050 3.0 1.362 W00018051 15.0 6.810 18.0 8.172
7-6 Replacing the Process Heater
WDMR and WDFR Series dehumidifying dryers use single-phase Calrod-type heater elements
mounted in the center compartment below the desiccant beds. The wattage of the heater varies
with model, voltage, temperature range, etc., but the replacement procedure is the same.
! WARNING !
Disconnect and lock out power before you replace heater elements!
WDMR and WDFR Series Dehumidifying Dryers
Page 53