Visara Master Console Center Installation User Manual
Page 11
Chapter 1 Introduction and Checklist
Installation Preparation Guide
11
Master Console Center Pre-Installation Requirements
The following procedure tells the customer how to prepare for the
installation of the Master Console Center. It should also be used as a
checklist to ensure each step has been completed. Each item should be
signed off by a representative of the customer as it is completed, and a
date and initials placed in the right two columns of the form. This
identifies the person to whom questions should be directed if necessary.
Please have completed checklists available on-site during installation.
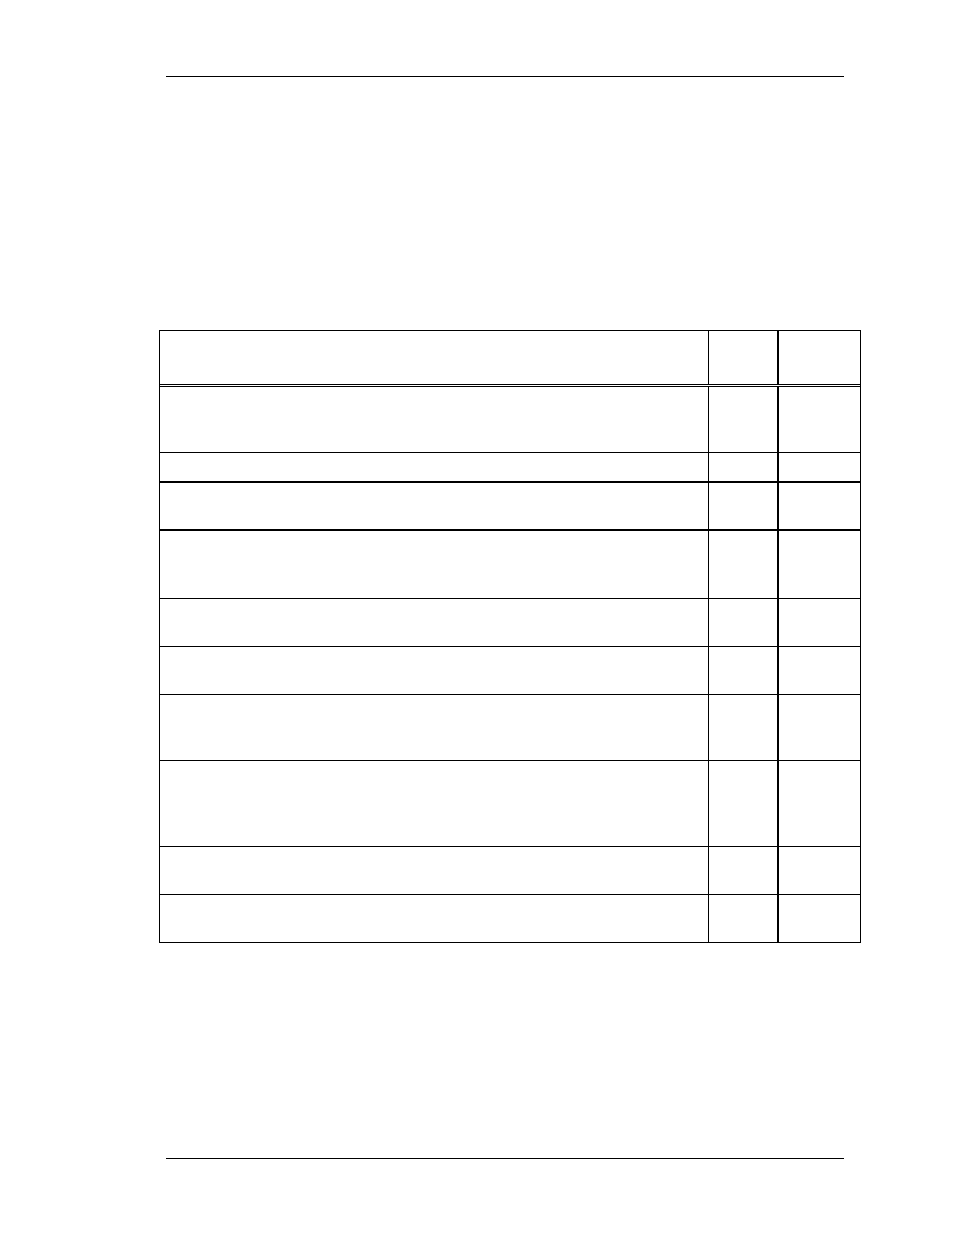
Function to be performed
Date
Done
Initials
1. Supply Visara with the name of your site’s focal point person
during site installation/customization. (This should have been
done with the completion of the Installation Form.)
2. Determine where on the raised floor the MCC will be placed.
3. Arrange for an analog telephone line (and phone number) for
the MCC modem.
4. Obtain a RJ-11 telephone cord that will reach from the floor to
the MCC. (A standard phone extension cord of 6’ will normally
suffice.)
5. Arrange for work area space for each MCC unit’s Thin Client /
workstation(s).
6. Assign an IP address to the MCC server and supply the proper
subnet mask. (See Chapter 4 MCC Network for details.)
7. Assign an IP address to each Thin Client / workstation and
supply the proper subnet mask for each workstation. (See
Chapter 4 MCC Network for details.)
8. Supply the gateway IP address for each Thin Client /
workstation if any will be located at sites other than the MCC
server location site and/or if the workstations will be on multiple
subnets. (See Chapter 4 MCC Network for details.)
9. Assign the gateway IP address for the MCC. (See Chapter 4
MCC Network for details.)
10. Supply the IP addresses to Visara. This should have been done on
the Installation Form.