3) install software, 4) test hardware – Measurement Computing Daq PC-Card User Manual
Page 17
457-0942, rev 1.2
01-11-00
DaqBoard [ISA Type] Quick Start Guide 1-9
1.
Turn power OFF to the PC and all attached equipment.
2.
Remove the PC’s cover. Refer to your PC Owner’s Manual as needed.
3.
Choose an empty 16-bit ISA slot. Loosen and remove the screw at the top of
the slot’s blank adapter plate. Then slide the plate up and out to remove.
Refer to your PC Owner’s Manual as needed.
4.
Align DaqBoard’s edge-connector with the desired ISA slot, and with the
PC’s corresponding rear-panel slot. Gently press the board into the ISA slot.
5.
Secure the board by inserting the rear-panel adapter-plate screw.
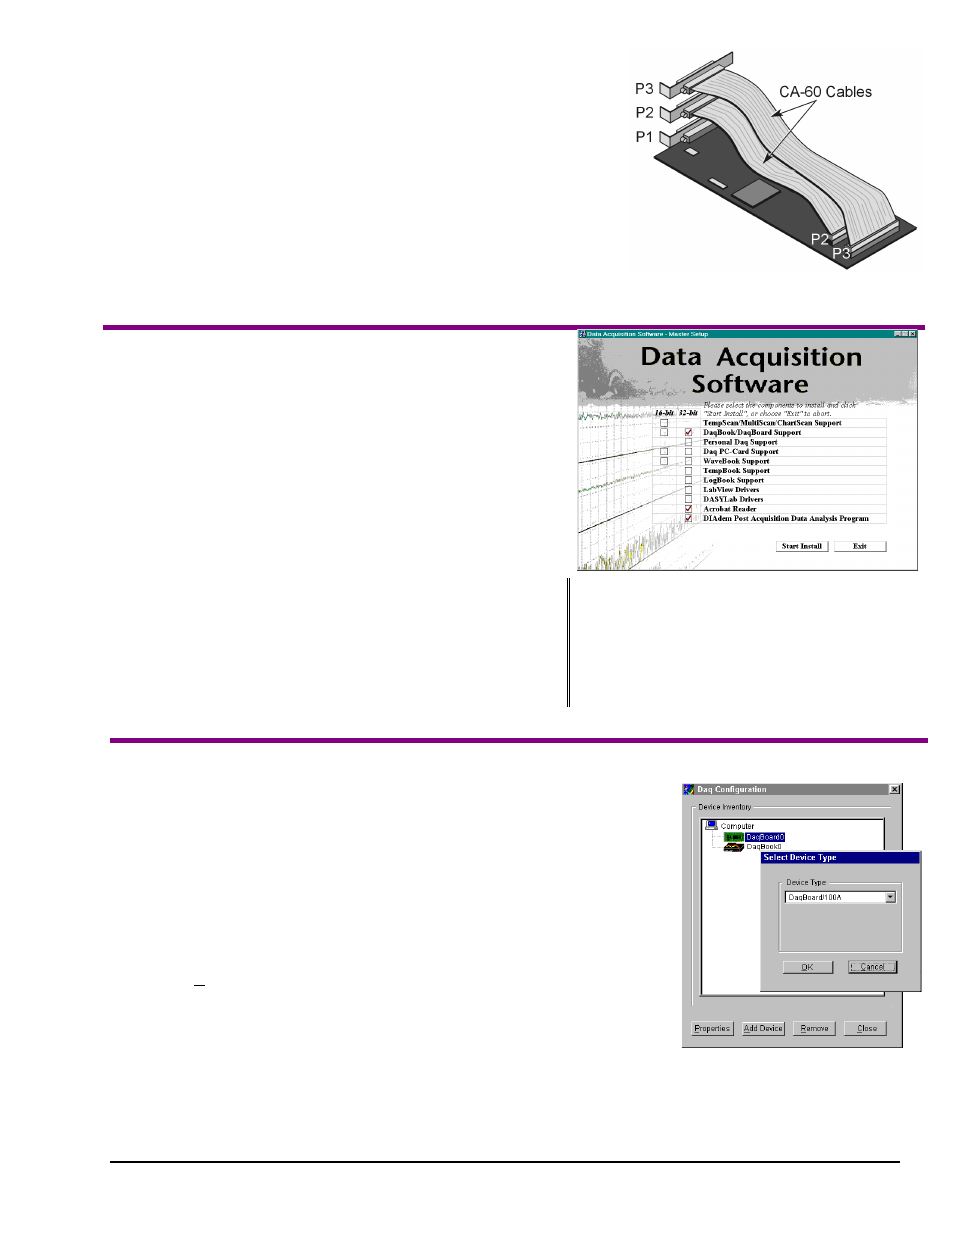
6.
If using P2, P3, or both, route CA-60 cables as needed. Secure the P2 and
P3 rear panel connectors, as applicable.
7.
Replace the computer’s cover.
8.
Plug in all cords and cables.
9.
Apply power to the PC.
DaqBoard’s I/O Connectors
If used, P2 and P3 require cable CA-60.
(3) Install Software
1.
Remove previous version Daq* drivers, if present. You can do this through
Microsoft’s Add/Remove Programs feature by navigating from your
desktop as follows:
Start
⇒ Settings ⇒ Control Panel ⇒ Add/Remove Programs
2.
Place the Data Acquisition Software CD in the host PC’s
CD-ROM drive.
Wait for PC to auto-access the CD.
This may take a few moments, depending on your PC.
3.
If a Licensing Agreement appears, read over the agreement, then
click “Agree.” The Data Acquisition Software Master Setup Screen
appears (see figure at right).
4.
Select DaqBook/DaqBoard Support.
For Windows95/98/NT (or more recent Windows), select 32-bit.
If using Windows3.1, or DOS, select 16-bit instead of 32-bit.
5.
If you do not have Acrobat Reader version 3.0 or greater installed
on your PC, select Acrobat Reader. This will enable you to read
and print documentation that is included on the install CD-ROM.
6.
Select DIAdem Post Acquisition DataAnalysis
Program. Refer to your separate DIAdem
document (p/n 457-0903) for information
regarding this program.
7.
Click “Start Install.”
8.
Follow screen prompts.
(4) Test Hardware
Use the following steps to test your DaqBoard. Note that screen captures of the Daq
Configuration window (with DaqBoard Properties and Test Hardware tabs selected)
appear on the next page.
1.
Run the Daq Configuration control panel applet.
2.
Click “Add Device.”
3.
Select your DaqBoard model from the “Device Type” scroll box and click OK.
4.
Select your DaqBoard from the “Device Inventory” window and click “Properties.”
5.
Ensure settings are correct, and make changes if needed.
6.
Select the “Test Hardware” tab.
7.
Click the “Resource Test” button.
8.
Click the “Test” button.
Test results should be displayed within a few seconds. Note that test results have two
components: Resource Tests and Performance Tests. Each is described on the
following page.
Note:
Testing the DaqBoard device may, in some cases, cause the system to hang. If test results are not
displayed in 30 seconds or the system does not seem to be responding, reboot the system. Upon
power-up, re-enter the Daq Configuration and change DaqBoard configuration settings to those that
work properly.
Device Inventory and
Device Type Windows